RDK Resources
[*RDK Preferred*]
Code Management Facility
RDK Forums
[RDK Conferences]
RDK Support
Archives
Papers & Presentations Archive![]()
Papers & Presentations Archive![]()
![]()
Copyright 2015 RDK Management, LLC. All rights reserved.
The contents of this document are RDK Management, LLC Proprietary and Confidential and may not be distributed or otherwise disclosed without prior written permission of RDK Management, LLC.
Document Control Number | D10-20141105 |
Document Title | RDK Emulator Users Guide |
Version | D05 |
Date | 2015/02/23 |
Status | Issued (I) |
Distribution | RDK licensees & ASP Members |
Work in Progress (WIP) | An incomplete document designed to guide discussion and generate feedback that may include several alternative requirements for consideration. |
Draft (D) | A document in specification format considered largely complete, but lacking review. Drafts are susceptible to substantial change during the review process. |
Pre-Issued (Pre I) | A revision of a document circulated for review or approval prior to release, but not approved for distribution |
Issued (I) | A stable document, which has undergone rigorous review and is suitable for product design and development |
This document is provided under the terms and conditions of the RDK License Agreement, License Agreement for Software Integration Kit, License Agreement for Set-top Box Software Integration Kit.
RDK Management LLC is not responsible for any liability of any nature whatsoever resulting from or arising out of any use or reliance upon this specification. This document is furnished on an "AS IS" basis, and RDK Management, LLC does not provide any representation or warranty, express or implied, regarding its accuracy, completeness, or fitness for a particular purpose."
| Table of Contents |
|---|
RDK (Reference Design Kit) is an integrated set of software components, tools and documentation that help in the development of the software stack for set-top box based on the standard Linux operating system which is designed to meet the requirements of the latest generation media servers and clients.
The RDK emulator is an x86 based implementation of the RDK software stack. It is primarily targeted towards the RDK development community (integrators, component developers and application developers) that attempts to simplify the process of working with the RDK software stack without the need for a reference hardware platform. The key applications in the RDK Emulator are the rmfApp, Media streamer and the RDK-Browser. As RDK emulator runs on desktop computers, applications can be tested and debugged before trying to deploy them to real devices.
The purpose of this document is to enable RDK users and developers to be able to bring up the RDK stack and emulator on the PC platform. The document also includes step-by-step procedures to setup & build RDK Emulator
The intended audience includes the MSO teams, developers and external vendors responsible for the development of firmware and applications for RDK-based Set Top Boxes
Scope of this document includes understanding RDK Emulator and functionalities, supported build types and to run and test in Virtual Box environment.
RDK Emulator does not support all components of RDK 2.0 stack .Currently RDK Emulator supports mediaframework, media-streamer,RDK-Browser and RDK-Logger, XRE components.
The following table describes the acronyms and abbreviations used in this document
Abbreviation/Acronym | Description |
RDK | Reference Development Kit |
VM | Virtual Machine |
VBox | Virtual Box |
QAM | Quadrature Amplitude Modulation |
STB | Set Top Box |
XRE | Cross-Platform Runtime Environment |
HDD | Hard Disk Drive |
EOS | End of Stream |
SPTS | Single Program Transport Stream |
MPTS | Multi-Program Transport Stream |
UPNP | Universal Plug and Play |
Build Types | RDK Components Involved | Features/Applications Supported | Final Image Name | Startup Application |
RDK Mediaclient |
|
| rdk-generic-mediaclient-image-qemux86.vmdk | RDK-Browser |
RDK Hybrid |
|
| rdk-generic-hybrid-image-qemux86.vmdk | RDK-Browser |
How to Build#SettinguptheHostEnvironment
RDK-V Emulator Build Instructions#VEmulatorBuildInstructions-Yocto2.2(Morty)supportinRDKEmulator
Host Requirements
| Requirement | Remarks |
|---|---|
| Linux | 32/64 bit Ubuntu 16.04 operating system |
| Free HDD Space | Minimum 100GB Free Memory |
| Oracle Virtual Box | 4.3.18 or higher |
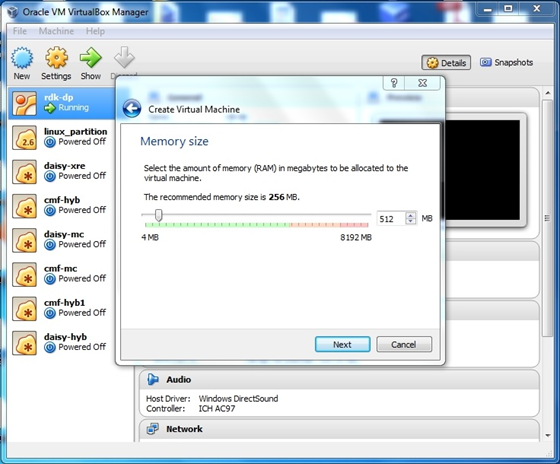
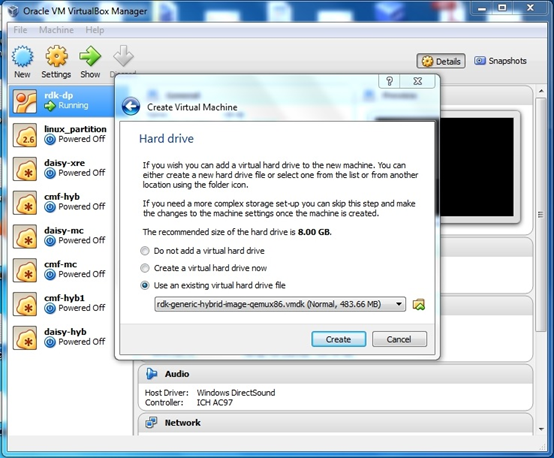
Install Virtual Box and follow the following steps to bring up RDK Emulator on Virtual Box:
In the following steps, it is recommended to review the description and screenshot completely before proceeding with steps.
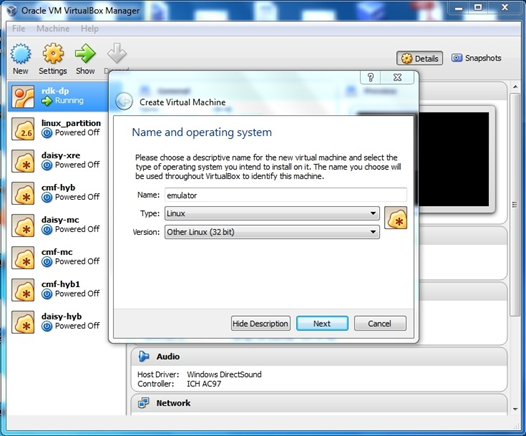
Open Virtualbox
Select New [A popup will come up]
Select Type as ‘Linux’
Select Version as ‘Other Linux (32 Bit)’
Click on “Next”
Your VM has been built with very limited hard drive space. In order to run emulator and play video files, you need to copy your video files into the file system for playback. For this, you will need to setup a virtual external hard drive.

| $ ssh root@x.x.x.x |
|---|
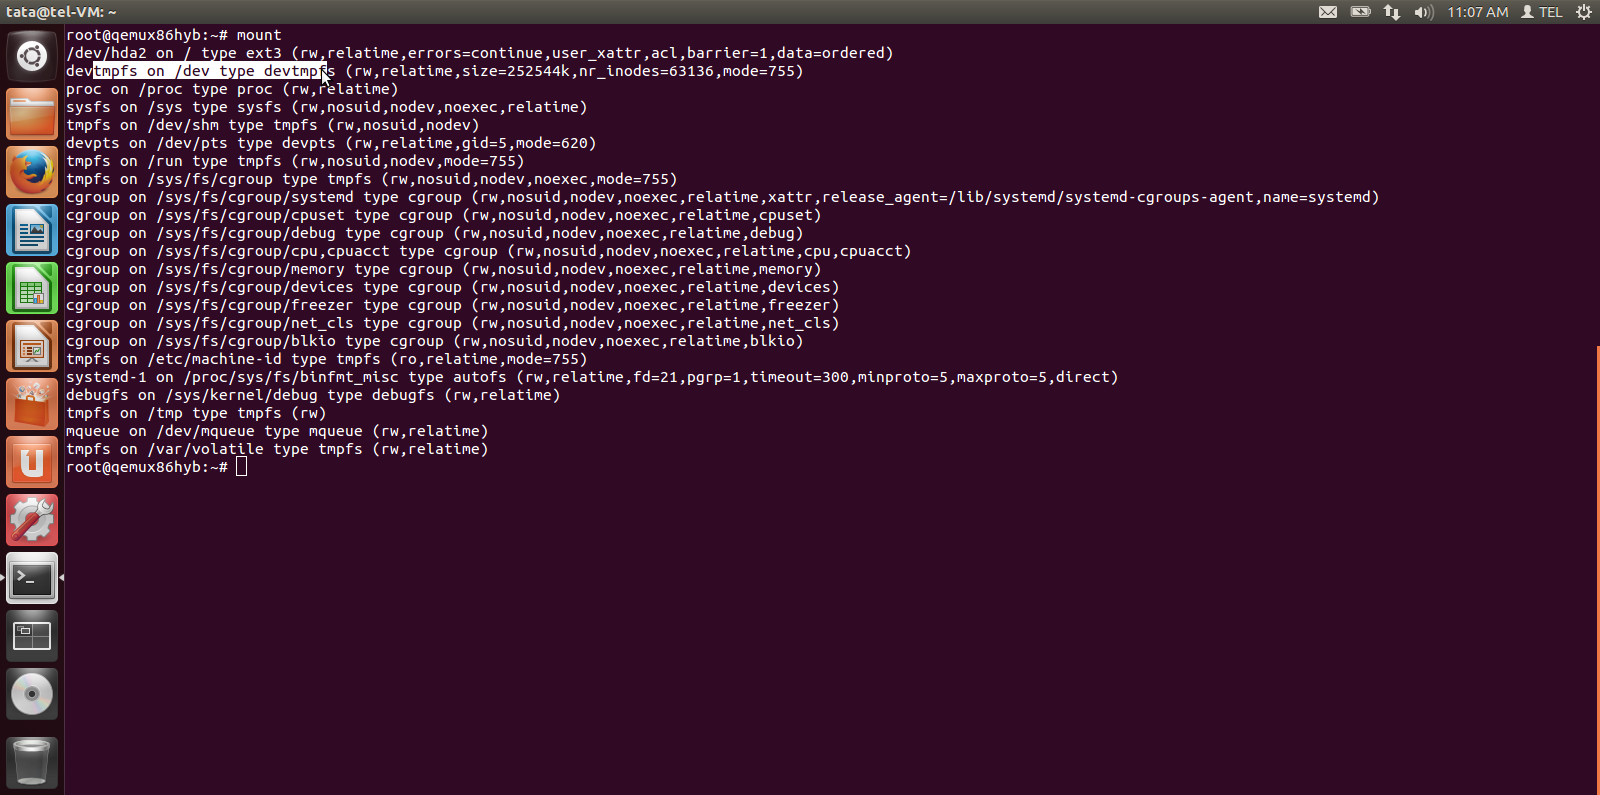
| $ mount |
|---|
| $ fdisk -l |
|---|

| $ fdisk /dev/hdb |
|---|
Review the description of the steps during fdisk operation below and the following screenshot for reference before proceeding.
| $ Command (m for help): n |
|---|
$ Partition type: p primary (0 primary, 0 extended, 4 free) e extended Select (default p): p |
|---|
| $ Partition number (1-4, default 1): 1 |
|---|
| $ Command (m for help): p |
|---|
| $ Command (m for help): w |
|---|

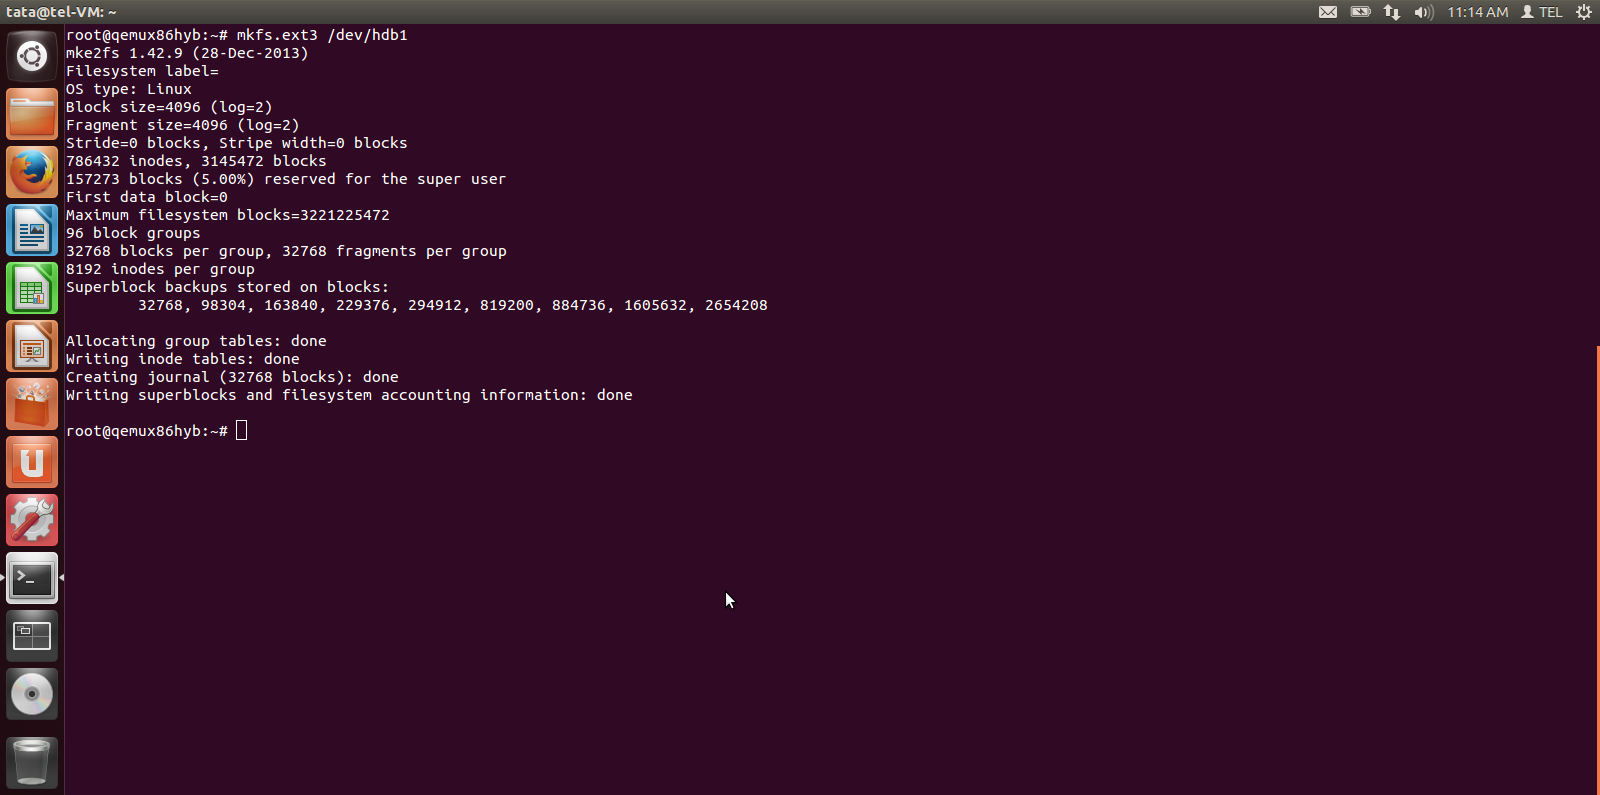
| $ mkfs.ext3 /dev/hdb1 |
|---|
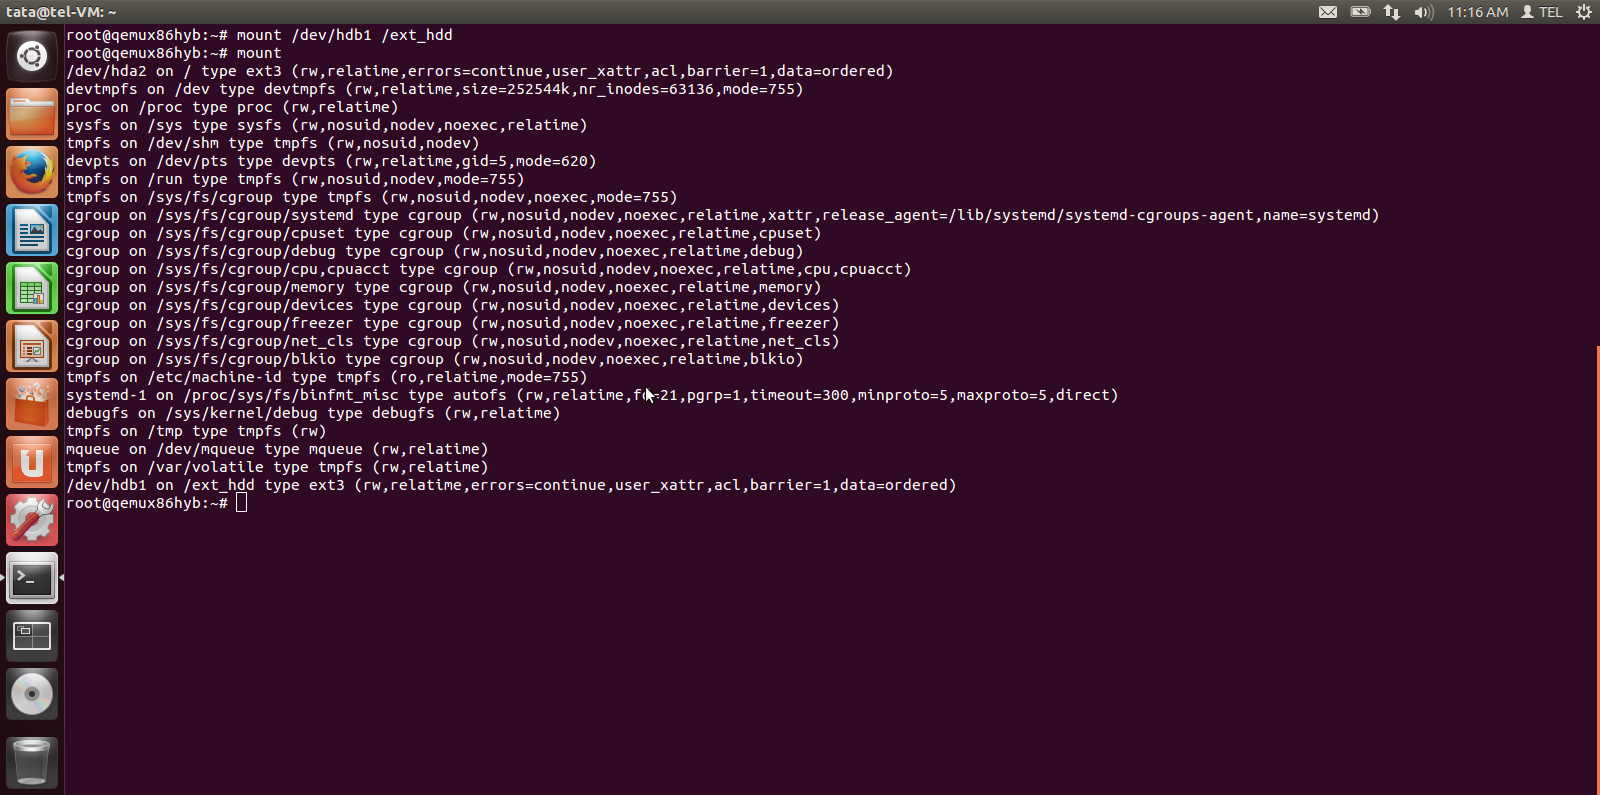
$ mkdir /ext_hdd $ mount /dev/hdb1 /ext_hdd |
|---|
| $ scp <your_spts_file_name>.ts root@<your_emulator_vm_ip>:/ext_hdd |
|---|
| $ ln -sf /ext_hdd/<your_spts_file_name> <your_spts_file_name> |
|---|

As described in the previous section, you can log in to your emulator VM from your Host Machine using the ssh command.
| $ ssh root@x.x.x.x |
|---|
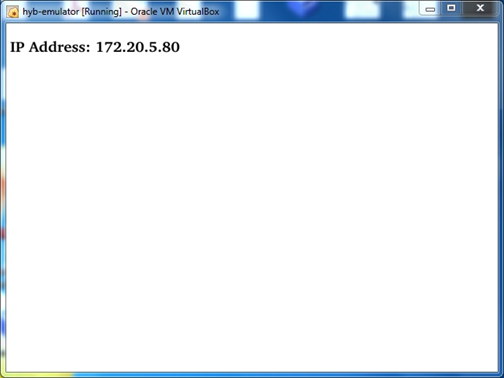
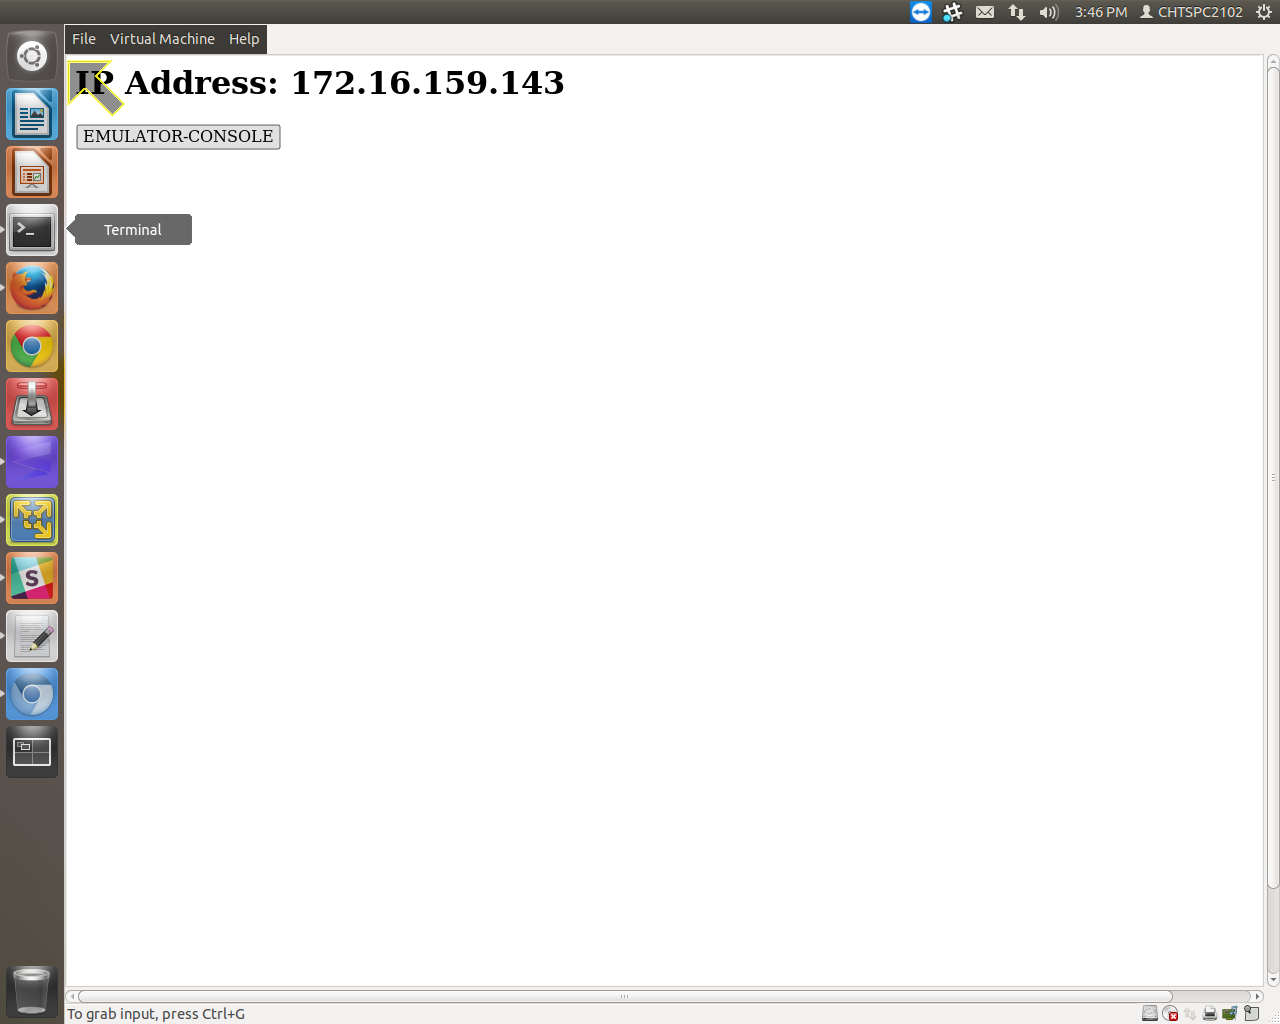
Note: In order to learn the IP address of your VM, use the RDK Browser application “tab” key to navigate to "Device Info" which will provide you the IP address. Press "Enter" key to enter Device Info
The rmfApp application is supported for all build types. Once you SSH into your emulator VM, you can play a video stream located at a url using a source and a sink.
rmfApp is located in the folder: /usr/bin on your emulator VM
Navigate to the folder /usr/bin and run rmf App using command ./rmfApp. After the initial log statements when the rmfApp starts up, press "Enter" key to get the rmfApp prompt - "rmfApp>"
root@qemux86:~# rmfApp [-source SOURCE] [-sink SINK] [other options] url
SOURCE can be: hnsource,qamsource
SINK can be: mediaplayersink
Other options include:
• -recordingId <id>: id of recording to create where <id> is a decimal number
• -recordingTitle <title>: title of recording
Before using rmfApp, it will be better to terminate rdkbrowser as it may impact the performance of playback. You may use the systemctl command to terminate rdkbrowser as shown below.
| $ systemctl stop rdkbrowser.service |
|---|
rmfApp is located in the directory /usr/bin. Navigate to the directory containing the rmfApp:
| $ cd /usr/bin |
|---|
Launch RMF App using the command below:
| $ ./rmfApp |
|---|
Once the app is launched, press enter again to get the prompt "rmfApp->":
| $ rmfApp-> |
|---|
| NOTE: |
Note 1: There is an additional step required prior to using the emulator because it is built without the gsttee module in gst-plugins-rdk: Before invoking rmfapp, it is necessary to set the environment variable 'USE_GENERIC_GSTREAMER_TEE' to 'TRUE', so that mediaframework uses the generic gsttee that is built from Open Source gstreamer: example : root@qemux86hyb-morty:/usr/bin# export USE_GENERIC_GSTREAMER_TEE=TRUE root@qemux86hyb-morty:/usr/bin# ./rmfApp Note 2: In the streaming scenario it is necessary to kill the rmfStreamer process on the hybrid image, which is started automatically, and invoke it manually as illustrated below : Streaming Scenario : Hybrid : barracuda:~> ssh root@193.120.91.104 root@qemux86hyb-morty:/# root@qemux86hyb-morty:/# export USE_GENERIC_GSTREAMER_TEE=TRUE root@qemux86hyb-morty:/# cd /usr/bin root@qemux86hyb-morty:/usr/bin# ps -aef | grep rmf root@qemux86hyb-morty:/usr/bin#kill -9 <pid> root@qemux86hyb-morty:/usr/bin# ./rmfStreamer IP Client : barracuda:~> ssh root@193.120.91.132 root@qemux86mc-morty:/# root@qemux86mc-morty:/# export USE_GENERIC_GSTREAMER_TEE=TRUE root@qemux86mc-morty:/# cd /usr/bin root@qemux86mc-morty:/usr/bin# ./rmfApp rmfApp->launch -source hnsource -sink mediaplayersink http://193.120.91.104:8080/vldms/tuner?ocap_locator=ocap://0x125d |
In a simulated live playback, the following rmfApp command maybe used to playback the local SPTS video file:
launch -source qamsource -sink mediaplayersink ocap://0x125d
Where
| $ rmfApp-> launch –source qamsource –sink mediaplayersink ocap://0x125d |
|---|
launch –source hnsource –sink mediaplayersink http://127.0.0.1:50050/received_spts1.ts
Where
| $ rmfApp-> launch –source hnsource –sink mediaplayersink http://127.0.0.1:50050/received_spts1.ts |
|---|
In a simulated live playback, the following rmfApp command maybe used to playback the local SPTS video file:
launch –source hnsource –sink mediaplayersink http://<HYBRID IP>:8080/vldms/tuner?ocap_locator=ocap://0x125d
Where
| $ launch –source hnsource –sink mediaplayersink http://<HYBRID IP>:8080/vldms/tuner?ocap_locator=ocap://0x125d |
|---|
RDK recordings on the Hybrid device are created from a cloud-based scheduler using json messages. Once the recordings are created, the rmfApp on the media client device can be used to playback the newly recorded media content.
This section outlines the use case:
Step 1: Preconditions / Prerequisites:
mkdir -p /ext_hdd/data ln -sf /ext_hdd/data /opt/data |
|---|
Note: The above directory and the soft link needs to be in place each time before scheduling recordings.
Your recordings will get created in the following path on the Hybrid VM:
/opt/data/OCAP_MSV/0/0/DEFAULT_RECORDING_VOLUME/test /opt/data/OCAP_MSV/0/0/DEFAULT_RECORDING_VOLUME/test/chunks |
|---|
If there is a media file created in the /chunks folder above, then the recordings have been successfully created.
Step 2: Launching rmfStreamer on Hybrid VM
There are multiple scripts in the folder /usr/bin. There are two scripts for launching rmfStreamer:
Note that the name of each file is similar apart from the usage of upper case and lowercase "s" in each file name.
Launch rmfStreamer using the script: rmfstreamer
cd /usr/bin/ sh rmfstreamer |
|---|
if you run in into issues accessing rmfstreamer, then change the access permissions of file appropriately:
chmod 777 rmfstreamer |
|---|
Once rmfStreamer starts, you will see log print statements on the console.
Step 3: Start playback of recorded content on Hybrid emulator from your Media Client emulator
Now you can playback from the media client using the rmfApp on the media client VM using the following sample commands:
cd /usr/bin ./rmfApp rmfApp> launch -source hnsource -sink mediaplayersink http://<hybird_vm_ip>:8080/vldms/test?rec_id=6 |
|---|
Note: Where the recording id is "6" as set in the schedule.json message from the server. Users may write a small application to simulate the scheduler server json messages.
RDK emulator supports westeros compositor and renderer module as westeros-renderer-gl
| Code Block | ||
|---|---|---|
| ||
# To build the same for different build types, use the below command #Hybrid MACHINE=qemux86hyb-morty source meta-cmf/setup-environment bitbake rdk-generic-hybrid-wpe-image |
To test WPE image from the VM console
1)Boot the VM in NAT mode and ssh in to the VM to get the console as mentioned above.
ex: ssh -p 2222 root@localhost
2)Then type the following command
To support westeros surface width and height are HD so emulator need to set HD resolution
To enable support for 1280x720 resolution in emulator please follow the steps mentioned in this page.
This will help us in adding custom resolution in Virtual Box.
1) ssh login to the Emulator
Westeros compositor will run automatically in startup of Emulator image
run following commands in terminal for manual starting the compositor on Emulator if needed
| Code Block | ||
|---|---|---|
| ||
$ mkdir -p /run/user/0 $ export XDG_RUNTIME_DIR=/run/user/0/ $ westeros --renderer <renderer module> --display <socket-name> & $ westeros --renderer /usr/lib/libwesteros_render_gl.so.0.0.0 --display WPE & $ gdisplay start $ export WAYLAND_DISPLAY=WPE |
westeros compositor will launch
to test westeros compositor with simple egl test apliaction
run westeros_test
| Code Block | ||
|---|---|---|
| ||
# After Launching westeros compositor in emulator $ export XDG_RUNTIME_DIR=/run/user/0/ $ export WAYLAND_DISPLAY=WPE $ westeros_test (or) $ westeros_test --display WPE |
| Code Block | ||
|---|---|---|
| ||
$ export XDG_RUNTIME_DIR=/run/user/0/ $ export WAYLAND_DISPLAY=WPE #Check the plugin in image $ gst-inspect-1.0 westerossink # To play the video and render on westeros compositor $ gst-launch-1.0 playbin uri=http://localhost:50050/received_spts1.ts videosink=westerossink |
ssh to emulator VM terminal run following commands
| Code Block | ||
|---|---|---|
| ||
$ export XDG_RUNTIME_DIR=/run/user/0/ $ export WAYLAND_DISPLAY=WPE $ WPElancher <http url > Ex: WPELauncher http://easyhtml5video.com |

| Code Block | ||
|---|---|---|
| ||
$ export XDG_RUNTIME_DIR=/run/user/0/ $ export WAYLAND_DISPLAY=WPE $ WPELauncher http://www.youtube.com/tv |


Note: Video Positioning is not proper with the present video sink so positioning is not setting properly as of now in Emulator. We will update it once it is done**
Yocto 2.2 (morty) support in RDK Emulator
The following commands fetches the source code of emulator using repo tool
#Yocto-2.2 Build (morty builds)
$ mkdir emulator-morty && cd emulator-morty
# Download code in yocto integration mode
$ repo init -u https://code.rdkcentral.com/r/manifests -b morty -m emulator.xml$ repo sync
# To build the same for different build types, use the below command # MediaclientMACHINE=qemux86mc-morty source meta-cmf/setup-environmentbitbake rdk-generic-mediaclient-wpe-image #HybridMACHINE=qemux86hyb-morty source meta-cmf/setup-environmentbitbake rdk-generic-hybrid-wpe-image
# NoteVMWare Player 6.X or less only supported to get wpe-webkit browser support Host OS ubuntu 12.04 32-Bit
#Yocto-2.2 Build (RDK-DEV-1901 builds)
$ mkdir emulator-rdk-dev && cd emulator-rdk-dev
# Download code in yocto integration mode
for Non-ASP:
$ repo init -u https://code.rdkcentral.com/r/manifests -b rdk-dev-1901 -m rdkv-extsrc.xml
for ASP:
$ repo init -u https://code.rdkcentral.com/r/manifests -b rdk-dev-1901 -m rdkv-asp-extsrc.xml
$ repo sync
# To build the same for different build types, use the below command
# MediaclientMACHINE=qemux86mc-morty source meta-cmf/setup-environmentbitbake rdk-generic-mediaclient-wpe-image #HybridMACHINE=qemux86hyb-morty source meta-cmf/setup-environmentbitbake rdk-generic-hybrid-wpe-image
#To build TDK-images
# MediaclientMACHINE=qemux86mc-morty source meta-cmf/setup-environmentbitbake rdk-generic-mediaclient-wpe-tdk-image #HybridMACHINE=qemux86hyb-morty source meta-cmf/setup-environmentbitbake rdk-generic-hybrid-wpe-tdk-image
# NoteVMWare Player 6.X or less only supported to get wpe-webkit browser support Host OS ubuntu 12.04 32-Bit
Install VMplayer in Host Machine
Use the below Link download to install VMware Player on host
After downloading
sudo ./VMware-Player-<Version>.bundle (LInux OS)
Run VMware-Player-<Version>.exe (Windows OS)
Reason for VMplayer: in Mesa Higher versions EGL-PLATFORM fbdev is not available as it is deprecated so we tried using DRM (Direct Rendering Manager driver for graphics)
for DRM driver is available only in vmware only (vmwgfx so we have gone for VMware Player)
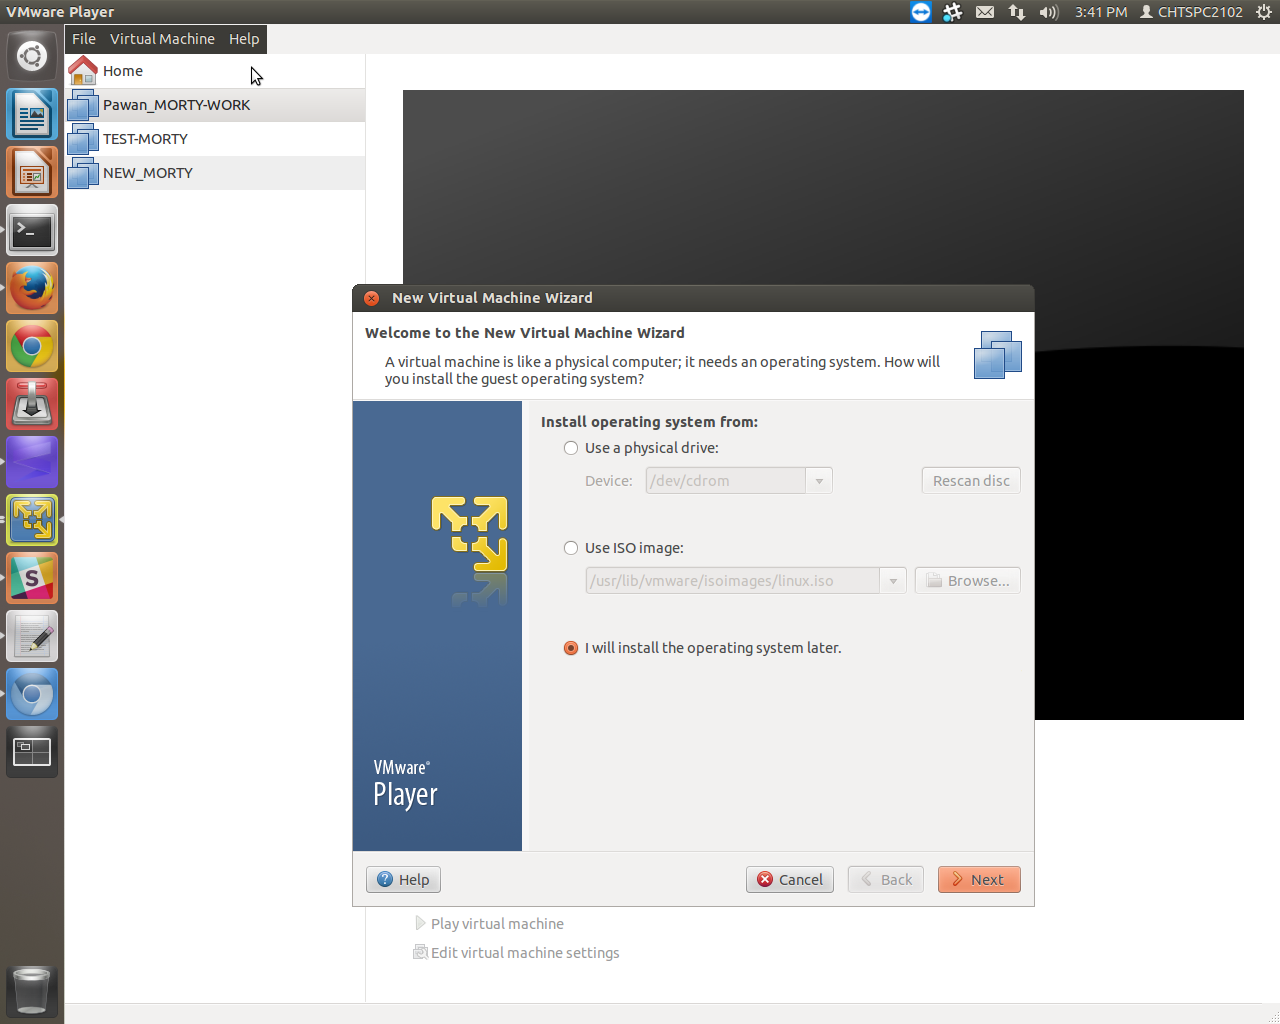
1 Once VMware Player is installed, open the VMWare Player using the command
|
2 Click File --> Create a New Virtual Machine --> Select 'i will install my operating system later' --> click Next
3 Select 'Linux' --> Version 'Other Linux 3.x kernel' --> Click Next --> Give name --> Click Next
4 Maximum Disk Size : 8 Gb --> Select 'Store Virtual Disk as a Single File' --> Click Next --> Memory for this Virtual Machine '512 Mb' --> Click 'Close' --> Click 'Finish'
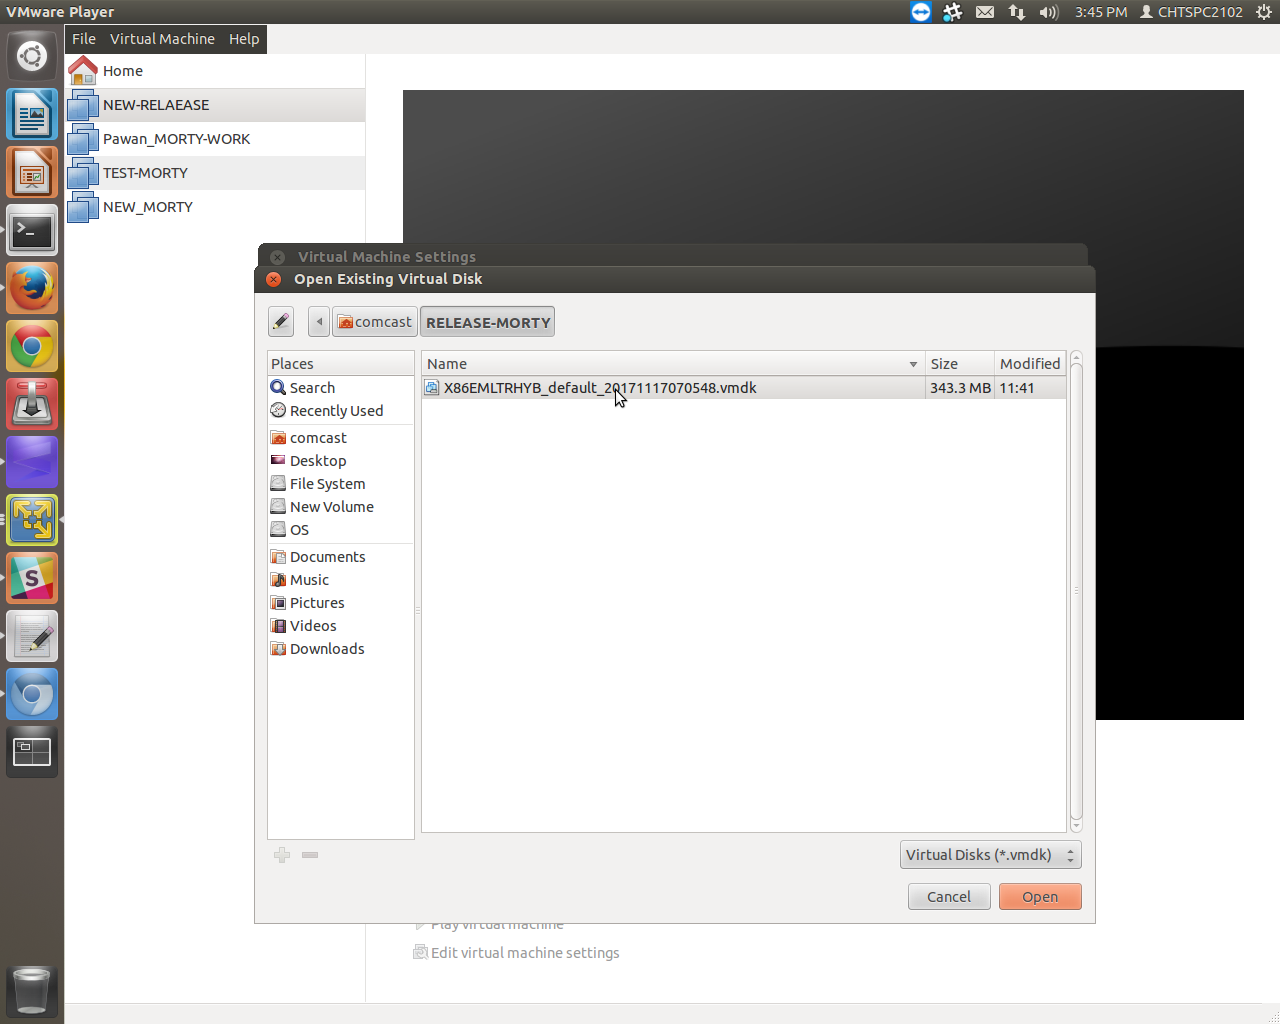
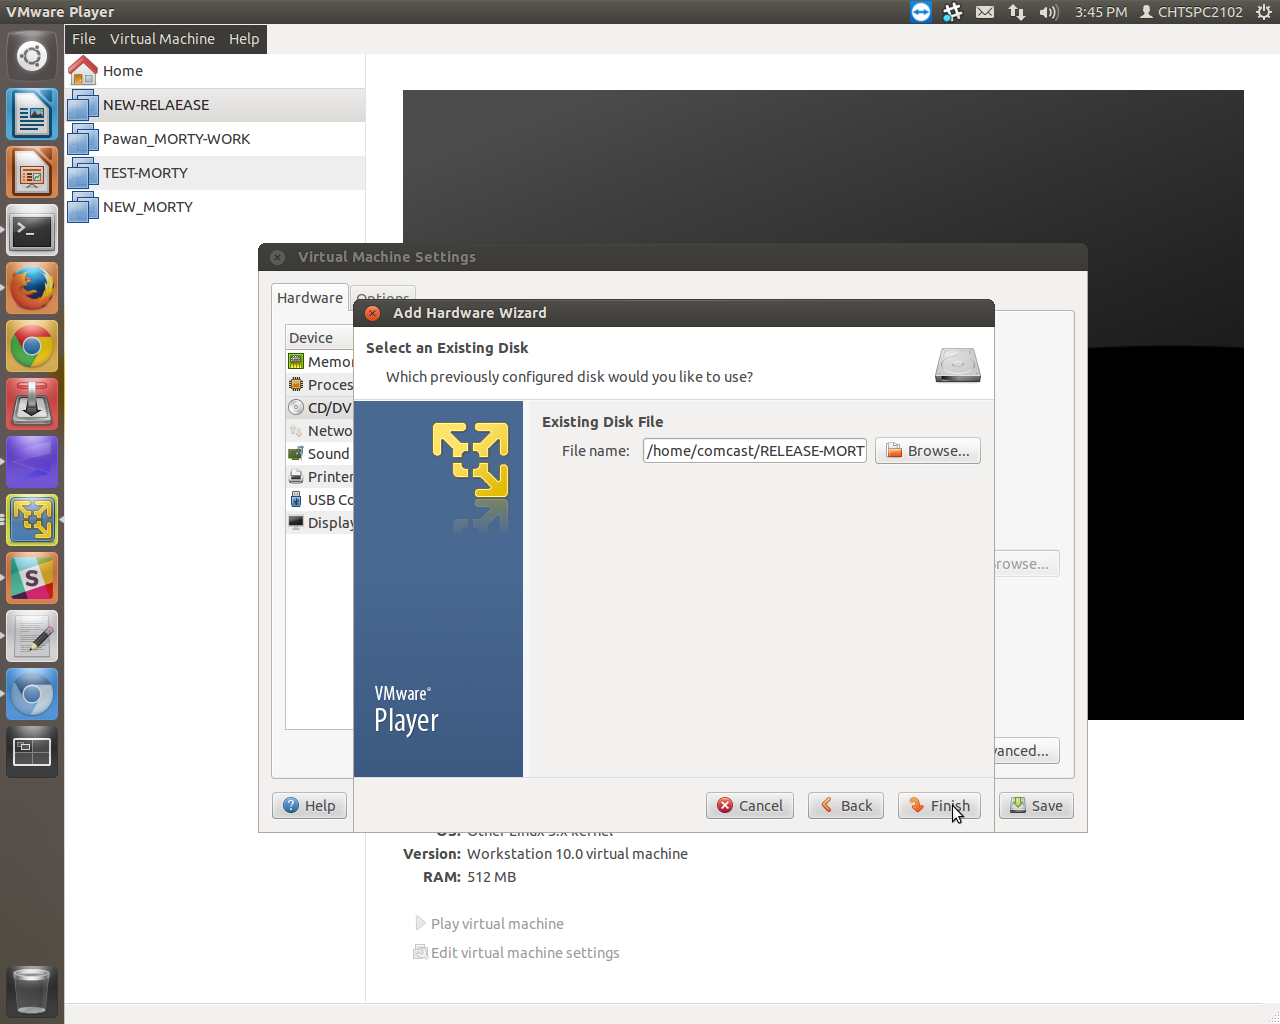
5 Click 'Edit virtual machine settings' --> select Hard Disk (IDE) --> Click 'Remove' -->Click 'Add' --> Select Hard Disk --> Select 'Use existing Virtual Hard disk'
6 File browse and set the path to the *.vmdk file --> Click Finish --> Click 'Keep Existing Format'
7 Network Adapter select Bridge Adapter --> Click Save
8 Click Play Virtual Machine
Cannot connect the virtual device ide1:0 because no corresponding device is available on the host.
Do you want to try to connect this virtual device every time you power on the virtual machine? [YES] [NO]
You select [NO]
9 This will bring the emulator up with the initial splash screen followed by RDK-Browser as startup application.
*** Note : No support for Shared Folder.
step 1:
Step 2:

Step3:

Step 4:

Step 5:

Click 'Save' --> Click 'Finish'
Click 'Edit virtual machine settings' --> select Hard Disk (IDE) --> Click 'Remove' -->Click 'Add' --> Select Hard Disk --> Select 'Use existing Virtual Hard disk'
Step 6:

Step 7:

Step 8:

Step 9:
Step 10:
Step 11:

step 12:
WPELauncher (wpewebkit default browing Application)
1) ssh login to the Emulator
systemctl stop wpe-launcher ( this will stop the wpe-webkit browser
to launch any url through wpe launcher use this script sh startWPE.sh
ex:
sh startWPE.sh http://www.easyhtml5video.com
sh startWPE.sh http://www.google.com
for using rmfApp in morty builds need to follow the below steps
in ssh terminal of emulator type the following commands
now you can see tty terminal console of emulator
from ssh terminal follow the normal rmfApp playback usage steps mentioned in this guide
Known Issues:
for using morty emulator WPE image we can validate rdkbrowser2 examples in emulator
works over the wayland compositor (westeros compositor)
For testing rdkbrowser2
| Code Block | ||
|---|---|---|
| ||
$ export XDG_RUNTIME_DIR=/run/user/0/ $ export WAYLAND_DISPLAY=WPE Example 1 : $ ./rdkbrowser2 ( will launch http://www.example.com) Example 2 : $ ./rdkbrowser2 --url http://www.google.com Example 3 : $ ./rdkbrowser2 --url http://www.youtube.com/tv Example 4 : $ ./rdkbrowser2 --url http://www.easyhtml5video.com Note: Video performance is gittery in emulator with westerosink ( software of emulator WEBBGL related urls not suported as graphics GPU available in the VMplayer is having limitation with 3d graphics renderering |
Cursor will work with rdkbrowser2
Ex: Picture-1 google.com
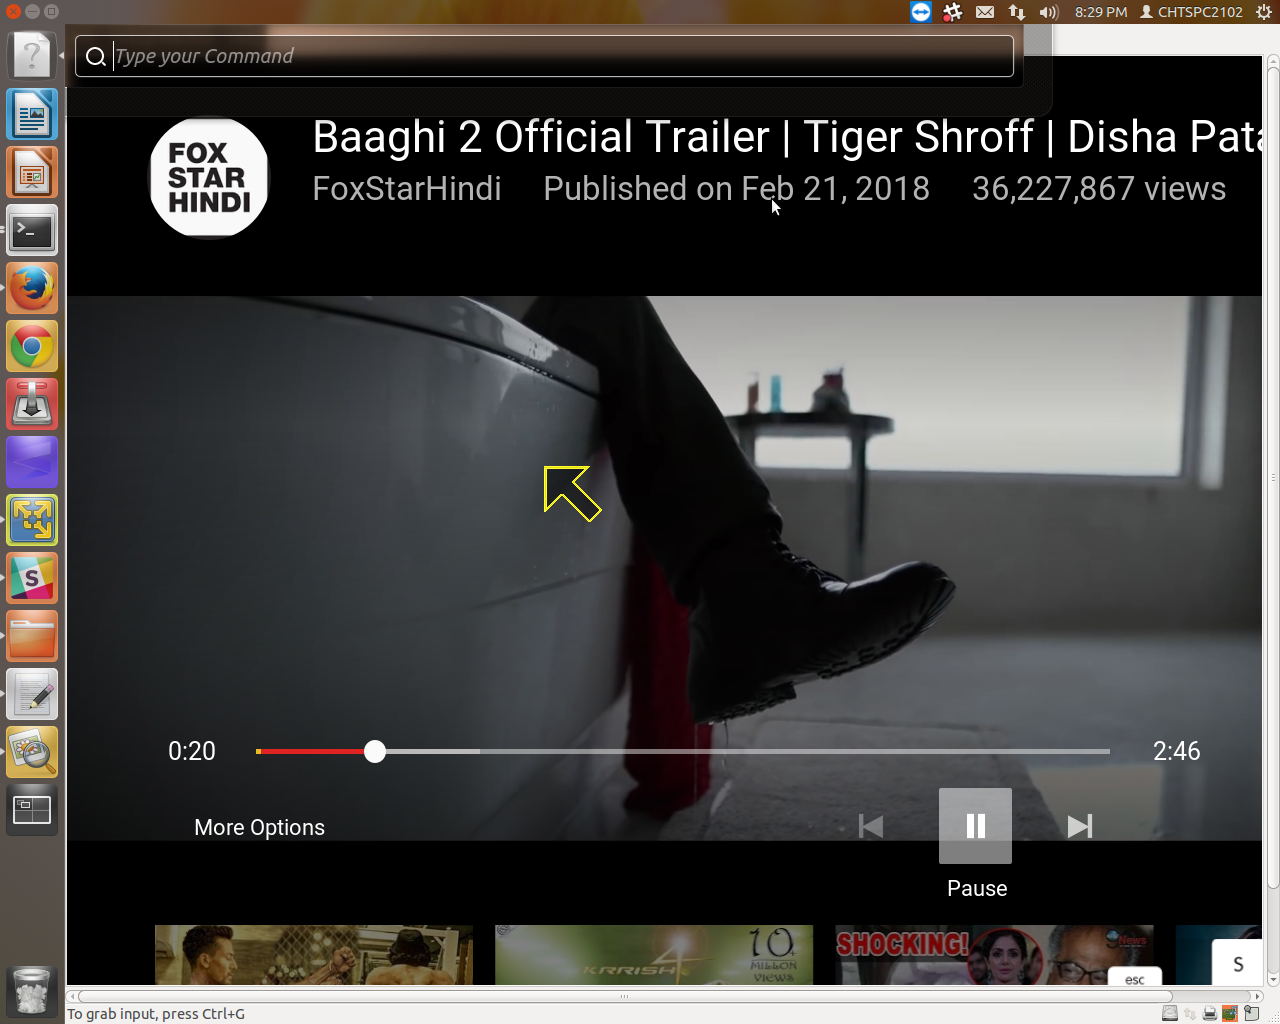
Ex 2: Youtube.com playback with westeros-sink
Ex 3 easyhtml5video.com
