RDK Resources
[*RDK Preferred*]
Code Management Facility
RDK Forums
[RDK Conferences]
RDK Support
Archives
Papers & Presentations Archive![]()
Papers & Presentations Archive![]()
| Table of Contents |
|---|
NOOBS(New Out Of Box Software) is an easy operating system installation manager for the Raspberry Pi. It has the added benefit of making it easy to set up the Pi to boot multiple operating systems. Here's how to convert a RDK image to a NOOBS-compatible image. You will need read access to all partitions of the flashed SD card. While RPi's instruction simply they can be followed directly from the Pi itself, you may be able to find plugins for your primary computer's operating system to allow read access to the ext-formatted partition of the SD card. This will allow you to use the full power of your computer to create
the compressed disk image and probably save you hours.
Download the latest NOOBS release. You will need the full NOOBS download (not NOOBSLite) since we will be using the included Raspbian image as a base. The latest official release of NOOBS can be downloaded from http://downloads.raspberrypi.org/NOOBS_latest.
Here we are considering RDK-V hybrid image as an example:


/media/<pc login name>/mount point>(/media/trinod/d4cee699-83b9-43ca-9f25-e6a5b63cd008 in this example) and issue below command.

Change the value for partition_size_nominal for boot partition with the size value for /media<pc login name>/raspberrypi from step 3 in megabytes(40MB in this example). But for root partition partition_size_nominal would be triple the partition size obtained from step 5 to make our rdk images to be loaded properly(Generally it would be 1024MB standard size for our rdk images).
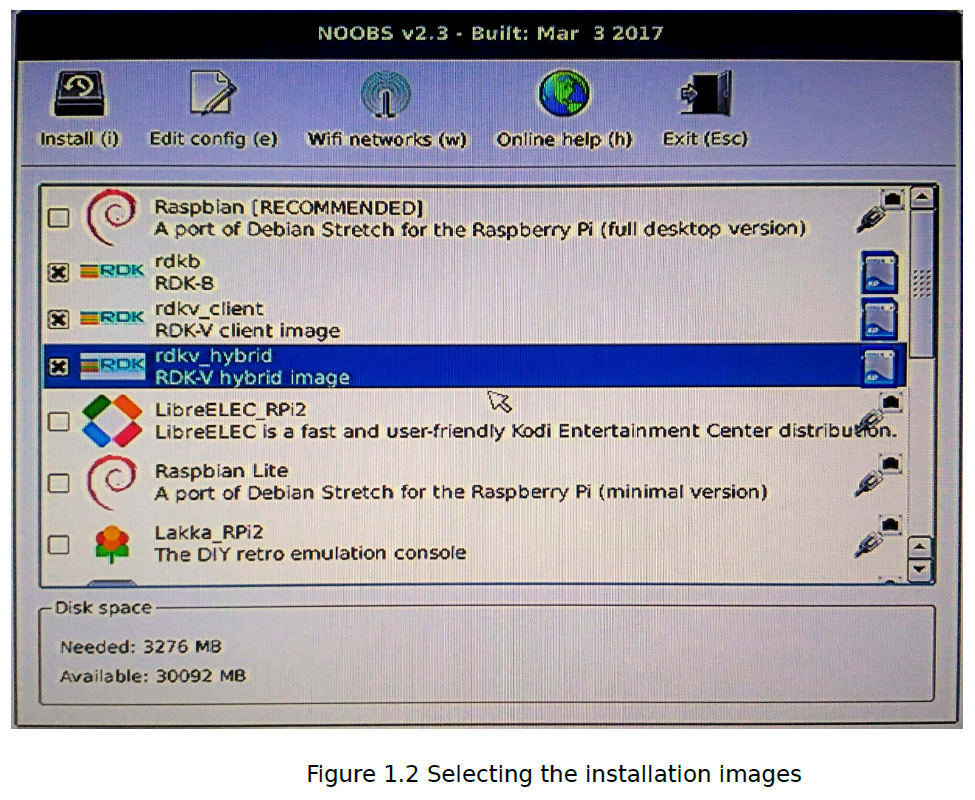
After boot-up RDK NOOBS image, it will show the below list of images available for installation.

Select the required images and press on install. Here we are selected all rdk images for installation.
After installation of required images it will populate the message as shown below.
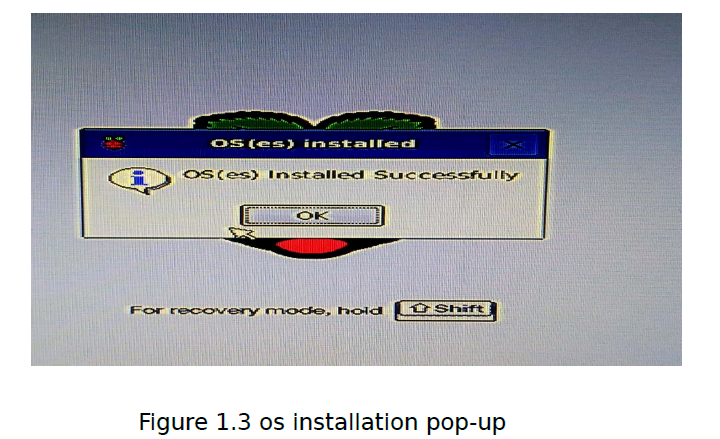
If any one image is corrupted (or) not installed properly then we can use shift button to go to installation menu as shown in Fig:1.1
After clicking ok it will populate the installed images as shown below.
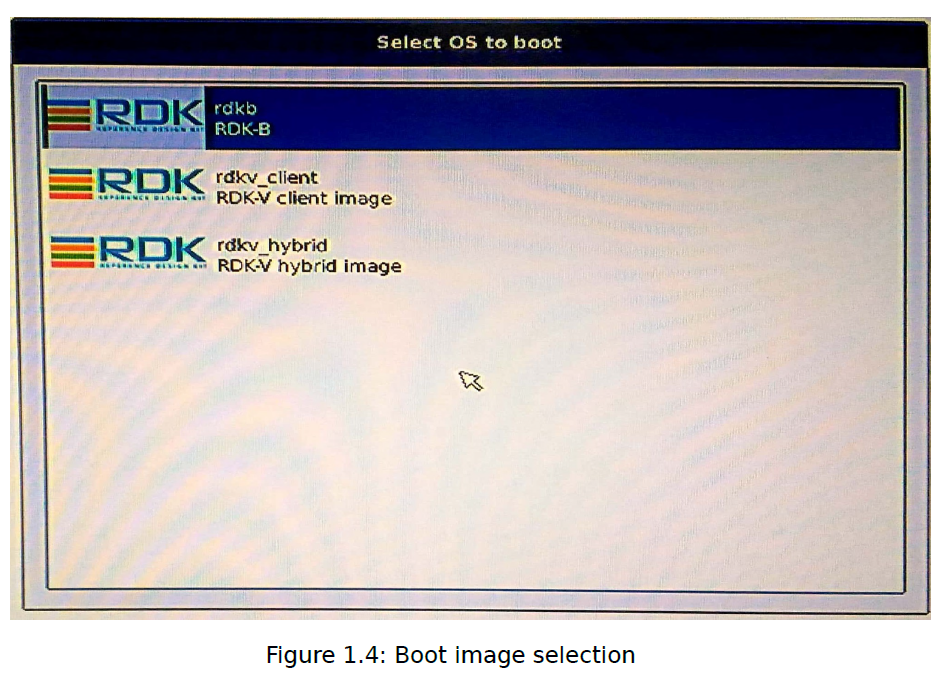
We can boot the required image by selecting it.
AV output display can be validated along with HDMI. We need to use 3.5MM RCA cable for getting AV composite output. From raspberrypi 3.5mm audio and composite output jack we need to connect to TV AV input (yellow, white and Red cable connections).
Similar kind of cable can be used.
NOOBS having the support of configuring between HDMI and AV output displays. It will support four different displays using HDMI and AV.
Connect both HDMI and AV cables from raspberrypi to TV. After flashing it will pop-up installation menu as shown in figure 1.1 (use shift key for getting installation menu from next time onwards). At install time, we can select the required images as shown in figure 1.2 and press corresponding button as listed below for the desired display.
In HDMI mode(change the source in TV to HDMI)
In AV mode(change the source in TV to AV)
HDMI mode is the default display mode. HDMI display resolution would be 1366*768 (native display) and for HDMI safe mode, the resolution changes to 640*480.
Composite PAL and NTSC modes come under AV (options 3 and 4). After selecting each mode, we can make it as permanant. From next time onwards it will be launched as default display mode.
In AV mode, after installing the required images, if we also want to boot images in AV, then we need to modify the corresponding image boot/config.txt file as shown below.
After installing the required rdk image if we wants to boot the image in AV display, then we need to do below mentioned changes to the corresponding rdk image config file. By default all rdk images will support HDMI output display by default. If we want to configure AV output display for any single rdk image then we need to modify /boot/config.txt file of that particular image as shown below:
Changes need to be done in boot/config.txt:
uncommenting sdtv stuff:
sdtvmode=2
sdtv_aspect=1
hdmi_ignore_hotplug=1
commenting hdmi stuff:
#hdmi_group=1
#hdmi_mode=4
Same changes can be made at runtime after installation of the image, using Edit config(e) option of NOOBS.
For more advanced documentation of noobs please head over to noobs github page here