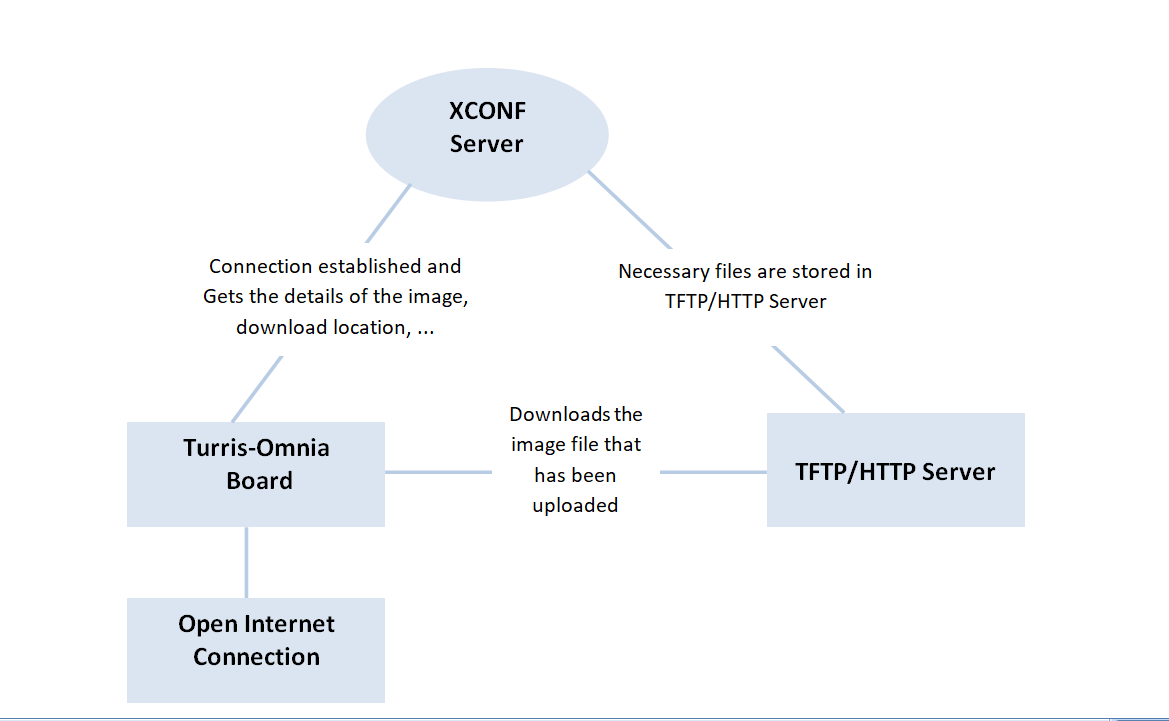
The Firmware upgrade will upgrade higher or lower version of the current image for Turris-Omnia with the help of Xconf server and Local TFTP/HTTP server.
This page dedicated to bringing up and validation of Firmware upgrade in Turris-Omnia.
Follow the wiki page to make yocto's RDK-B image from yocto workspace in your PC.
Wifi-Extender Yocto Build Instructions
Refer the below link for image flashing
Turris Omnia Reference Platform: Flashing Instruction
STEP 1:
Install xinetd and tftpd-hpa application in your local PC to setup tftp server by using below command
TFTP Server Installation Step
|
STEP 2:
Create a .tar file and place the image files.
For Example, the image files are,
zImage--4.14.22-r0-turris-20200629035029.binrdkb-generic-broadband-image_default_20200629035029.rootfs.tar.gzarmada-385-turris-omnia.dtb
|
STEP 3:
Create checksum file for the upgrading image.
md5sum checksum creation
|
Create new folder for example "tftp" in your PC home directory and place the checksum file and upgrading image file (the .tar file generated).
STEP 4:
Check for tftp file in /etc/xinetd.d/ directory. If not, then create tftp file under this /etc/xinetd.d/ directory and add below content.
vi /etc/xinetd.d/tftp
TFTP File Content
|
STEP 5:
Verify /etc/default/tftpd-hpa file content
vi /etc/default/tftpd-hpa
|
STEP 6:
Start tftp server and xinetd server
|
XConf URL
|
Select common → Environments. Then click edit and enter the device environment detail.

Select common → Models. Then add your device model detail.

Select common → MAC Lists. Then add your device MAC detail
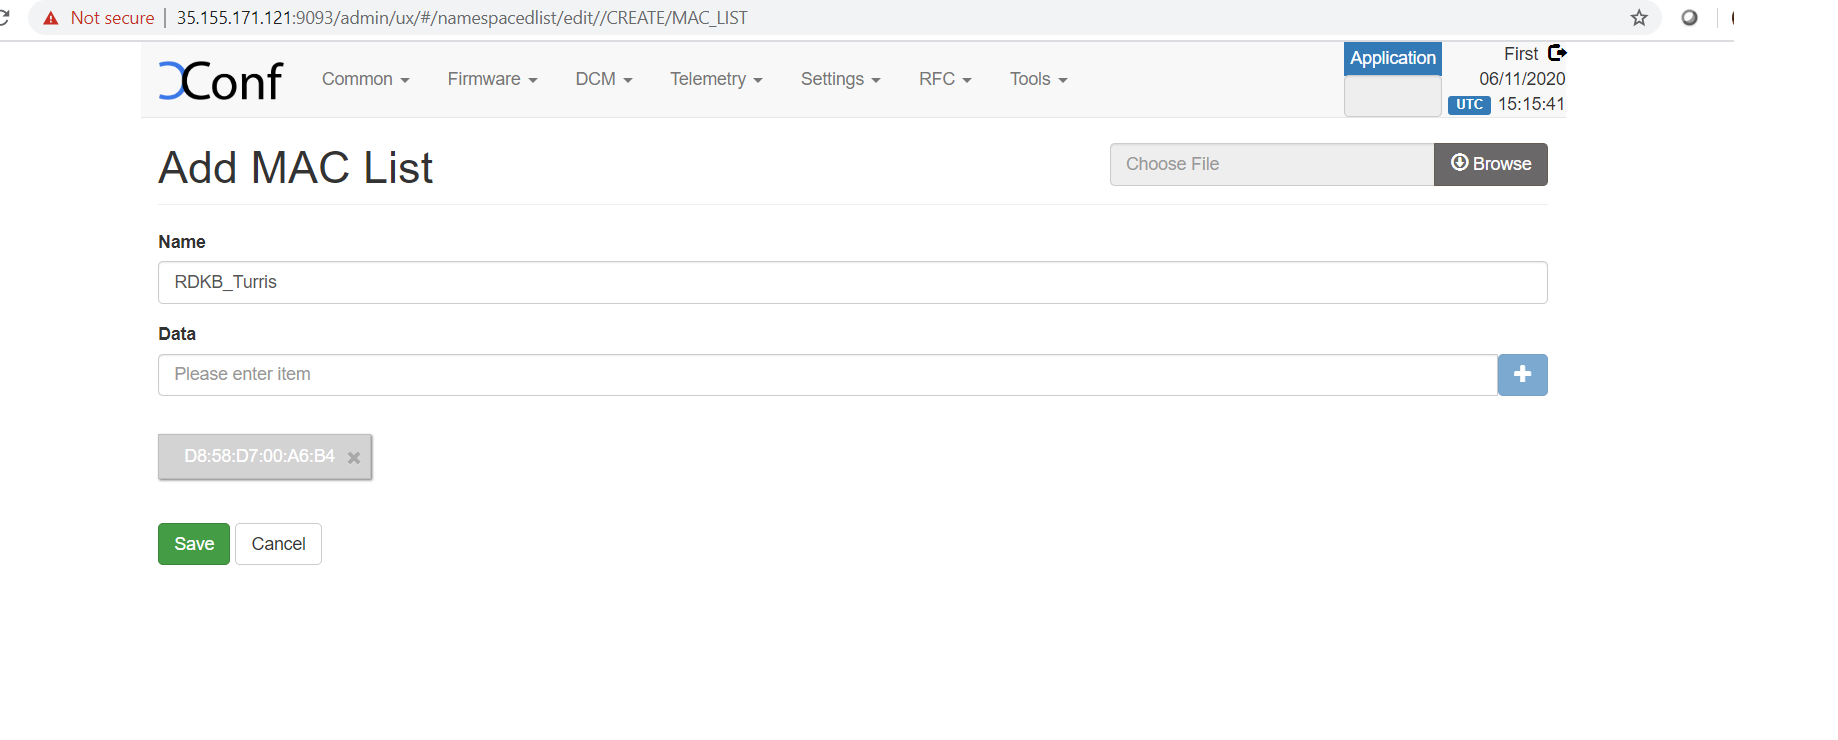
NOTE: Before configuring Firmware essentials, Ensure application type is stb. (If the application type is xhome then change it)
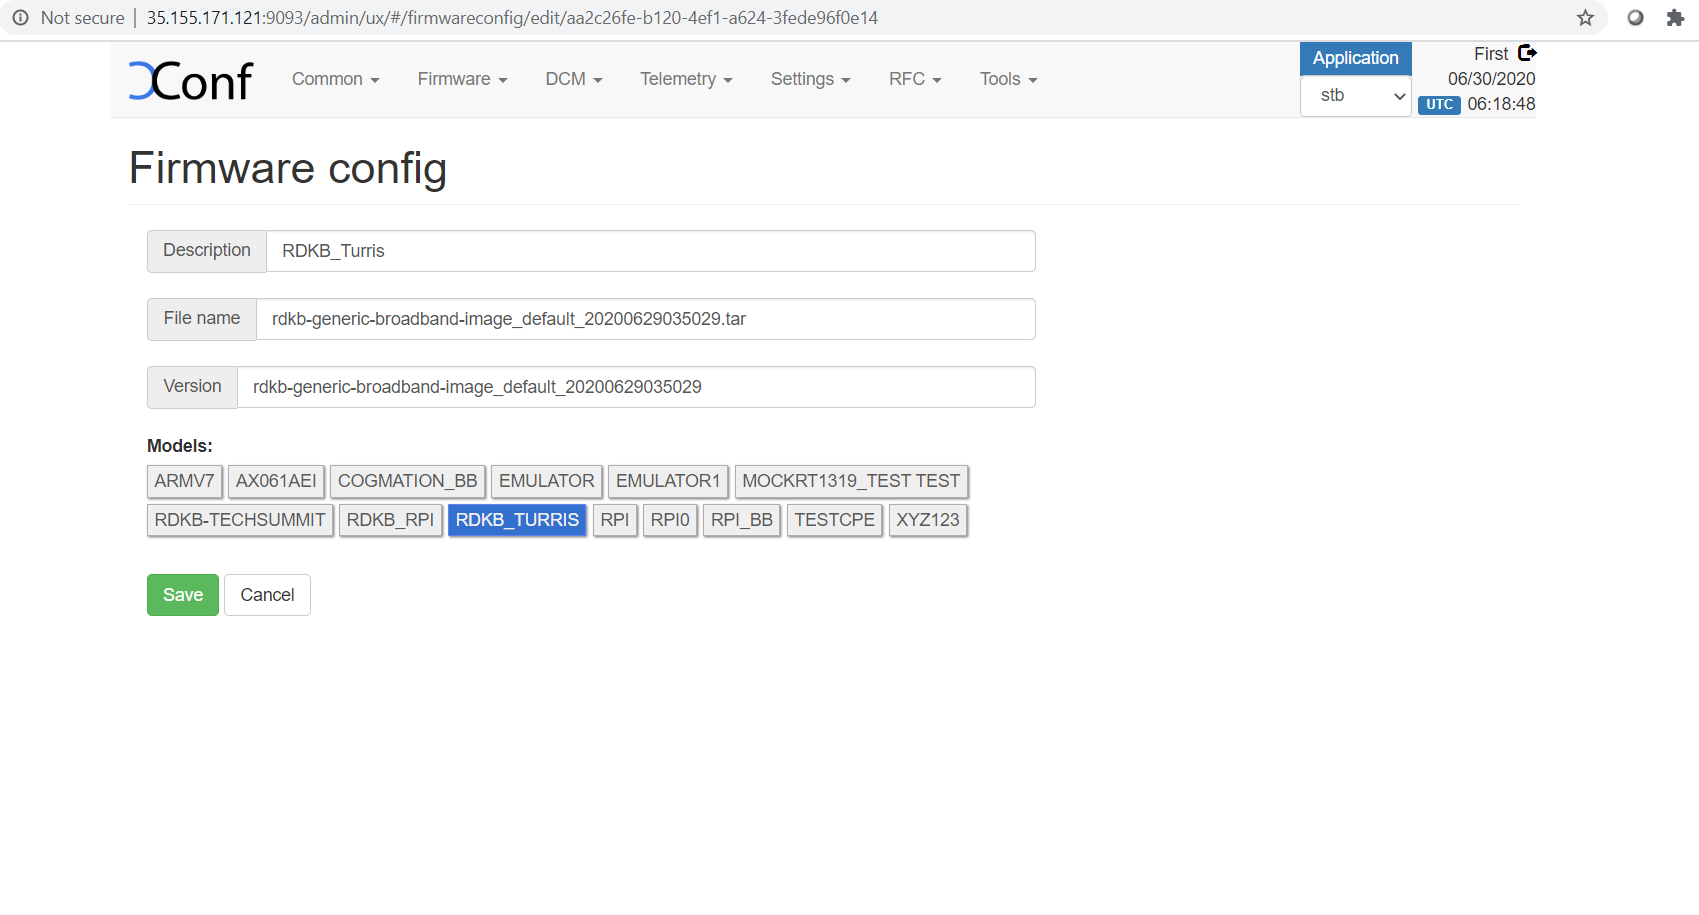
Select Firmware → Firmware Configs.
Give Description,File name ( Upgrading image name ),Version( Upgrading image name without extension) and select your model name and save the details in xconf server.
Select Firmware → Firmware Rules
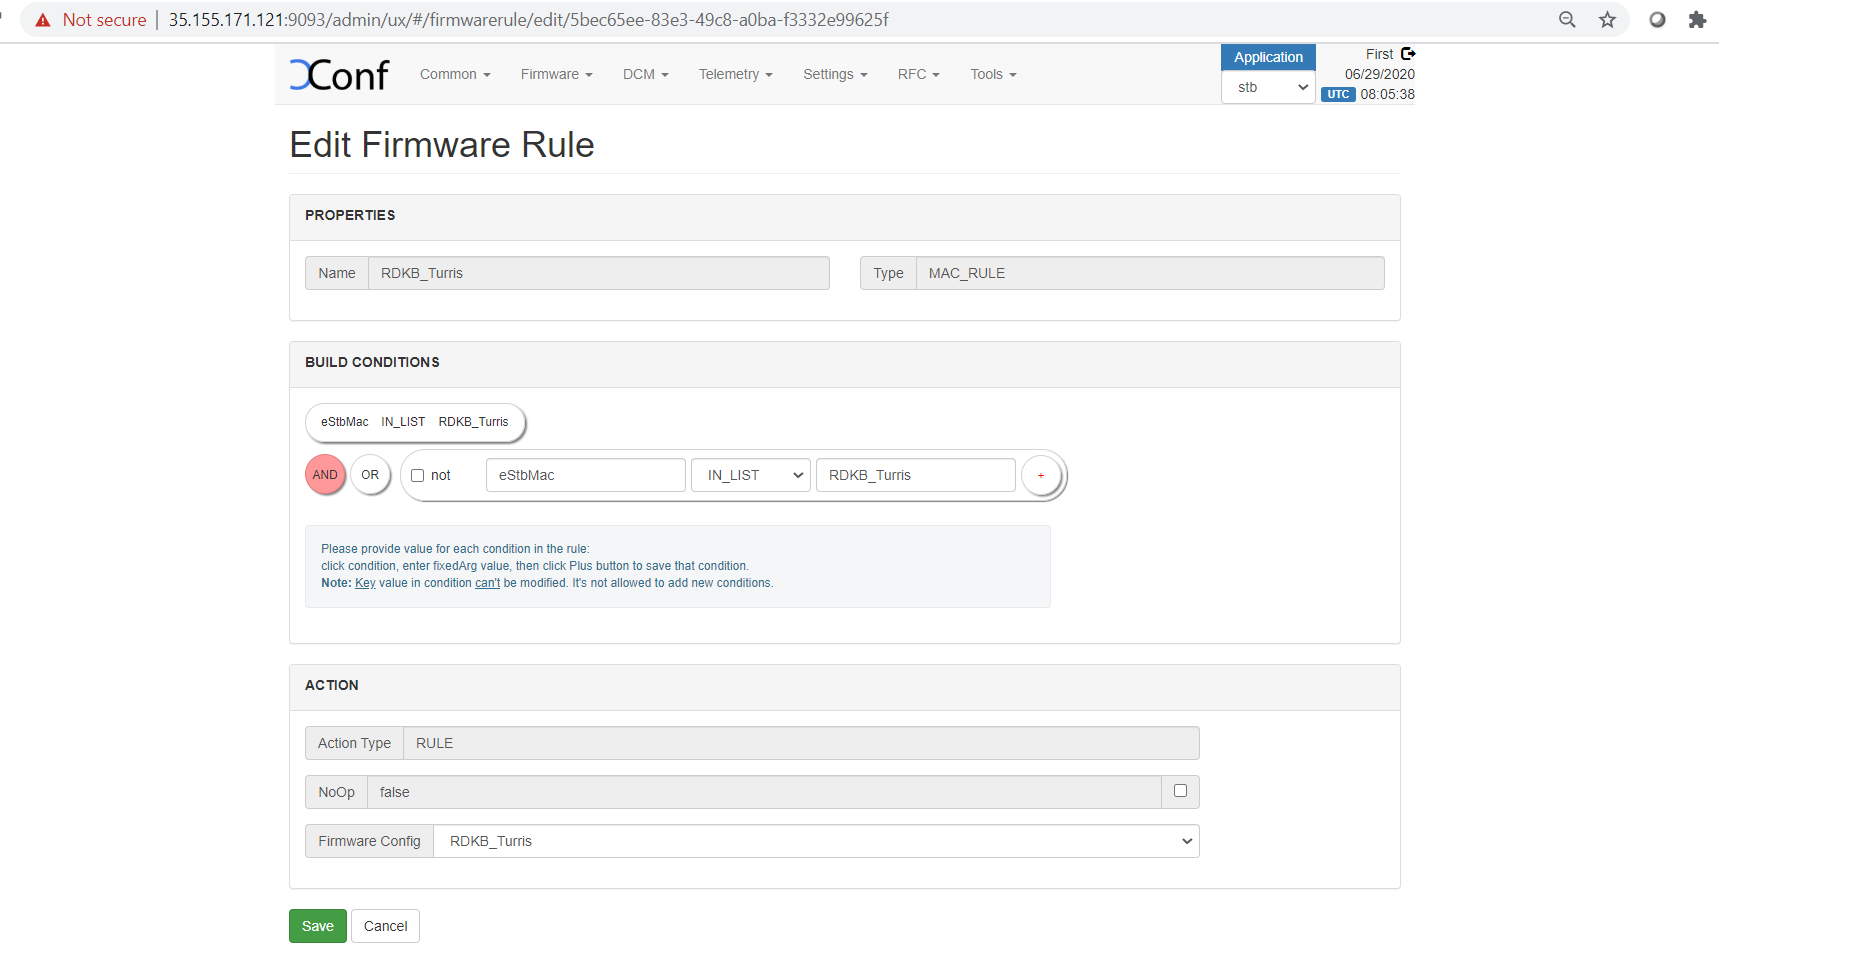
Choose MAC_RULE in the list of Template displayed.
Once entered into Firmware Rule page, If any estbmac present under build condition then remove that estmac before adding the device specific Firmware rules.
Add your device specific eStbMac under build condition option.
Select your firmware config under Action option and save your Firmware rule in XConf server.
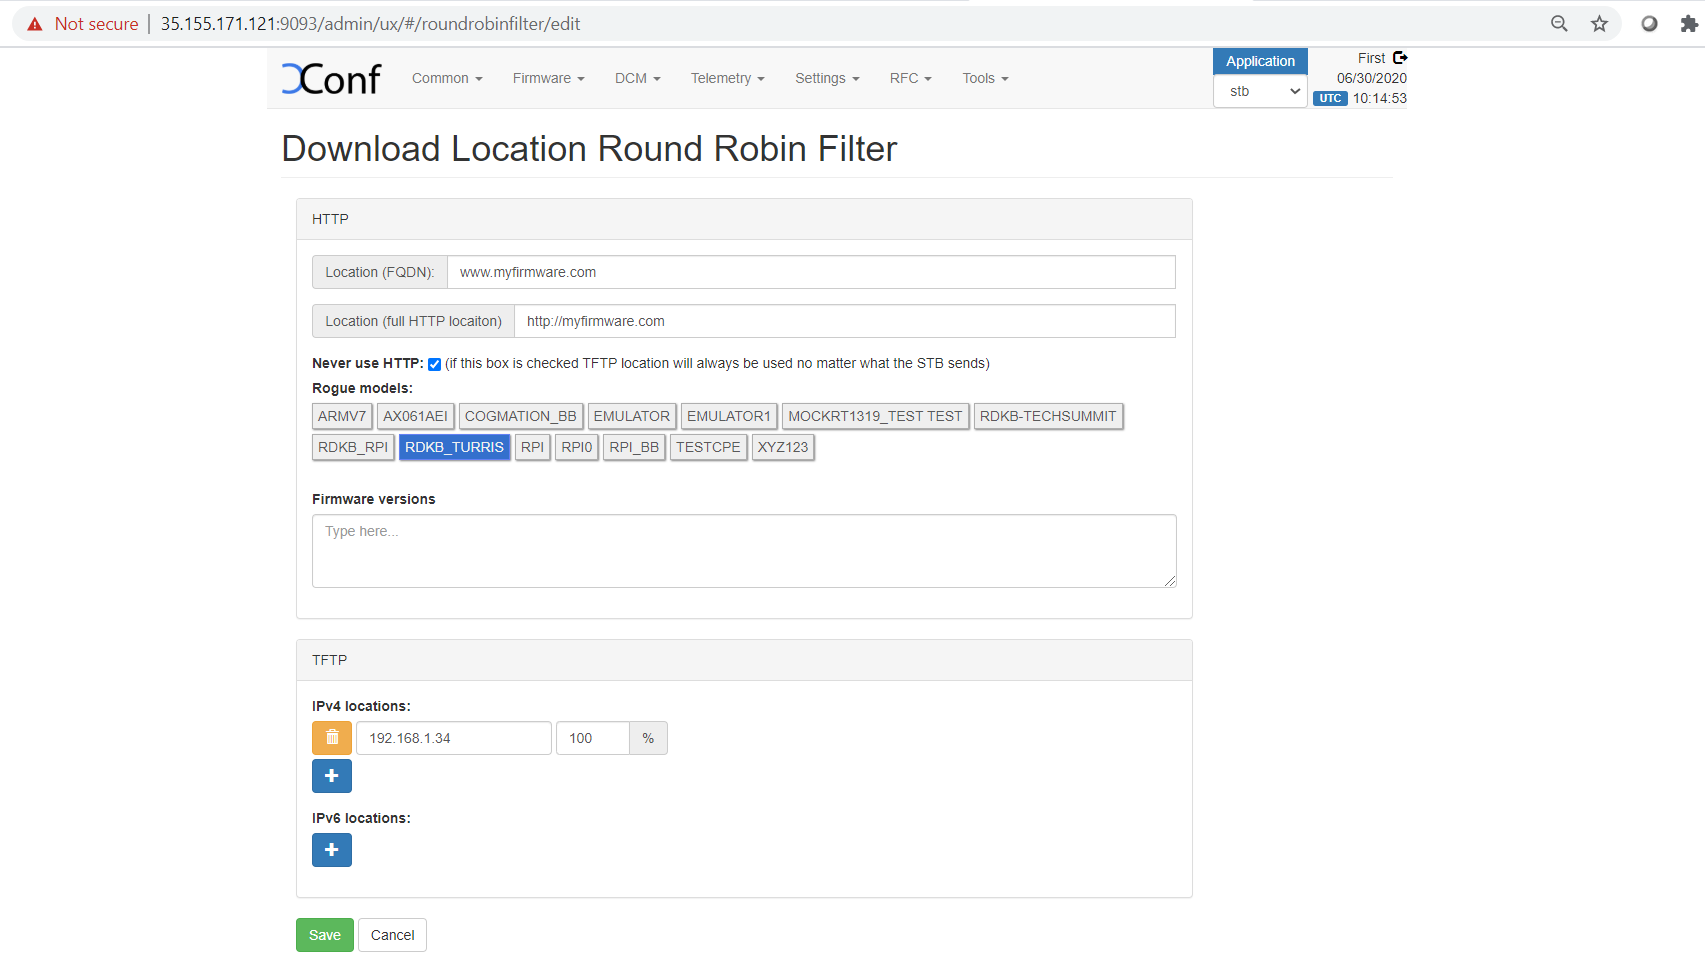
Select Firmware → Download Location Filter
After entered Download Location Round Robin filter, then edit your image downloading details.
FOR TFTP SERVER CONFIGURATION:
Enable Never use HTTP and select your Rogue model.
Give TFTP server running IP address to download image.
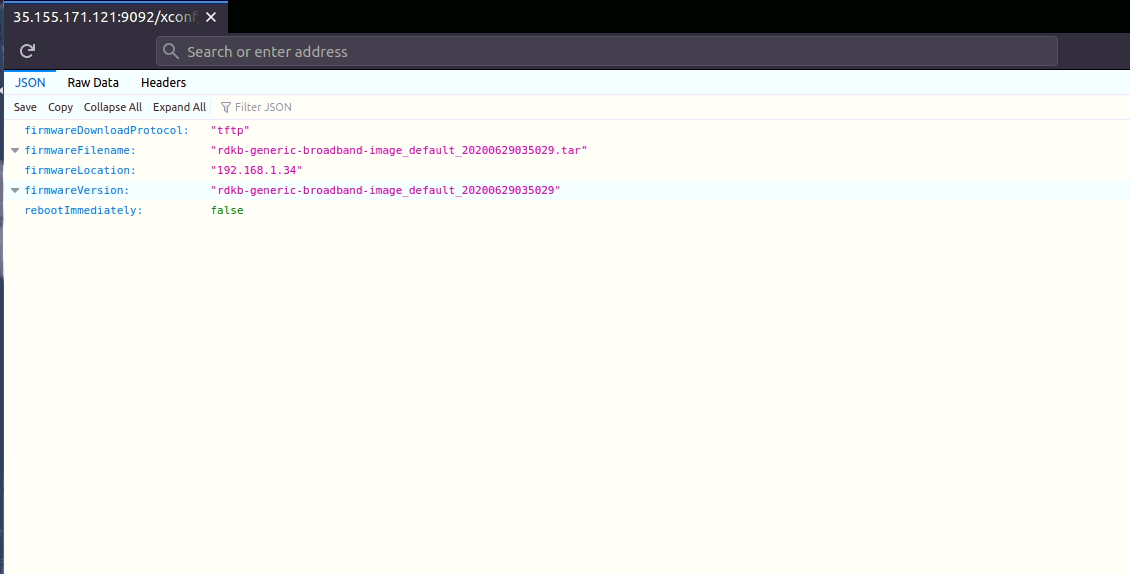
Verify that XConf Server configuration displays the Json response from the mentioned URL:
http://35.155.171.121:9092//xconf/swu/stb?eStbMac=<Turris MAC address>&model=<model_name>&capabilities=RCDL&capabilities=supportsFullHttpUrl
1) Add the necessary firmware utilities in armada_38x_defconfig
2) In fw_env.config, set MTD device specifications
3) Device specific details are added and try to retrieve the data by executing fw_printenv
4) Once, that is done try to set the bootargs by using fw_setenv and verify the same
Note: The U-boot Configuration is added to handle the uboot environment in linux. This is specifically to change the root value in bootargs ( to avoid the old rootfs in mmcblk0p5 and load the downloaded rootfs that has been placed in the mmcblk0p7). And so, the new rootfs comes up while the reboot.
1) Flash the image and confirm for the 7 partitions in the turris-omnia board(ex. mmcblk0p1, mmcblk0p2, mmcblk0p3, mmcblk0p4, mmcblk0p5, mmcblk0p6, mmcblk0p7)
2) Ensure Partition7 is of ext2 file system
3) verify the CLOUDURL parameter where XConf Server URL is configured
4) Start the swupdate.service that initiates the firmware upgrade
5) Verify the image version ( cat /version.txt) displays the flashed image version
6) Download the image in the /tmp folder(roots image, zImage, dtb file) and move the rootfs filesystem(rdk*.rootfs.tar.gz) into the 7th partition and kernel (zImage*.bin) image into 3rd partition
7) By changing the Active partition (mmcblk0p5) by target partition (mmcblk0p7) the downloaded rootfs is loaded
8) On reboot, the turris board comes up with the downloaded image
9) Verify the version of booted image which shows the downloaded image version
Please find the summary on firmware upgrade explained above
Yet to have https support