1.1. Introduction
The Firmware upgrade will upgrade higher or lower version of the current image in RPI target with the help of Xconf server and Local TFTP server.
This page dedicated to bringing up and validation of Firmware upgrade in RPI-0 and RPI-3 B+.
1.2. Yocto Build Steps
Refer below link to build camera image
Morty:
[Archived] RDK-C Build Instruction for RPI-0
[Archived] RDK-C Build Instruction for RPI-3
Dunfell:
RDK-C rdk-next Yocto 3.1 dunfell build for Raspberrypi
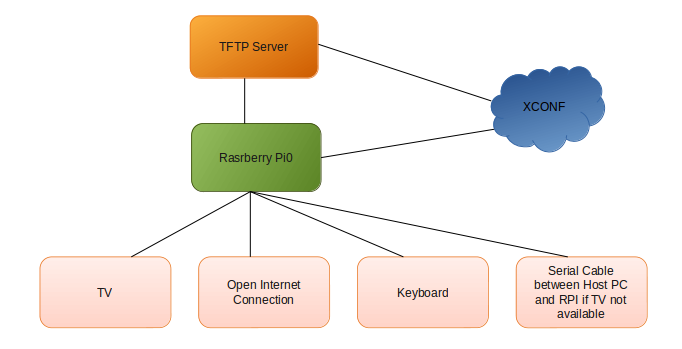
1.3. Test Setup Block Diagram for RPI RDK-C Firmware Upgrade
1.4. Firmware Upgrade Validation Procedure
1.4.1. TFTP Server Setup
STEP 1:
Install xinetd and tftpd-hpa application in your local PC to setup tftp server by using below command
TFTP Server Installation Step
sudo apt-get install xinetd
sudo apt-get install tftpd-hpa
STEP 2:
Create checksum file for your upgrading image.
Dunfell:
Before creating checksum file, need to decompress the .wic.bz2 camera image with the below command
$ bzip2 -dk camera_image
Example:
$ bzip2 -dk rdk-generic-camera-image_default_20201125081842.rootfs.wic.bz2
After decompression, we may get "rdk-generic-camera-image_default_20201125081842.rootfs.wic" this image.use this image to create checksum file and firmware upgrade.
md5sum checksum creation
Morty:
md5sum "<imagefile_name>.rootfs.rpi-sdimg" > imagefile_name.txt

for Ex:
upgrading image file is rdk-generic-camera-image_default_20200329074421.rootfs.rpi-sdimg
md5sum "rdk-generic-camera-image_default_20200329074421.rootfs.rpi-sdimg" > rdk-generic-camera-image_default_20200329074421.txt

Dunfell:
md5sum "<imagefile_name>.rootfs.wic" > imagefile_name.txt

for Ex:
upgrading image file is rdk-generic-camera-image_default_20201125081842.rootfs.wic

md5sum "rdk-generic-camera-image_default_20201125081842.rootfs.wic" > rdk-generic-camera-image_default_20201125081842.tx
STEP 3:
Create new folder for example "tfphome" in your PC home direcotry to maintain checksum file and upgrading image file.
Keep upgrading image file and checksum file in your created folder.
For Ex:
Morty:
Keep rdk-generic-camera-image_default_20200329074421.rootfs.rpi-sdimg and rdk-generic-camera-image_default_20200329074421.txt files in your tftphome folder.
Dunfell:
Keep rdk-generic-camera-image_default_20201125081842.rootfs.wic and rdk-generic-camera-image_default_20201125081842.txt files in your tftphome folder.
STEP 4:
Check tftp file is there or not in /etc/xinetd.d/ directory. if it is not there then create tftp file under this /etc/xinetd.d/ direcotry and add below content.
vi /etc/xinetd.d/tftp
TFTP File Content
service tftp
{
protocol        = udp
port            = 69
socket_type     = dgram
wait            = yes
user            = nobody
server          = /usr/sbin/in.tftpd
server_args     = -c -v -s /home/xyz/tftphome ( Give upgrading file and checksum file maintained directory )
disable         = no
}
STEP 5:
Verify /etc/default/tftpd-hpa file content
vi /etc/default/tftpd-hpa
tftp-hpa File Content
# /etc/default/tftpd-hpa

TFTP_USERNAME="tftp"
TFTP_DIRECTORY="/home/xyz/tftphome" ( Give upgrading file and checksum file maintained directory )
TFTP_ADDRESS="0.0.0.0:69"
TFTP_OPTIONS="--secure"
STEP 6:
Start tftp server and xinetd server
sudo service tftpd-hpa restart
sudo /etc/init.d/xinetd restart
1.4.2. XCONF Server Setup
1.4.2.1. XConf URL
Enter XConf server wiki page with below URL to create Environment,Model,Mac list,Firmware config,Firmware rule and Download Location Round Robin Filter.
XConf URL
http://35.155.171.121:9093/admin/ux
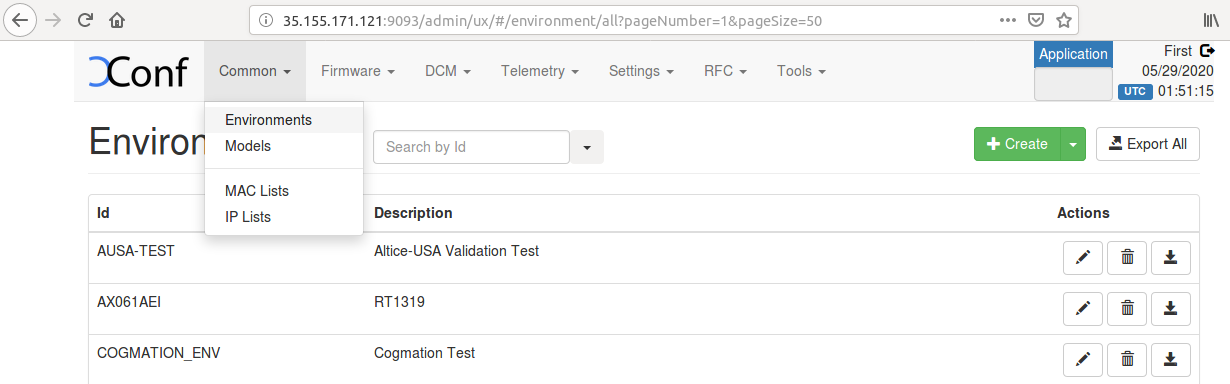
1.4.2.2. Create Environments
STEP 1:
Select Environments option within common list to enter Environments page.
After entered Environments page press create button to add your device environment detail.
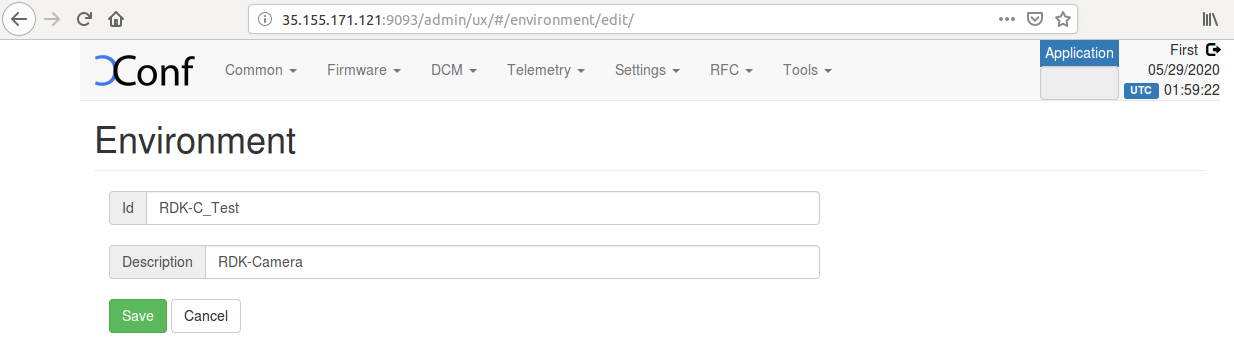
STEP 2:
Give ID and Description to setup Environment for your device and save that details in xconf server..
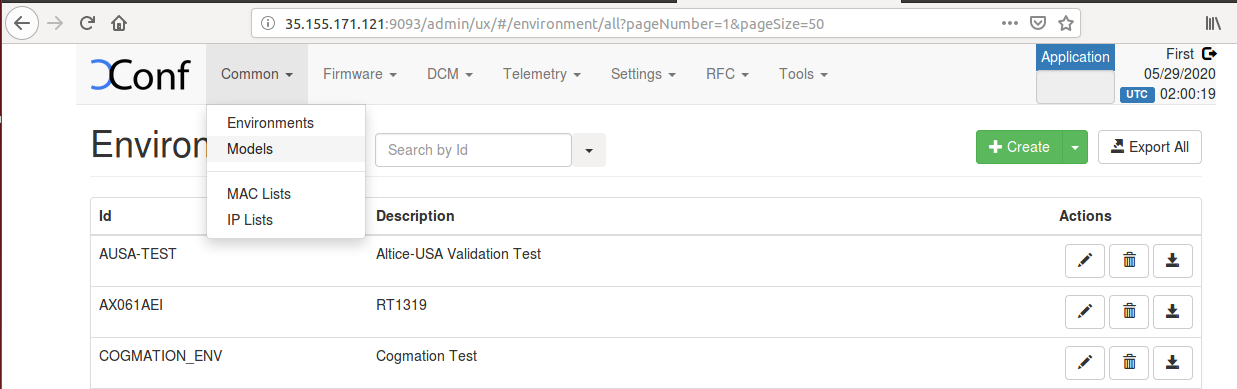
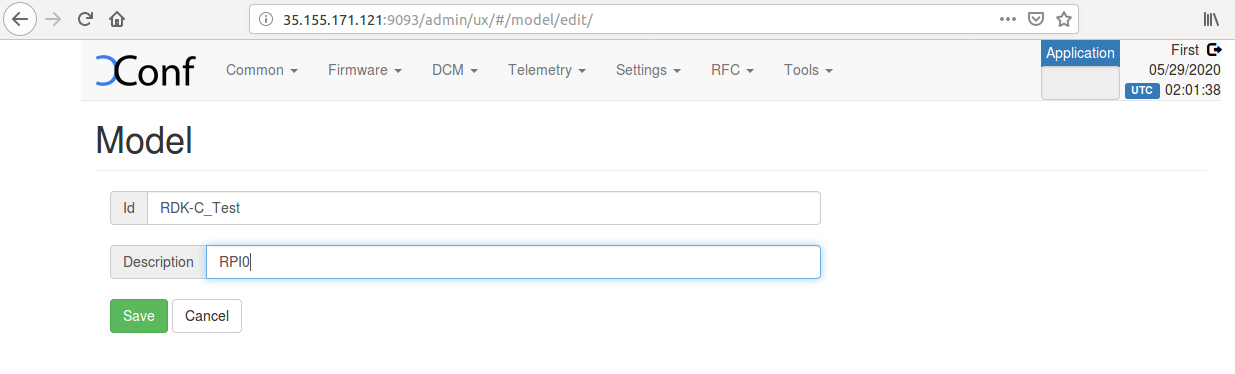
1.4.2.3. Create Model
STEP 1:
Select Models option within common list to enter Models page.
After entered Models page press create button to add your device model detail.
STEP 2:
Give ID and Description to setup Model for your device and save that details in xconf server..
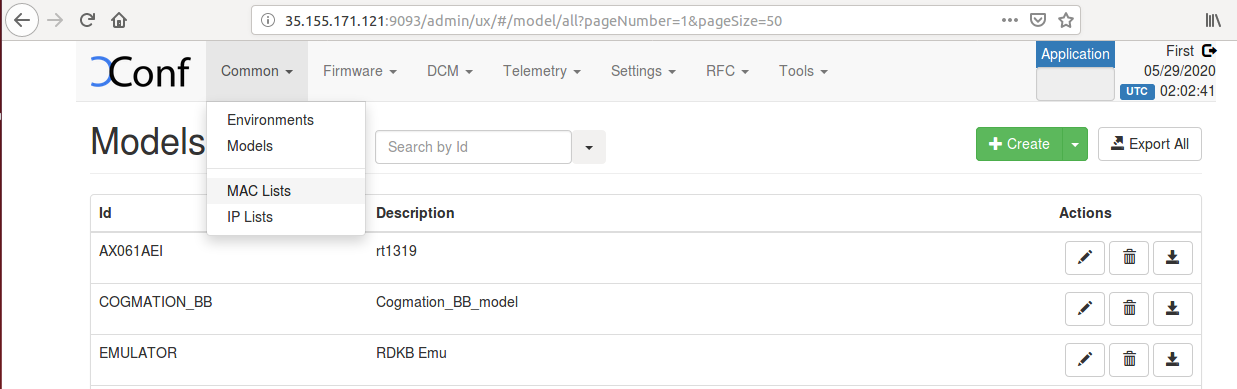
1.4.2.4. Create MAC List
STEP 1:
Select MAC Lists option within common list to enter MAC Lists page.
After entered MAC Lists page press create button to add your device MAC detail.
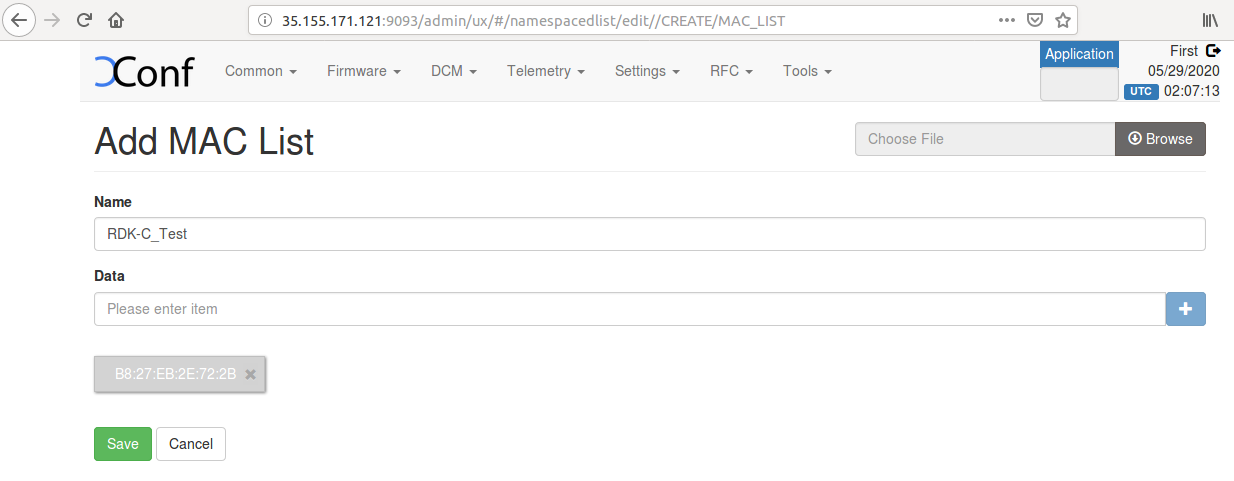
STEP 2:
Give Name and Data to set MAC detail for your device and save that details in xconf server..
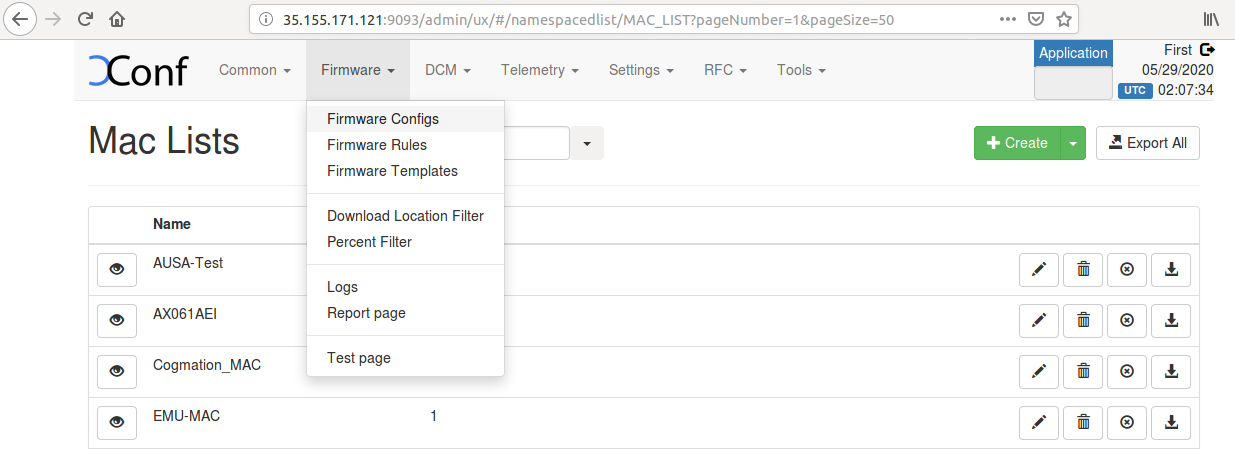
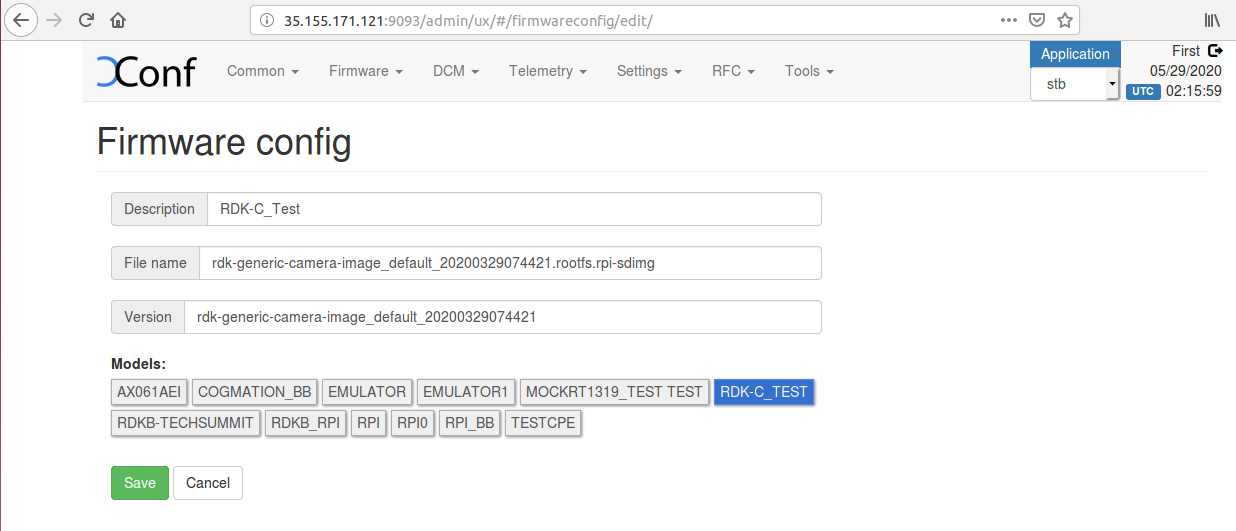
1.4.2.5. Create Firmware config
Ensure application type is stb. If the application type is xhome then change application into stb.
STEP 1:
Select Firmware Configs option within common list to enter Firmware Configs page.
After entered Firmware Configs page press create button to add your device firmware configuration detail.
STEP 2:
Give Description,File name ( Upgrading image name ),Version( Upgrading image name without .rootfs.rpi.sdimg) and select your model name and save the details in xconf server.
1.4.2.6. Create Firmware Rule
STEP 1:
Select Firmware Rule option within common list to enter Firmware Rule page.
After entered Firmware Rule page press create button to add your device firmware Rule detail.

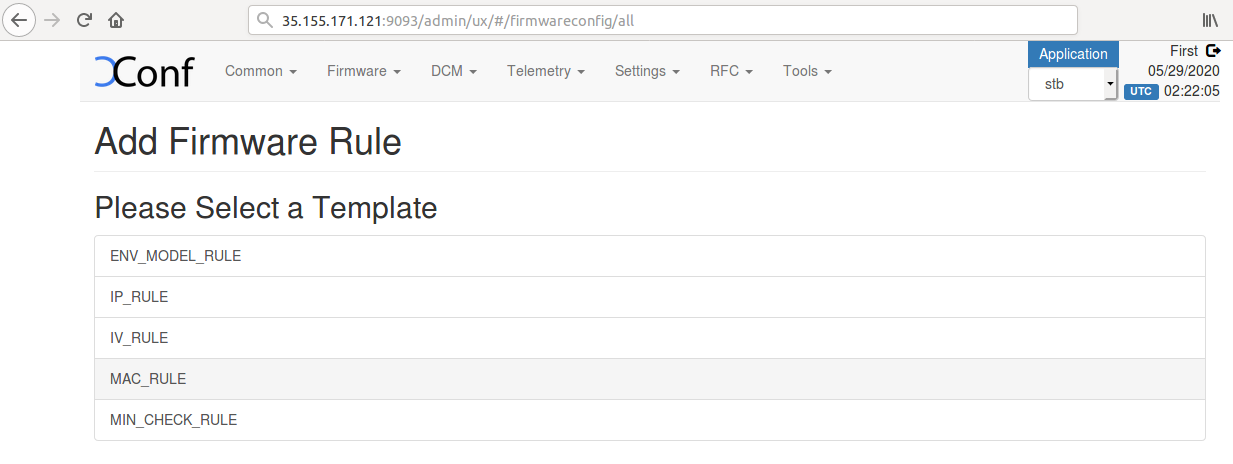
STEP 2:
After entered firmware Rule page you can see list of template.
Choose MAC_RULE in this list of Template to add your device MAC list in Firmware Configuration.
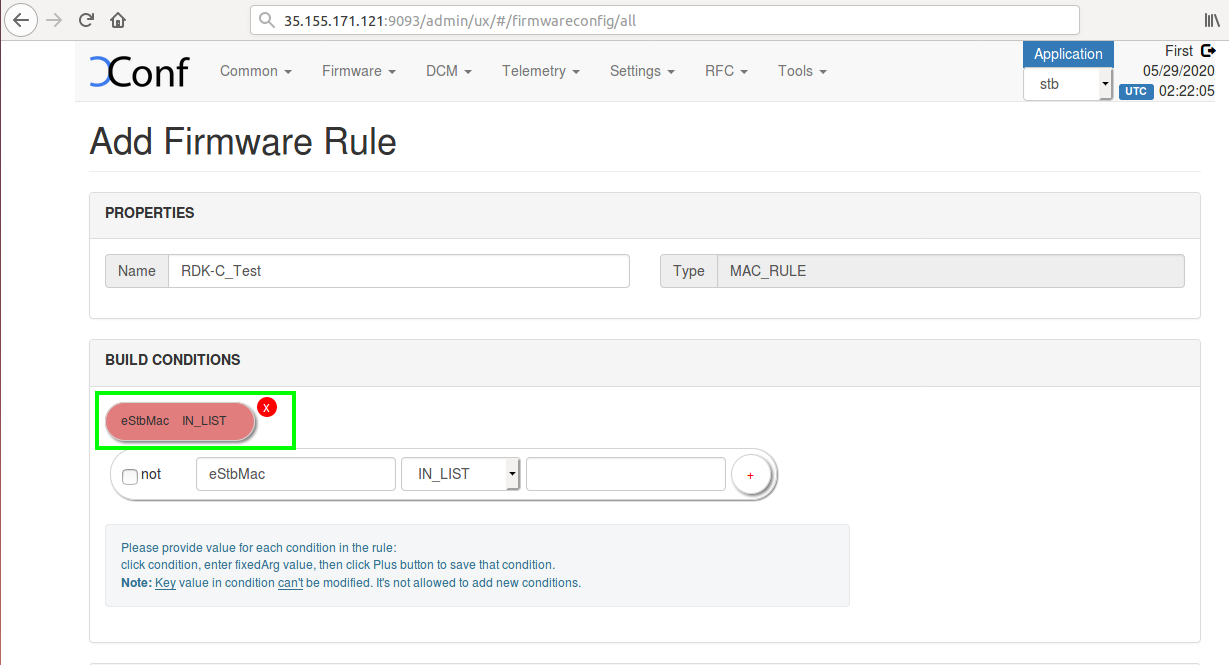
STEP 3:
After entered Firmware Rule page.If any estbmac if there under build condition then remove that estmac before add your device specific Firmware rules.
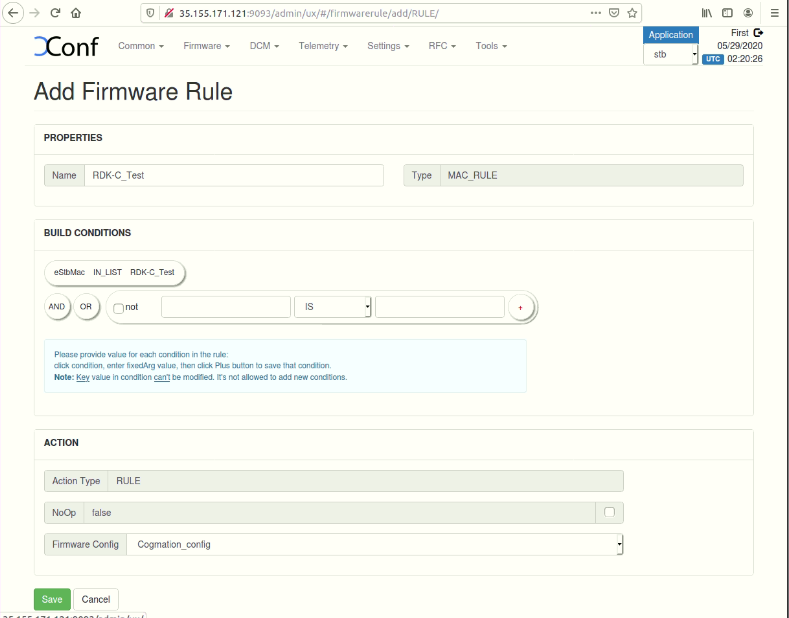
STEP 4:
Add your device specific eStbMac under build condition option.
Select your firmware config under Action option and save your Firmware rule in XConf server.
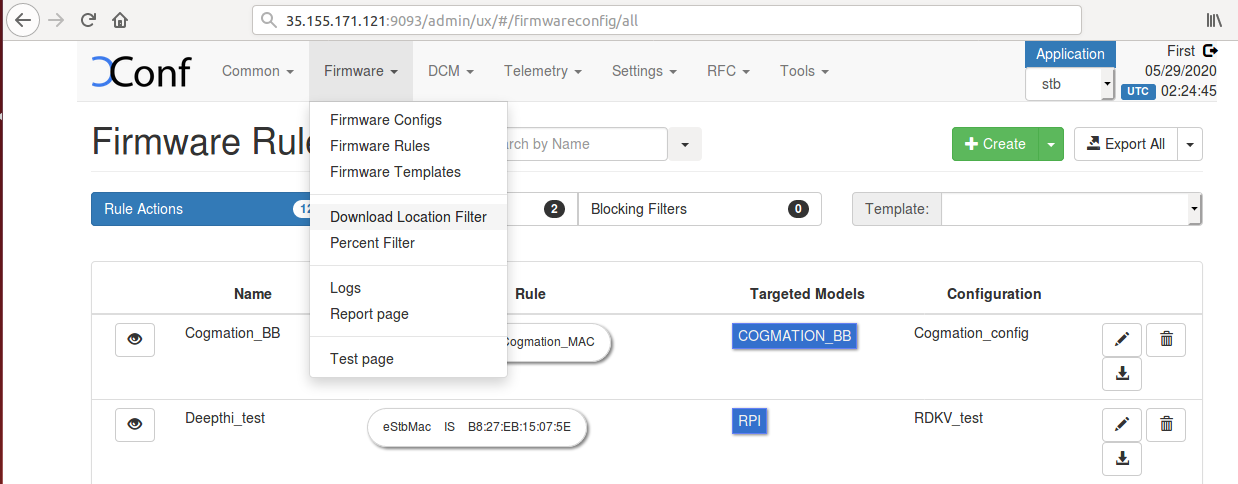
1.4.2.7. Edit Download Location Round Robin Filter
1.4.2.7.1.1. With selection of HTTP Protocol
Server Set-up :
- Install the apache2 http server in local pc
- Add the below line in /etc/hosts (192.168.0.107(wan IP) http://myfirmware.com)
- place the rpi image and checksum files in document root directory.
XCONF side :
1.Select Download Location filter under the firmware tab in XCONF UI
2.click the edit button
3.Enter the "Location (FQDN)" field is local/Public http server (fully qualified domain name ) (ex : www.myfirmware.com)
4.Enter the "Location (full URL)" field is full location path of local/Public http server (ex : http://www.myfirmware.com)
5.Unclick the check box of Never use HTTP
6. Removed the model name from Rogue Models.
7.Removed the firmware version (If it's not updated earlier, please ignore this step).
8. click the save button.
RPI Target :
9.In DUT, please edit the following file with below format,If it's local http server
i) Open the /etc/hosts
ii) Add your local http server ip with DNS ( Ex : 192.168.0.128 www.myfirmware.com)
iii) Save the file.
Note : Every reboot, You need to add the above three steps if it's local http server.
1.4.2.7.1.2. Verify XConf server configuration
Verify that XConf Server configuration displays the Json response from the mentioned URL:
Using the below url to view the JSON Format result of http protocol ,
http://35.155.171.121:9092//xconf/swu/stb?eStbMac=<RPI MAC ADDRESS>&model=<model_name>&capabilities=RCDL&capabilities=supportsFullHttpUrl

1.4.2.7.1.3. Http Location folder:
Verify that image file and its respective md5 checksum file is present in the http folder:
ltts40009681@CHTSL20070:/var/www/html$ ls
rdk-generic-camera-image_default_20210107140802.rootfs.wic.bz2
rdk-generic-camera-image_default_20210107140802.txt
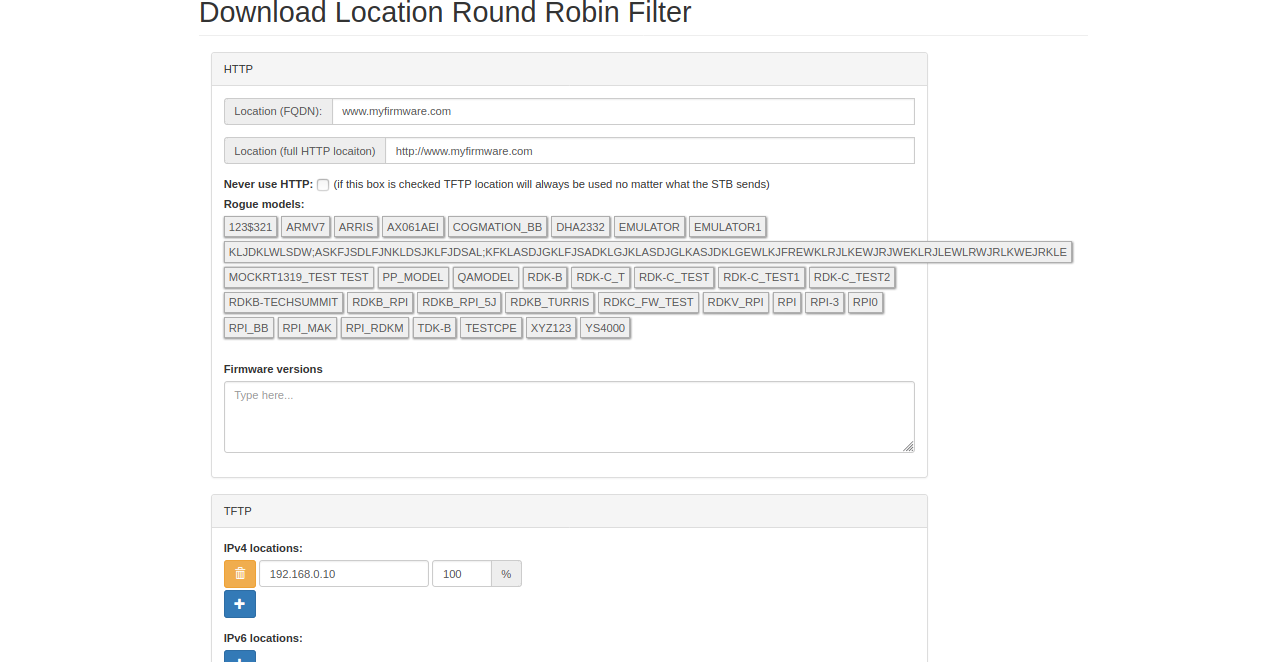
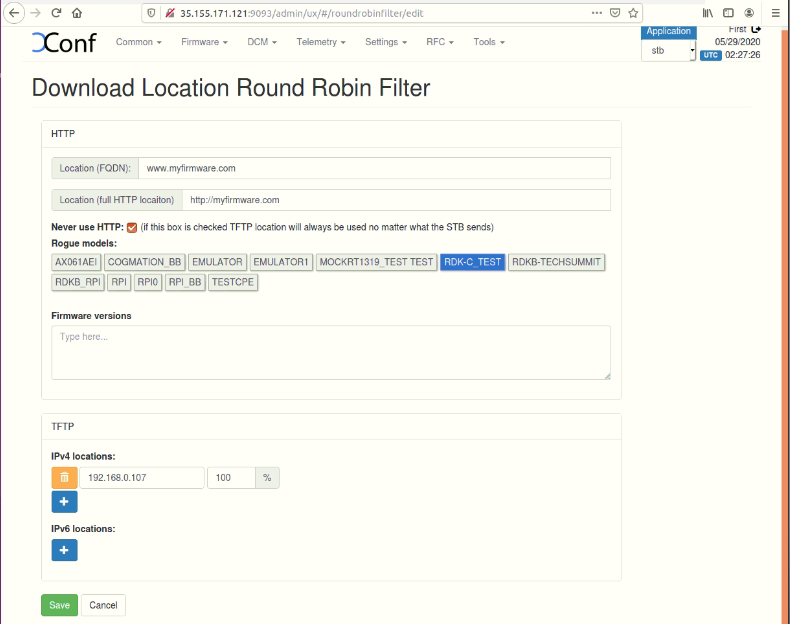
1.4.2.7.1.4. With Selection of TFTP Protocol
STEP 1:
Select Download Location Filter option within common list to enter Download Location Filter page.
After entered Download Location Filter page press create button to add your Download Location detail.
STEP 2:
After entered Download Location Round Robin filter press edit button to edit your image downloading details.
Enable Never use HTTP and select your Rogue model.
Give TFTP server running IP address to download image.
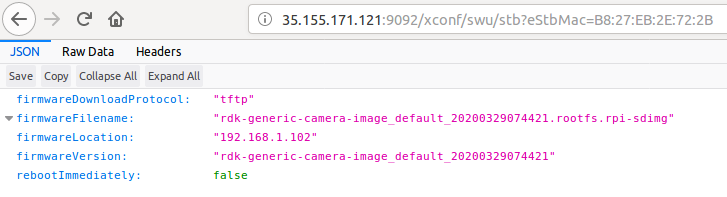
1.4.2.7.1.5. Verify XConf server configuration
Verify that XConf Server configuration displays the Json response from the mentioned URL:
http://<Xconf Server IP:port no.>/xconf/swu/stb?eStbMac=<MAC address of Rpi board>
1.4.3. RPI-Board
- Flash the RDKC image supported for Firmware upgrade feature in the Rpi and verify the 2 partitions(ex. mmcblk0p1, mmcblk0p2) present under dev folder (use command ls /dev)
- Device auto-reboots and verify there are 2 more additional partitions are created (ex. mmcblk0p3, mmcblk0p4).
- Open /etc/include.properties file and verify the CLOUDURL parameter where XConf Server URL is configured
- Verify the image version ( cat /version.txt) displays the flashed image version
- Open /rdklogs/logs/swupdate.log to verify the communication from RPI board with XConf Server and the download status
- Verify the tftp download is happening by noticing the change of file size using below command: ls /extblock/tftpimage/imagedwnldls -sh (use this command frequently to verify the file size change)
- Once image download completed, the Rpi board will auto reboot and come up with downloaded image
- Verify the version of booted image which shows the downloaded image version
1.5. Conclusion
Please find the summary on firmware upgrade explained above
- Build the image RDK-C Image.
- Ensure 8GB sd-card is available for flashing
- Flash the build image to sd-card
- Setup xconf server ready with rules and download location for RPI device
- Place the upgrading image and checksum file in tftp server
- Boot the flashed image
Note :
1. RPI will go for reboot while booting for the first time, since two more partition needs to be created which requires reboot. Depends on the image present in xconf and RPI, further reboot will happen for upgrade. Please refer to design (Firmware Upgrade Support in R-Pi - RDK Camera - Design - M5 - 2020) for how firmware upgrade works with bank switching
2. SD card should be zero filled formatted before starting the firmware upgrade procedure. DriveWipe software is used for this. Please refer the you-tube video link for the SD card full format process.
1.6. Limitations
RPI will support only tftp protocol . No http protocol support is provided yet.
Overview
Community Forums
Content Tools
Tasks