Introduction
Backup and Restore is a Troubleshooting feature developed for the WebUI considering RPi as the reference platform.
Its key features are as follows:
- Backup allows user to save all the existing User Settings in a form of tar file containing encrypted database files and download to their local PC.
- Restore allows the user to retrieve the user settings from the backup created earlier. The backed up file from local PC can be uploaded to the server and the settings from the decrypted database files will be loaded to the WebUI.
Device will be rebooted after loading saved settings, to ensure the settings are applied.
These features are placed as a sub menu under the main menu Troubleshooting in WebUI.
Environment Setup
Set-up Considerations
Backup and Restore functionalities are supported by a set of script files. Following are the mentioned script files:
→ ConfPhp
→ download_user_settings.php
→ upload_user_settings1.php
→ upload_user_settings2.php
→ backup_user_settings.php
→ backup_enc_key.php
→ ajax_at_saving_backup_key.php
These script files which are already present in the RDK build, will execute when the Backup and Restore buttons are clicked.
- Accessing the System
The User needs to login to the WebUI using <username> admin and <password> password (These are default username and password). Once logged in, the following procedure has to be followed:
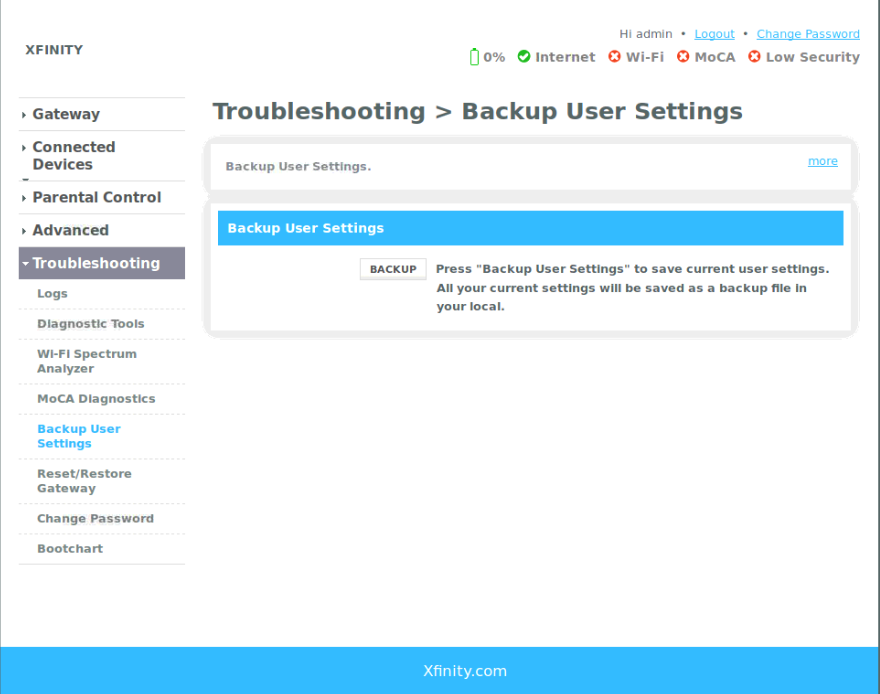
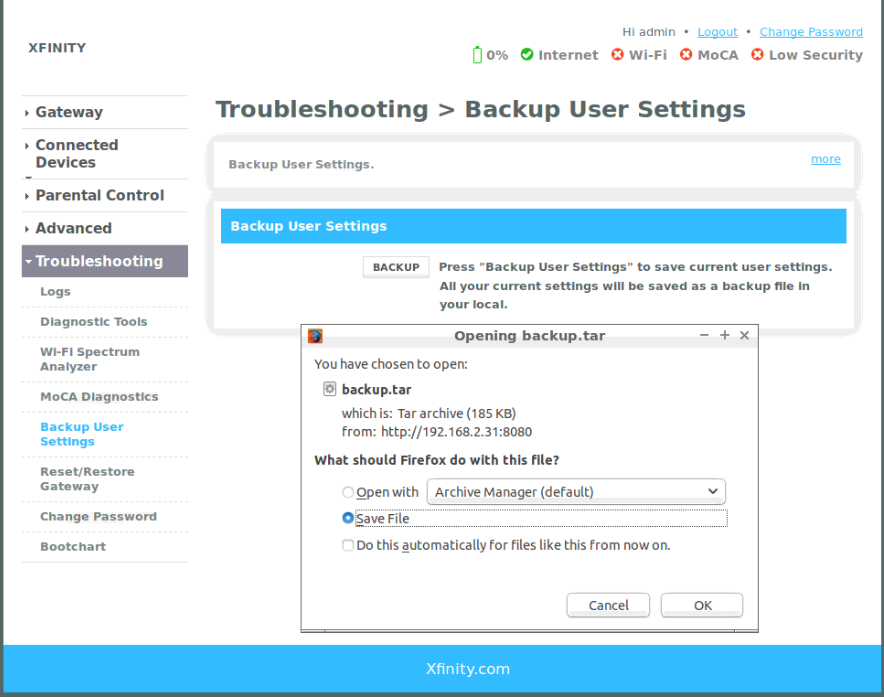
Backup: Under the main menu Troubleshooting, Backup User Settings sub menu is selected and Backup button is clicked. The user is asked to enter a Secure key to encrypt the files. Once key is entered, a pop up to download the Current User settings in the form of a tar file in Local PC.
Troubleshooting → Backup User Settings → Backup (button) → Enter Secure key → Click Save → Pop up to Save → Select Save .
Please check the following figure for reference:

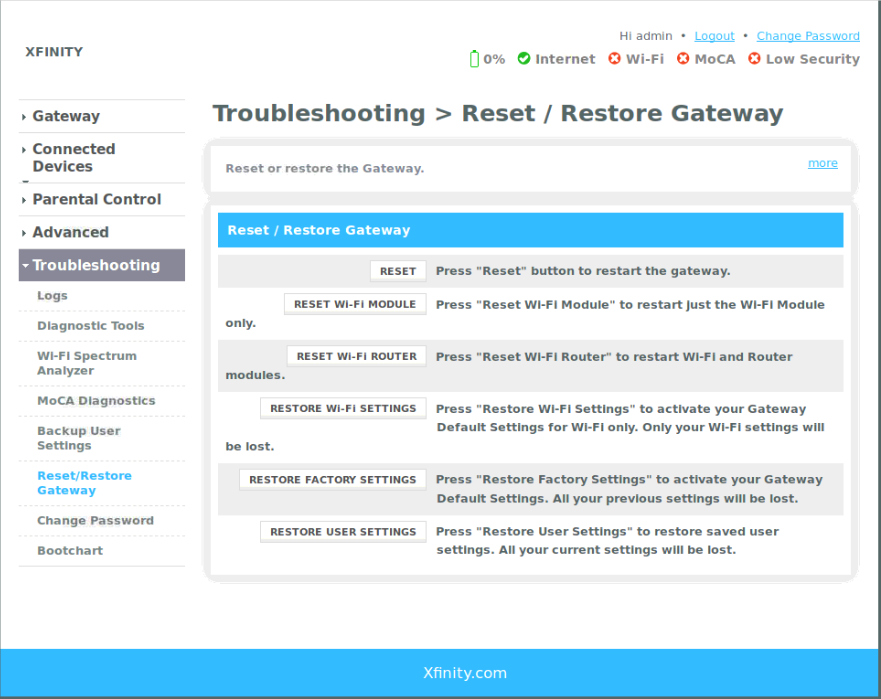
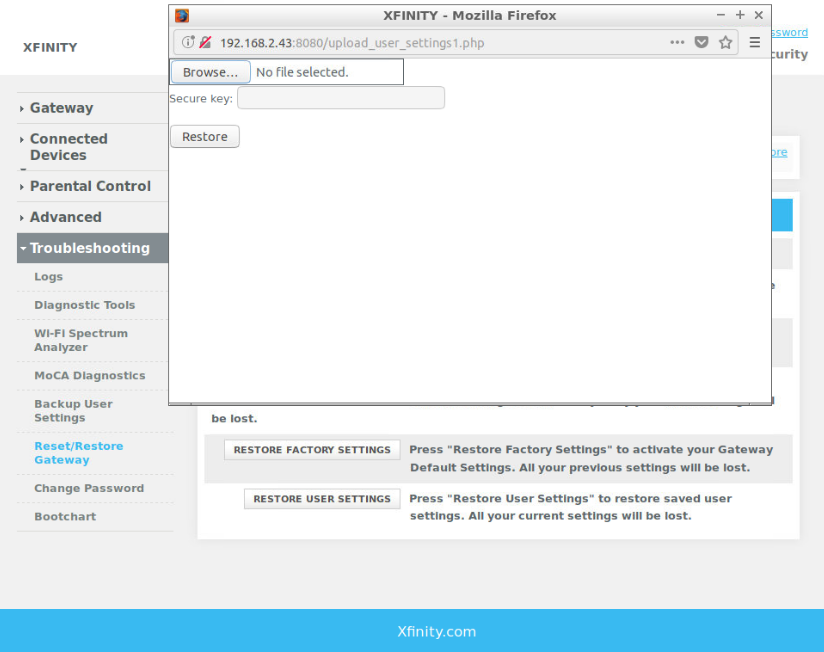
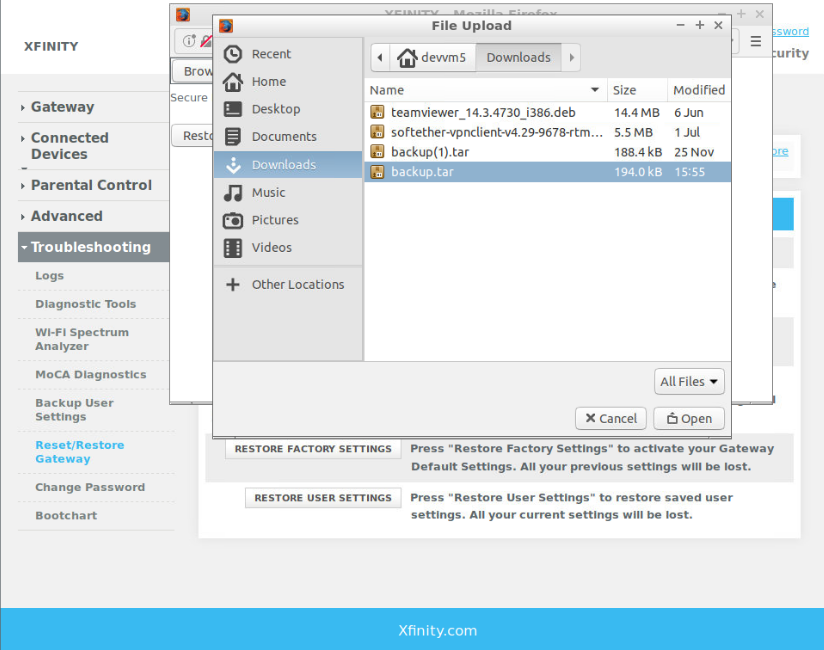
Restore: Under the main menu Troubleshooting, Reset / Restore Gateway is selected and Restore User Settings button is clicked. The file which needs to be uploaded has to be selected from local PC, the secure key previously used to encrypt the files should be entered to decrypt the files and Restore is clicked to apply the settings.
Troubleshooting → Reset / Restore Gateway → Restore User Settings (button) → Browse (To select the file from Local PC) → Enter Secure key to decrypt files → Restore (button).
Please check the following figure for reference:
System Work Flow
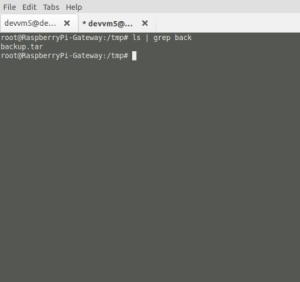
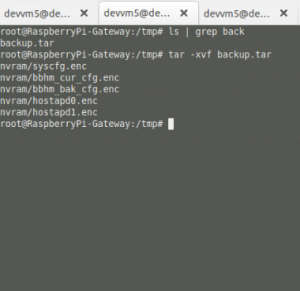
Once Backup is performed, the following path can be checked to ensure that backup has executed as expected.
→ In the RPi image → /tmp/ folder can be checked if a backup file has been created "backup.tar"
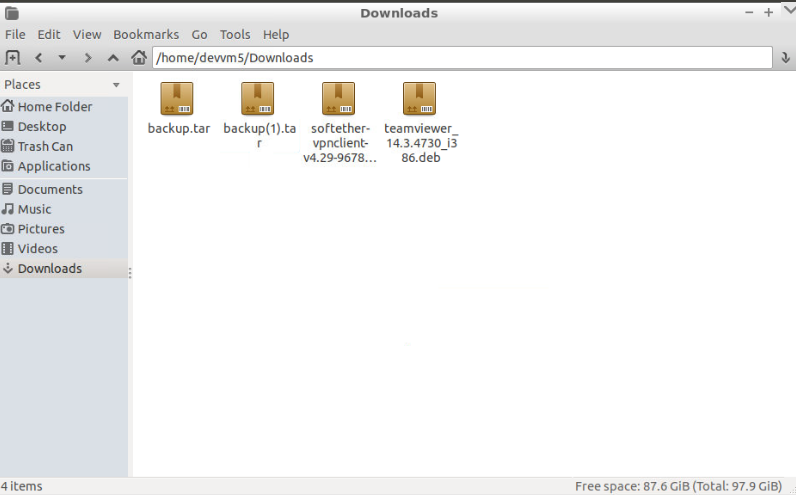
→ In the Local PC → Downloads/ folder can be checked for "backup.tar" file to be saved.
Please check the following figure for reference:

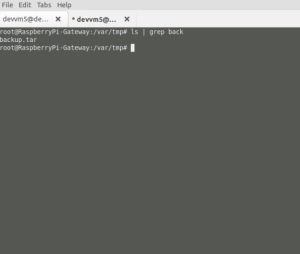
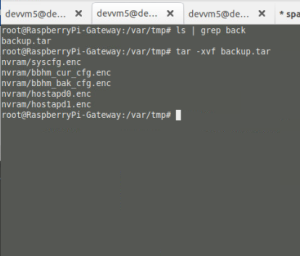
Once Restore is performed, the following path can be checked to ensure that Restore has been executed as expected.
→ In RPi image before automatic reboot, /var/tmp/ folder can be checked for backup.tar file to be present.
→ In RPi image, /nvram/syscfg.db or /nvram/bbhm_cur_cfg.xml file can be checked manually to confirm if the changes have been applied.
→ In WebUI, the changes in settings can be observed after reboot of device.
Please check the following figure for reference:
Exiting the System
Care should be taken that before Backup is performed, backup.tar file already existing in Download folder of Local PC has to be deleted or renamed to avoid creation of duplicate file.
Please check the following figure for reference:
Executing System
The Backup feature creates a tar file in the /tmp/ folder. This tar file contains all the necessary files like, bbhm_bak_cfg.xml, syscfg.db and bbhm_cur_cfg.xml required for backing up all the user settings. The same tar file is downloaded to local PC.
The Restore feature copies the uploaded file temporarily to /var/tmp/ folder and restores all the settings from the tar file to the WebUI. The restore changes can be observed in WebUI and the files in /nvram/ folder.
Backup Example:
The current settings show Managed Sites is Enabled.
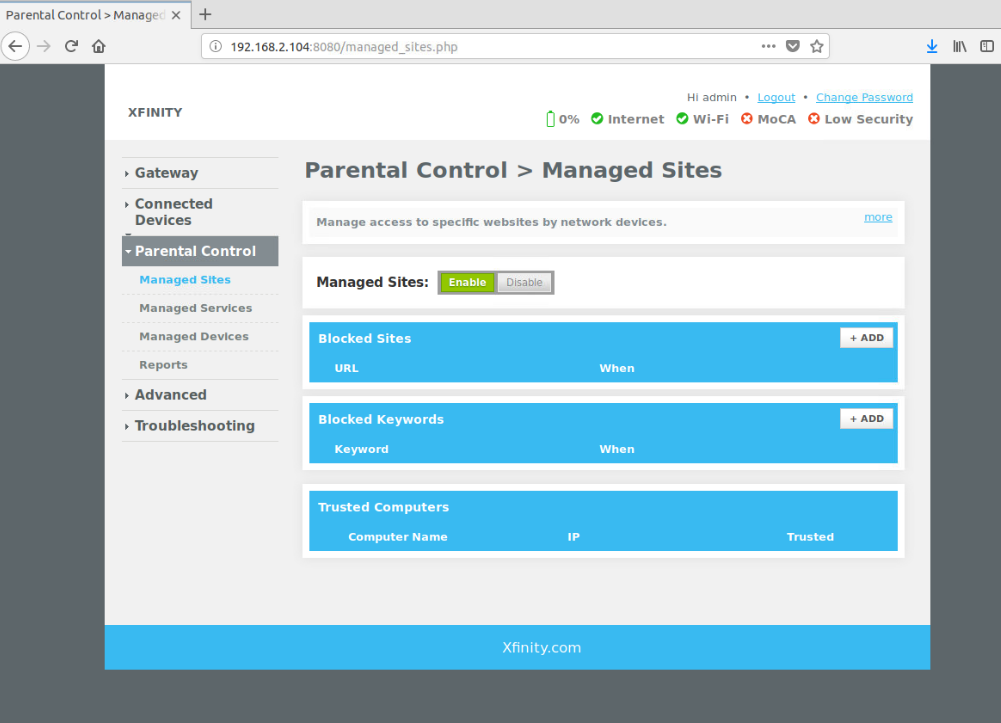
These settings will be saved in the encrypted backup files.
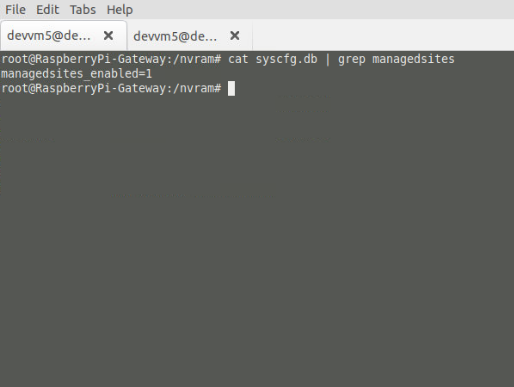
Restore Example:
In the current setting, Managed Sites is disabled.


If User wants to load the backed up settings, Restore option is used and Managed sites will be Enabled in WebUI after device reboot.
Troubleshooting
Error Messages
If restore is success, the following message will be displayed before automatic device reboot.

In case of Error, one among the following will be displayed.
* backup file not selected:

* Empty secure key entered
![]()
* Invalid secure key entered

Special Considerations
The backed up and restored files are by default named as backup.tar (if changed, will cause misbehavior in feature execution).
Support
Contact | Organization | Phone | Role | |
Rajkumar Narayanan | L&T Technology Service Ltd. | Nil | Program manager |
Overview
Community Forums
Content Tools
Tasks