RDK Resources
[*RDK Preferred*]
Code Management Facility
RDK Forums
[RDK Conferences]
RDK Support
Archives
Papers & Presentations Archive![]()
Papers & Presentations Archive![]()
Refer below link to build camera image
Morty:
[Archived] RDK-C Build Instruction for RPI-0
[Archived] RDK-C Build Instruction for RPI-3
Dunfell:
RDK-C rdk-next Yocto 3.1 dunfell build for Raspberrypi
STEP 1:
Add require SSID and PSK in /etc/wpa_supplicant.conf file in below format
network={
ssid="username"
psk="password"
}

STEP 2:
Reboot the Target
After Reboot don't do step 1 and 2.
Note : Step 1 & 2 is only applicable for fresh target boot-up with new image.
STEP 3:
WiFi connection is must needed for CVR validation for to move TS content from RPI device into local PC for to play TS content in VLC Player.
Check WiFi connection by using below command.
ifconfig

STEP 4:
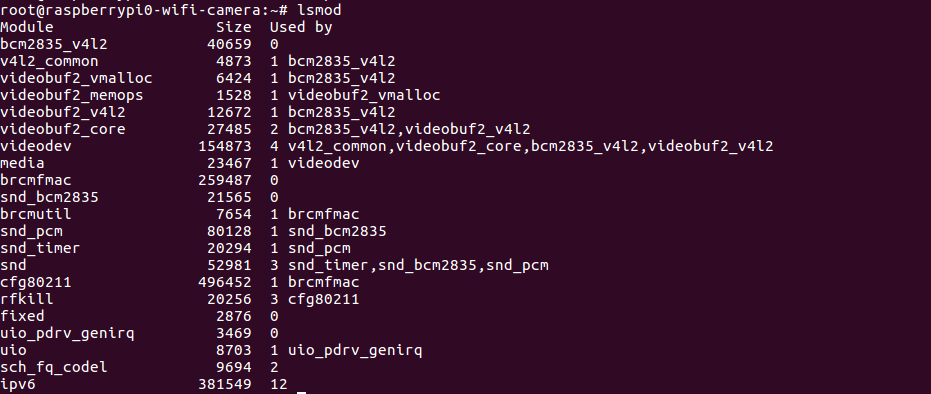
check loaded module by using below command
lsmod
STEP 5:
check camera device there or not by using below command
ls /dev/video0

STEP 6:
check mediastreamer binary running status in RPI by using below command
ps -Af | grep mediastreamer

STEP 7:
Run CVR binary in background by using below command.
cvr_daemongst_kvs &

STEP 8:
Check .ts file is available or not in /tmp/cvr folder in RPI device.

STEP 9:
Move .ts file from /tmp/cvr/ folder into local PC with WiFi connection by using below command and Play .ts file in VLC player
scp root@WiFI_IP:/tmp/cvr/TS_FileName .
Example : scp root@192.168.2.70:/tmp/cvr/2020-03031:12:24:27.ts .
Demo - RDK Camera Continuous Video Recording (CVR) Support in RPI - 2020 - M3

2 Comments
Z-Vineeth Shankar
The branch and manifest info has changed. Could you please update?
Unknown User (e.savidha)
Updated latest build instruction wiki links.