RDK Resources
[*RDK Preferred*]
Code Management Facility
RDK Forums
[RDK Conferences]
RDK Support
Archives
Papers & Presentations Archive![]()
Papers & Presentations Archive![]()
...
Table of Contents
...
Based on the jobs we need to select the type of of projects. Once project created it will be listed in job list

Let's now create a pipeline job using the below Groovy script:
Click on New Item in the Jenkins dashboard.
Set the “Job Name” as parent Job
Select the “Job Type” as Pipeline project.
Add the Groovy script as explained above and save the job.
Groovy Script Pipeline Syntax For RDKM_DEPLOY_AUTOMATICS_CORE
...
stage ('Deployment DEPLOY_AUTOMATICS_CORE') {
echo "Calling RDKM_DEPLOY_AUTOMATICS_CORE Job"
build job: 'RDKM_DEPLOY_AUTOMATICS_CORE', wait: true, propagate: true
}
}
Pipeline Syntax Groovy Script For RDKM_DEPLOY_RDKB_TEST_UTILS
node {
stage ('Deployment RDKM_DEPLOY_RDKB_TEST_UTILS') {
echo "Calling RDKM_DEPLOY_RDKB_TEST_UTILS Job."
build job: 'RDKM_DEPLOY_RDKB_TEST_UTILS', wait: true, propagate: true
}
}
Pipeline Syntax Groovy Script For RDKM_DEPLOY_RDKV_TEST_UTILS
...
{
stage('Run utility parser for RDKV Test Utils') {
echo "Calling RDKM_AUTOMATICS_API_SCAN_FOR_RDKV_UTILS Job"
build job: 'RDKM_AUTOMATICS_API_SCAN_FOR_RDKV_UTILS', wait: true, propagate: true
}
}
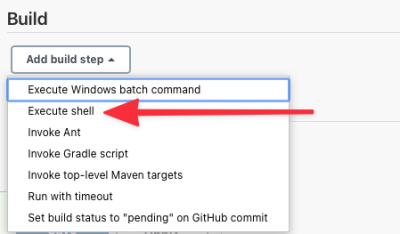
Now, it’s time to give your job something to do. Click on the Build tab on the configure page.

This will take you to the build section. Click on the Add build step menu and select Execute shell.
We’re going to use a one-line shell step for this job.
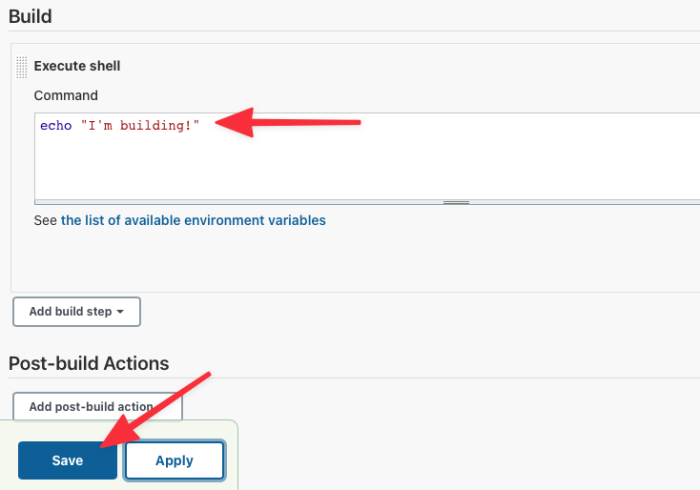
Enter the single line of shell code and click Save.
Click Build Now. The job will run and complete almost immediately. Next, click the build number to see your results.
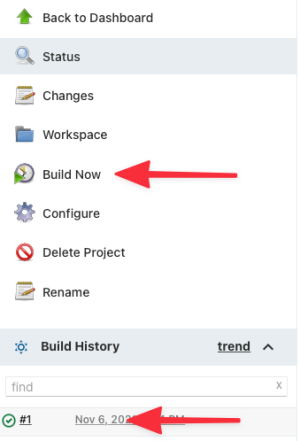
Next, click on Console Output, and you’ll see the shell message.
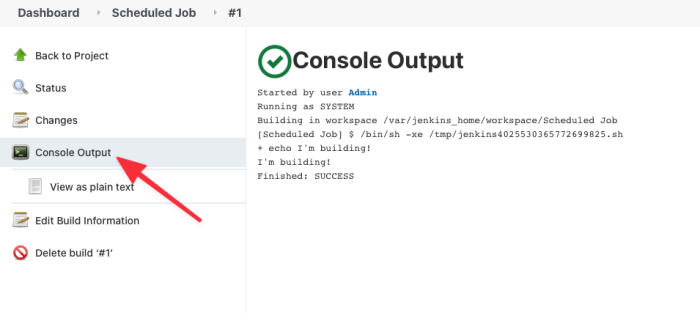
Your job is ready for scheduling!
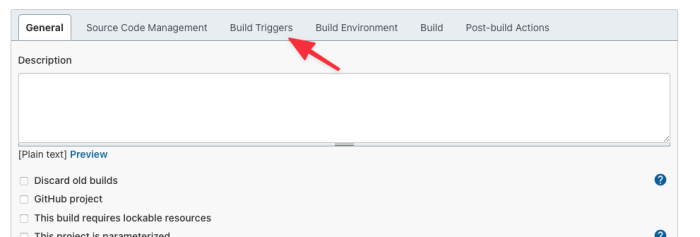
Head back to the job configuration and click the Build Triggers tab.
Now, check the Build periodically box in the Build Triggers section.
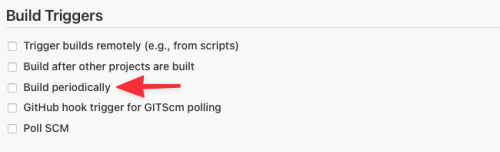
This will open the scheduling text area.

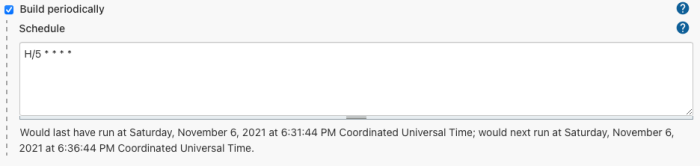
Next, let’s set the job to run every five minutes.
Enter H/5 * * * * into the box, click Save, and reopen the configuration. Jenkins will show you when the job will run.
Save the job again and wait a few minutes. Depending on the value Jenkins selects for H, the job will run after a few minutes.
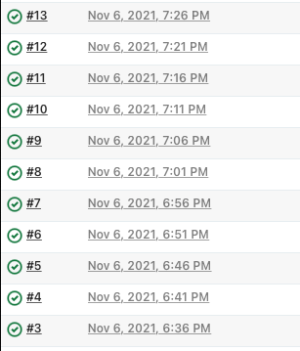
Here is a screenshot of a couple of builds on our system. You can see that the first build corresponds to the time shown above on the configure page.

The timestamps show that you’ve scheduled a job to run every five minutes.
Wait for a bit longer and you will see that it continues to run every five minutes.