Versions Compared

Key

  • This line was added.
  • This line was removed.
  • Formatting was changed.

...

Install xinetd and tftpd-hpa application in your local PC to setup tftp server by using below command
TFTP Server Installation Step

sudo apt-get install xinetd
sudo apt-get install tftpd-hpa


STEP 2:

Create checksum file for your upgrading image.
md5sum checksum creation

md5sum "<imagefile_name>.rootfs.rpi-sdimg" > imagefile_name.txt
 
for Ex:
upgrading image file is rdk-generic-hybrid-wpe-image_default_20201221142654.rootfs.rpi-sdimg
md5sum "rdk-generic-hybrid-wpe-image_default_20201221142654.rootfs.rpi-sdimg" > rdk-generic-hybrid-wpe-image_default_20201221142654.txt


STEP 3:

Create new folder for example "tfphome" in your PC home direcotry to maintain checksum file and upgrading image file.

...

vi /etc/xinetd.d/tftp
TFTP File Content

service tftp
{
protocol        = udp
port            = 69
socket_type     = dgram
wait            = yes
user            = nobody
server          = /usr/sbin/in.tftpd
server_args     = -c -v -s /home/xyz/tftphome ( Give upgrading file and checksum file maintained directory )
disable         = no
}


STEP 5:

Verify /etc/default/tftpd-hpa file content

vi /etc/default/tftpd-hpa
tftp-hpa File Content

# /etc/default/tftpd-hpa
 
TFTP_USERNAME="tftp"
TFTP_DIRECTORY="/home/xyz/tftphome" ( Give upgrading file and checksum file maintained directory )
TFTP_ADDRESS="0.0.0.0:69"
TFTP_OPTIONS="--secure"


STEP 6:

Start tftp server and xinetd server

sudo service tftpd-hpa restart
sudo /etc/init.d/xinetd restart

XCONF Server Setup

XConf URL

Enter XConf server wiki page with below URL to create Environment,Model,Mac list,Firmware config,Firmware rule and Download Location Round Robin Filter.
XConf URL

http://35.155.171.121:9093/admin/ux

Create Environments

STEP 1:

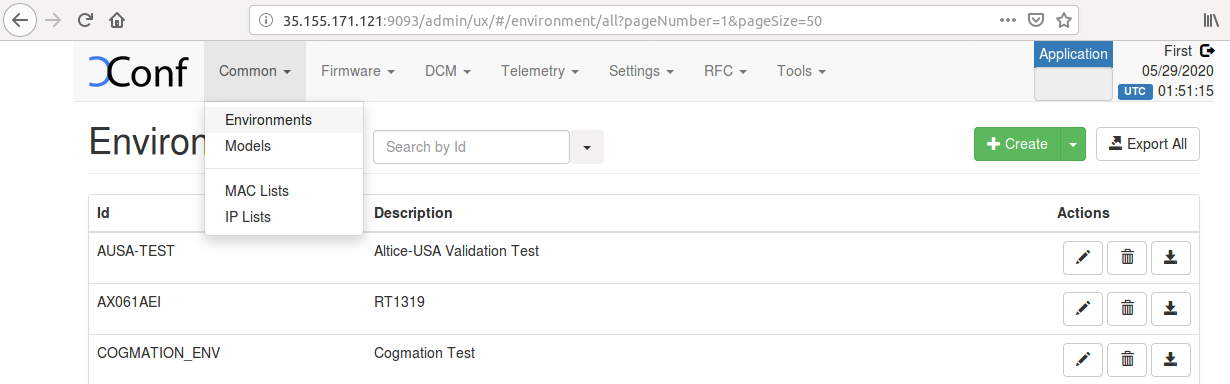
Select Environments option within common list to enter Environments page.

After entered Environments page press create button to add your device environment detail.
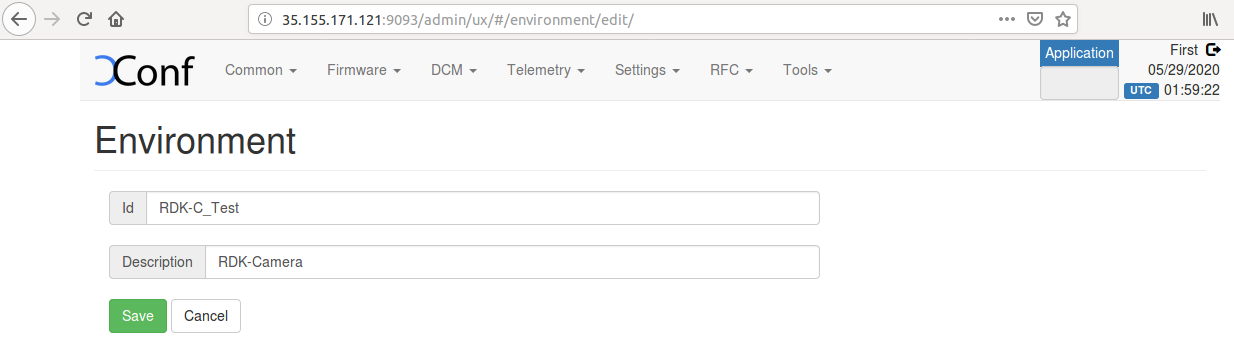
Image Added


STEP 2:

Give ID and Description to setup Environment for your device and save that details in xconf server..

Image Added

Create Model

STEP 1:

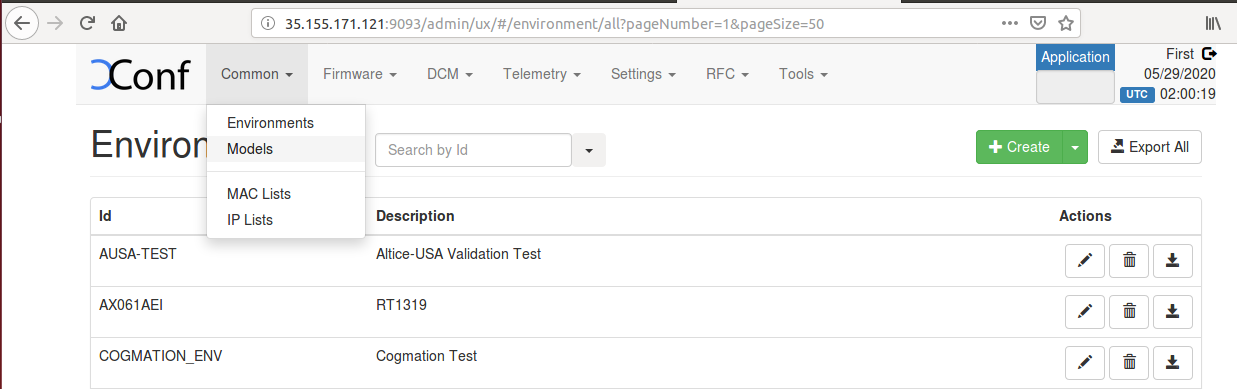
Select Models option within common list to enter Models page.

After entered Models page press create button to add your device model detail.
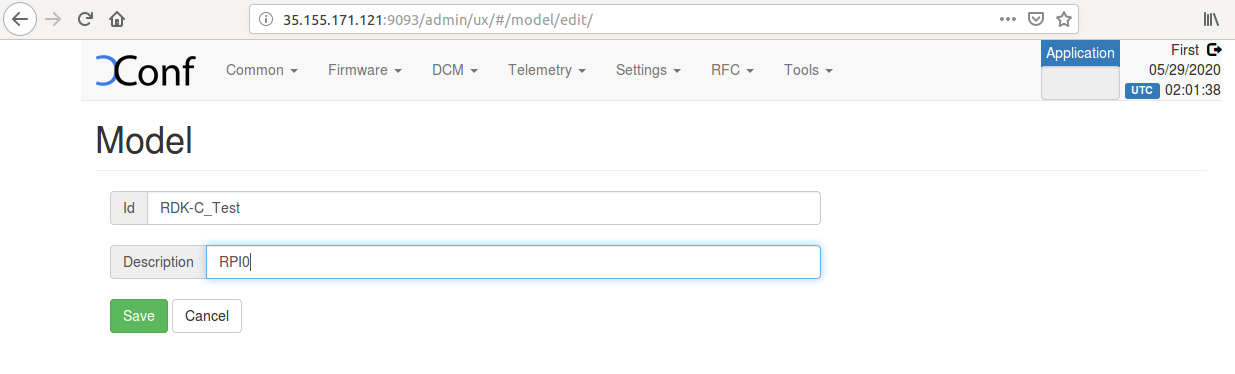
Image Added


STEP 2:

Give ID and Description to setup Model for your device and save that details in xconf server..

Image Added


Create MAC List

STEP 1:

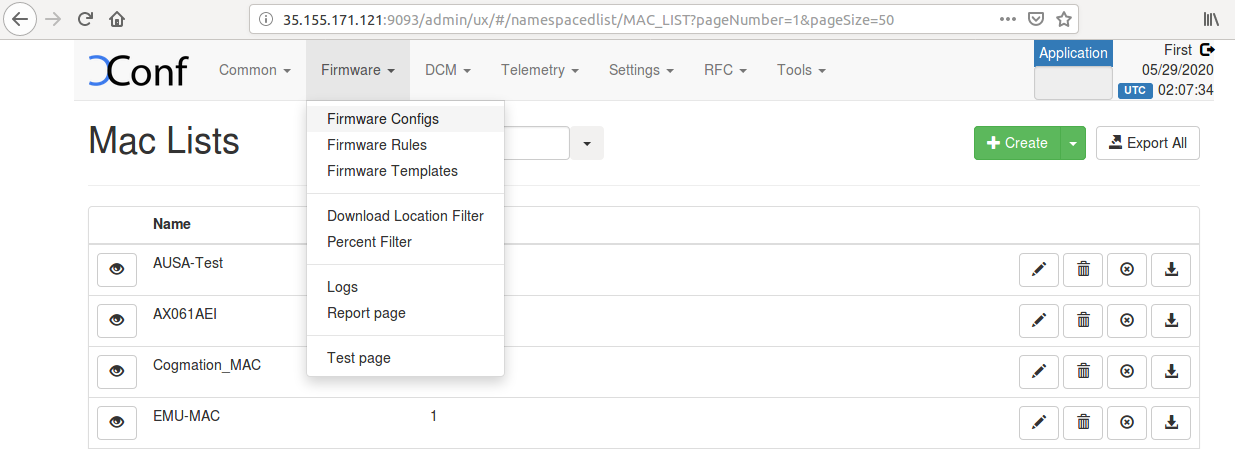
Select MAC Lists option within common list to enter MAC Lists page.

After entered MAC Lists page press create button to add your device MAC detail.

Image Added


STEP 2:

Give Name and Data to set MAC detail for your device and save that details in xconf server..

Image Added

Create Firmware config

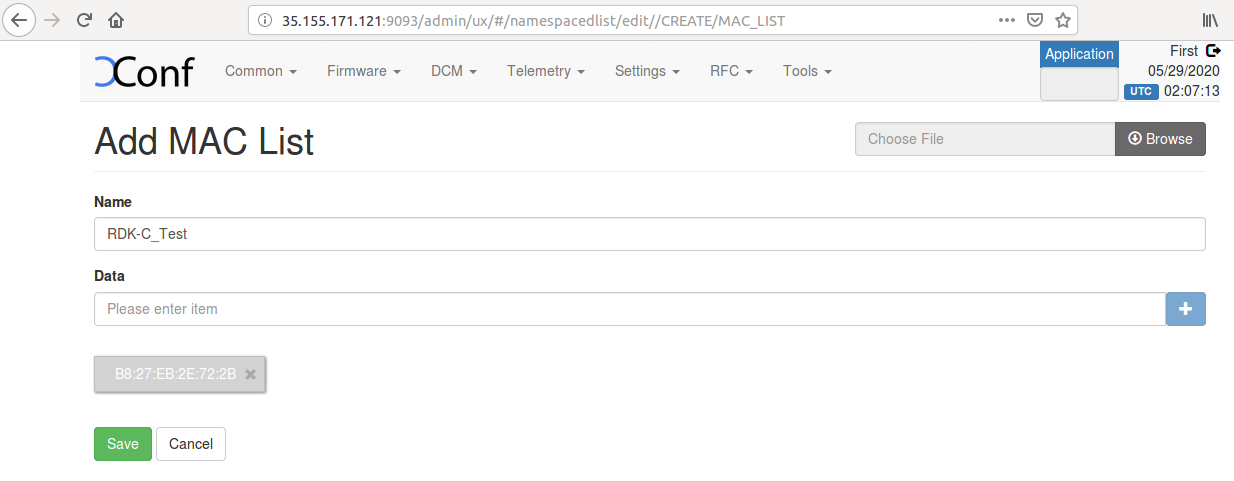
Ensure application type is stb. If the application type is xhome then change application into stb.

STEP 1:

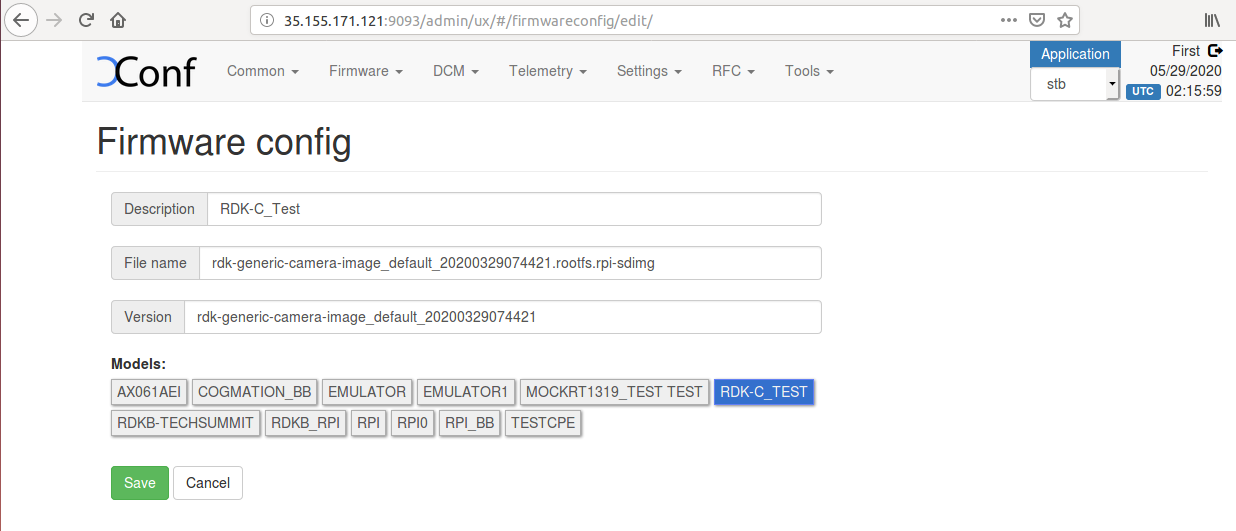
Select Firmware Configs option within common list to enter Firmware Configs page.

After entered Firmware Configs page press create button to add your device firmware configuration detail.

Image Added


STEP 2:

Give Description,File name ( Upgrading image name ),Version( Upgrading image name without .rootfs.rpi.sdimg) and select your model name and save the details in xconf server.

Image Added

Create Firmware Rule

STEP 1:

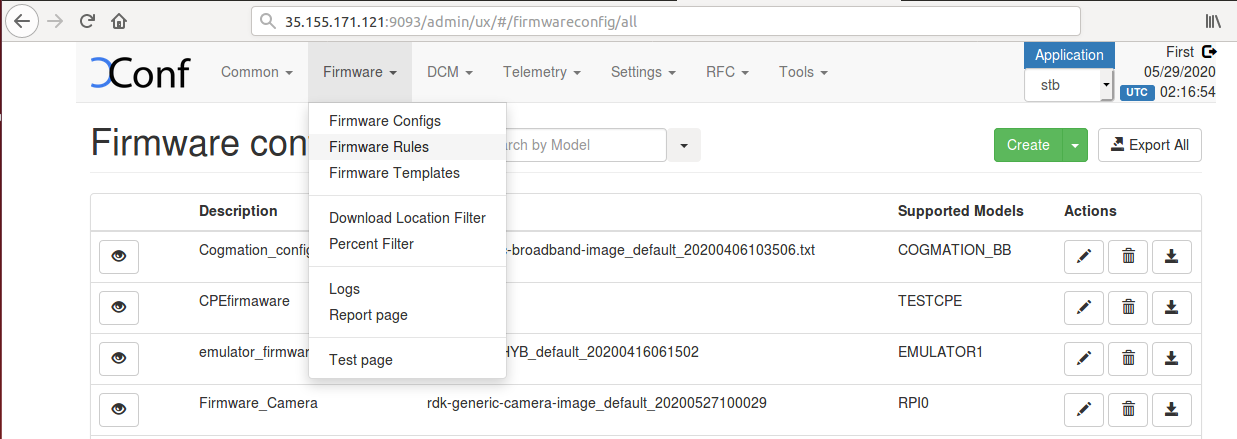
Select Firmware Rule option within common list to enter Firmware Rule page.

After entered Firmware Rule page press create button to add your device firmware Rule detail.
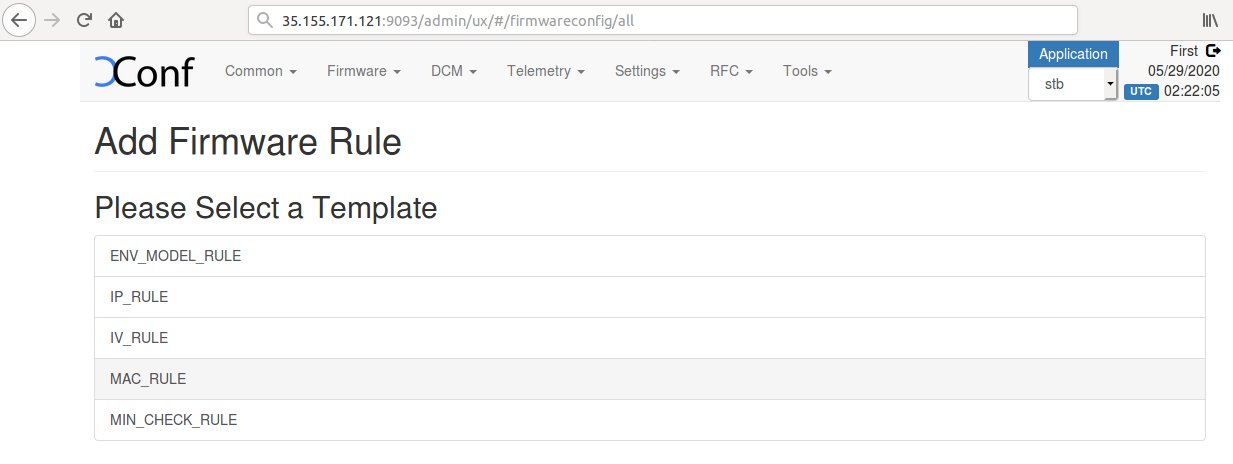
Image Added


STEP 2:

After entered firmware Rule page you can see list of template.

Choose MAC_RULE in this list of Template to add your device MAC list in Firmware Configuration.

Image Added


STEP 3:

After entered Firmware Rule page.If any estbmac if there under build condition then remove that estmac before add your device specific Firmware rules.
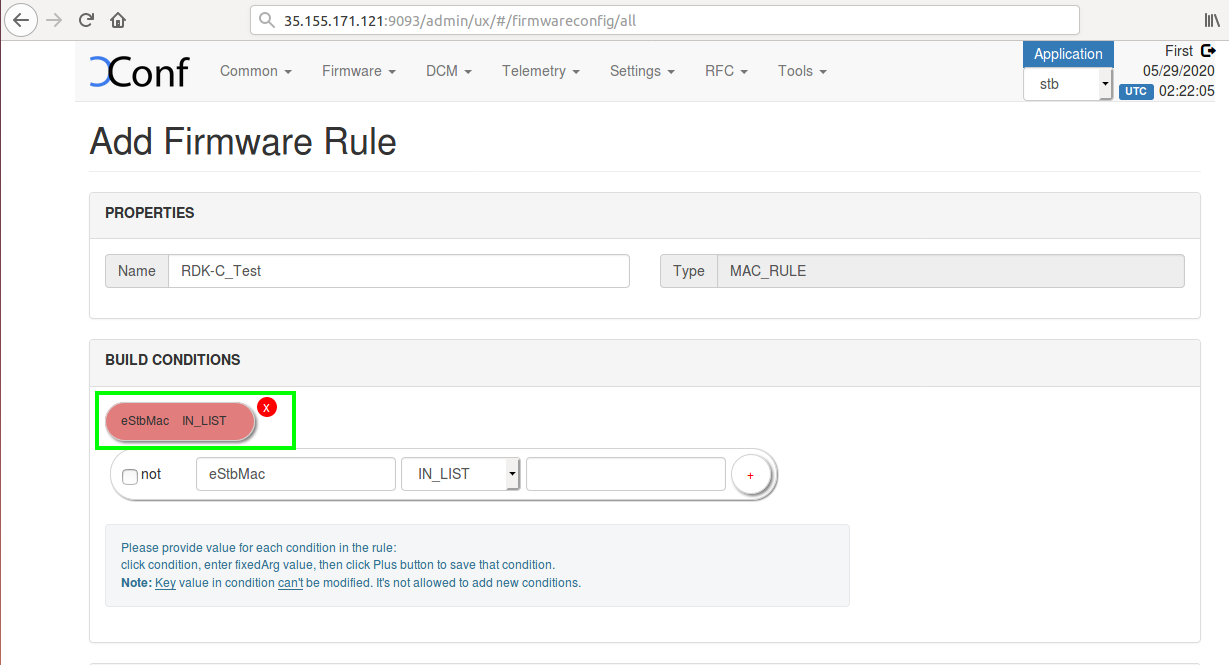
Image Added


STEP 4:

Add your device specific eStbMac under build condition option.

Select your firmware config under Action option and save your Firmware rule in XConf server.
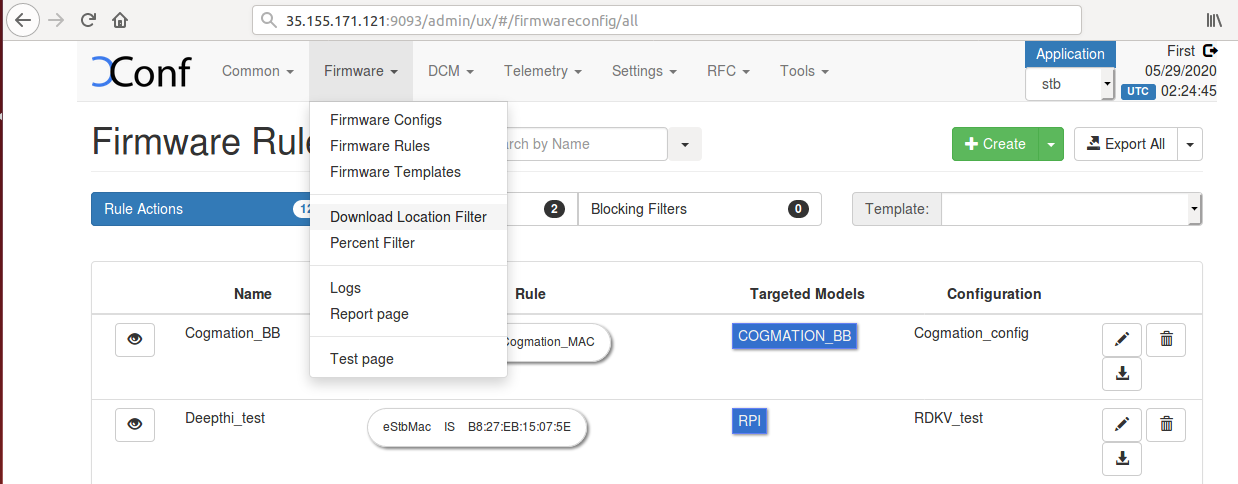
Image Added


Edit Download Location Round Robin Filter

STEP 1:

Select Download Location Filter option within common list to enter Download Location Filter page.

After entered Download Location Filter page press create button to add your Download Location detail.
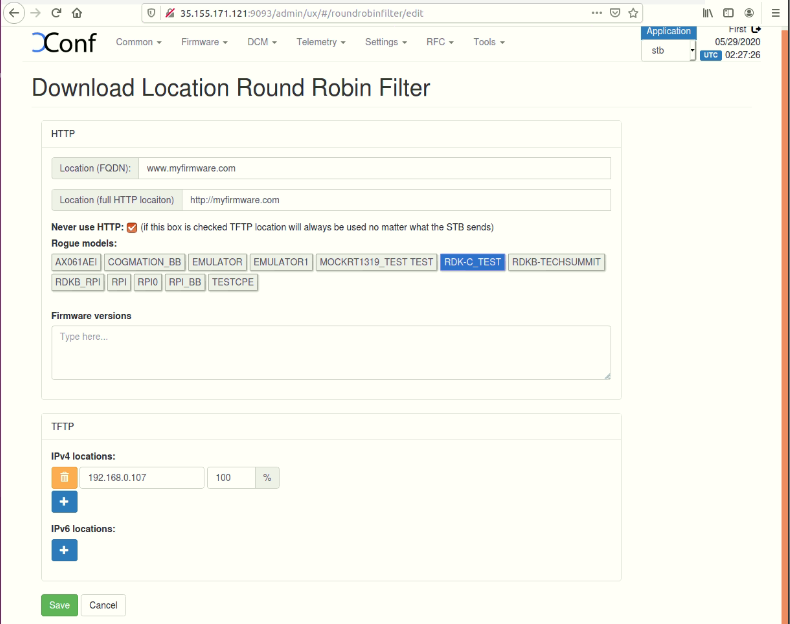
Image Added


STEP 2:

After entered Download Location Round Robin filter press edit button to edit your image downloading details.

Enable Never use HTTP and select your Rongue model.

Give TFTP server running IP address to download image.

Image Added


Verify XConf server configuration

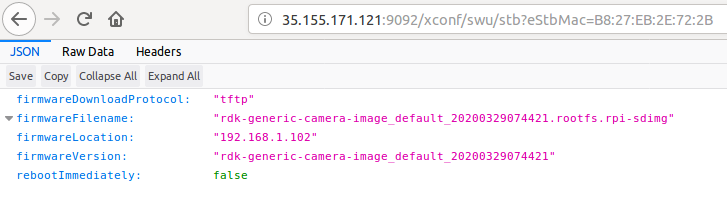
Verify that XConf Server configuration displays the Json response from the mentioned URL:

http://<Xconf Server IP:port no.>/xconf/swu/stb?eStbMac=<MAC address of Rpi board>

For Ex: http://35.155.171.121:9092/xconf/swu/stb?eStbMac=B8:27:EB:2E:72:2B

Image Added


Activate the System Serivce Plugin in the  Controller UI

 http://<ip_address_pi_board>:9998

  For Example:http://192.168.1.2:9998


Image Added


Provide the UpdateFirmware Curl command in the Rpi board

root@raspberrypi-rdk-hybrid:~# curl --data-binary '{"jsonrpc":"2.0","id":"3","method":"org.rdk.System.1.updateFirmware","params":{}}' -H 'con
ent-type:text/plain;' http://localhost:9998/jsonrpc


RPI-Board

  1. Flash the RDKV image supported for Firmware upgrade feature in the Rpi and verify the 2 partitions(ex. mmcblk0p1, mmcblk0p2) present under dev folder (use command ls /dev)
  2. Verify System Service plugin is activated in controller UI as: http://<ip_address_pi_board>:9998
  3. Provide the updateFirmware curl command on the pi board ex: root@raspberrypi-rdk-hybrid:~# curl --data-binary '{"jsonrpc":"2.0","id":"3","method":"org.rdk.System.1.updateFirmware","params":{}}' -H 'content-type:text/plain;' http://localhost:9998/jsonrpc
  4. Device auto-reboots and verify there are 2 more additional partitions are created (ex. mmcblk0p3, mmcblk0p4).
  5. After the board gets auto-reboots for creation of 2 more additional partitions (ex. mmcblk0p3, mmcblk0p4).Again  activate the  System Service plugin  in controller UI as: http://<ip_address_pi_board>:9998
  6. Provide the updateFirmware curl command on the pi board ex: root@raspberrypi-rdk-hybrid:~# curl --data-binary '{"jsonrpc":"2.0","id":"3","method":"org.rdk.System.1.updateFirmware","params":{}}' -H 'content-type:text/plain;' http://localhost:9998/jsonrpc
  7. Open /etc/include.properties file and verify the CLOUDURL parameter where XConf Server URL is configured
  8. Verify the image version ( cat /version.txt) displays the flashed image version
  9. Open /opt/logs/swupdate.log to verify the communication from RPI board with XConf Server and the download status
  10. Verify the tftp download is happening by noticing the change of file size using below command: ls /extblock/tftpimage/imagedwnldls  -sh  (use this command frequently to verify the file size change)
  11. Once image download completed, the Rpi board will auto reboot and come up with downloaded image
  12.  Verify the version of booted image which shows the downloaded image version

Conclusion

Please find the summary on firmware upgrade explained above

  • Build the image RDK-V Image.
  • Ensure 8GB sd-card is available for flashing
  • Flash the build image to sd-card
  • Setup xconf server ready with rules and download location for RPI device
  • Place the upgrading image and checksum file in tftp server
  • Boot the flashed image
  • Activation of System Service plugin in controller UI befor executing Curl command
  • Curl command need to be provide twice initailly after the RPI board bootup  for the creation of 2 more additional partitions  (ex. mmcblk0p3, mmcblk0p4) in /dev folder.and again after the auto-reboot of the RPI board