RDK Resources
[*RDK Preferred*]
Code Management Facility
RDK Forums
[RDK Conferences]
RDK Support
Archives
Papers & Presentations Archive![]()
Papers & Presentations Archive![]()
| Status | ||||||
|---|---|---|---|---|---|---|
|
| Table of Contents |
|---|
...
On pressing Mic key from remote , Mic icon will be highlighted and voice bar will be displayed (animated wave) instead of search text.
![]()

Use key up from home ui to navigate to mic
![]()
Use right key to navigate to search
This new app has redesigned ‘Home UI’ screen with new background, shadow and animation effects, it contains sections for Apps, Metro Apps, TV shows, and Voice and Settings icons displayed on top section. YouTube and the metrological apps can be launched from app listings. Video content can be played from the TV Shows section. Bluetooth and WIFI settings can be managed from the settings screen. Search bar and time display are also available in the home UI. Functionality implementation for the search bar and mic are in progress.
...
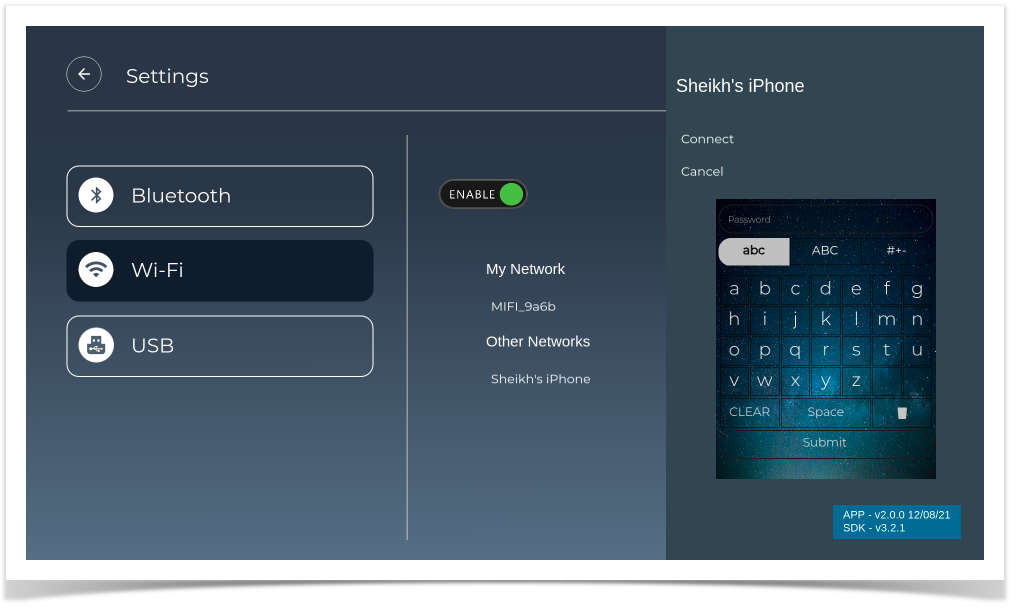
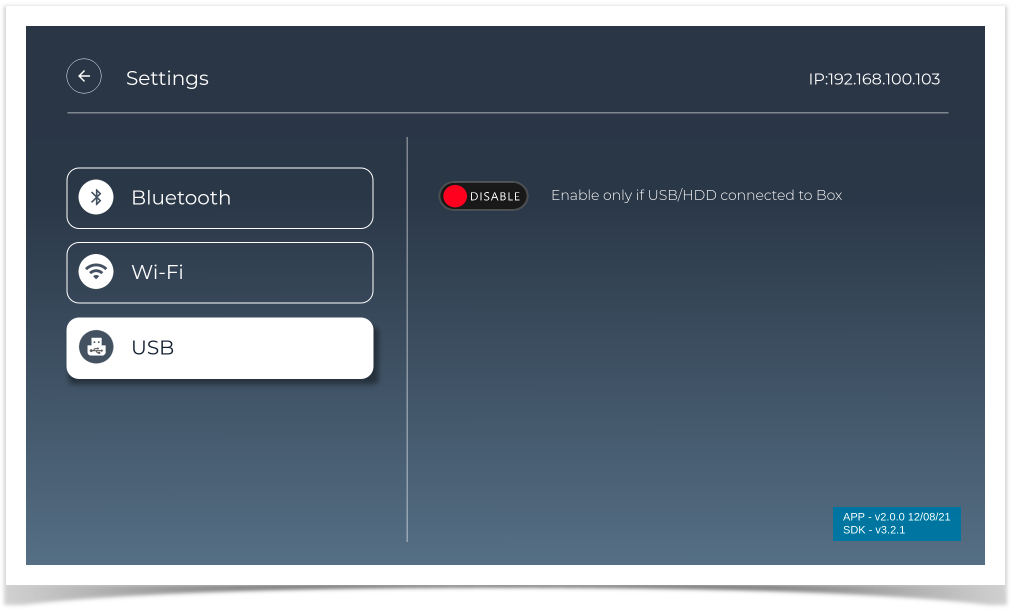
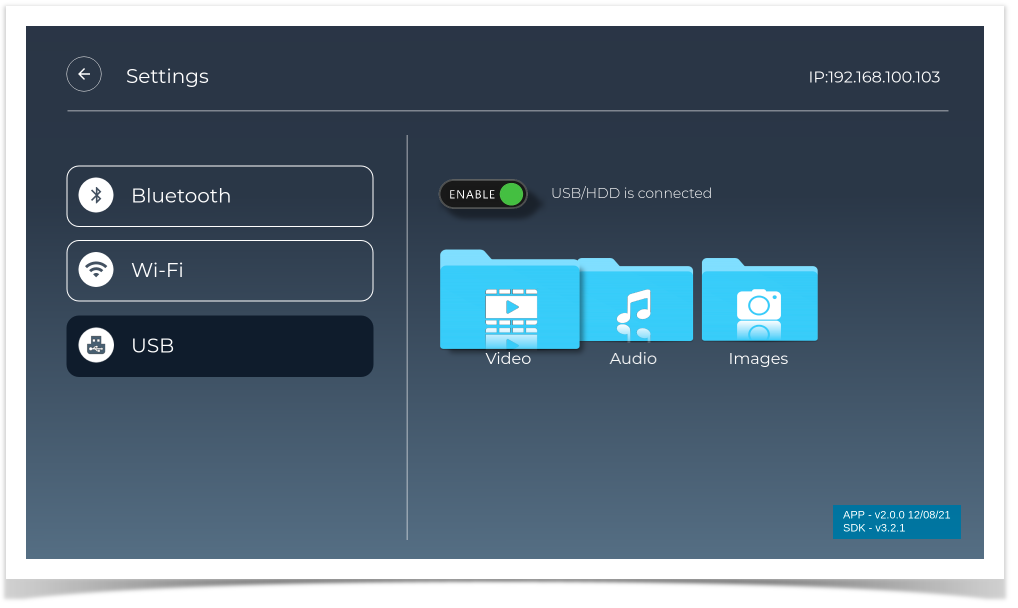
Steps to enable USB on box
Note:
Key Navigation:
...
...
Steps to enable USB on box
Note:
...
...
...
| Key | Functionality |
|---|---|
| S key | To display UI Switch screen from the splash screen |
| Enter/Right/left/up/down keys | To move the focus to app list/metro apps/tv-shows/settings from Home UI screen To navigate to USB folders on settings screen To navigate to Bluetooth tab on settings screen To navigate to wifi tab on settings screen |
| Enter key | To select the UI from the UI Switch screen To launch apps from the app list To launch player from tv-shows To launch the settings screen from the home ui screen To enable/disable Bluetooth scanning in settings screen To enable/disable wifi scanning in settings screen To pause player from Player controls To connect/disconnect/pair/unpair a Bluetooth device from the settings screen To connect/disconnect a WiFi network in settings screen |
| Left/Right/Up/Down arrow | To navigate within Home UI To navigate through available Bluetooth devices on the settings screen To navigate through available wifi networks in settings screen To navigate to USB contents |
| M/Home/1 key | To exit from launched apps (ex: cobalt, cnn, vimeo) To exit from player launched |
| Esc/M key | To exit from password panel on WiFi screen |
| Down arrow | To display player controls menu from Player screen |
| key Code : 27 , 77, 49 , 36 ,158 | To display Home Page |
| key Code : 112,142 | To STANDBY and POWER_ON |
| key Code : 228 , 116 | To deep sleep |
| key Code : 175 174 | To audio increase and decrease |
| key Code : 112,142, 116, F1 | To launch shutdown panel |
| View file | ||||
|---|---|---|---|---|
|
| View file | ||||
|---|---|---|---|---|
|
| View file | ||||
|---|---|---|---|---|
|
Prerequisites: Node.js , npm, Lightning-CLI should be available in PC
Step 1: Clone the RDKAPPS repo using the below command:
$ git clone "https://code.rdkcentral.com/r/components/opensource/RDK_apps"
Step 2: Switch to version 2 branch (new ui)
$ git checkout version_2
Step 3: Goto Accelerator Home Ui directory
$ cd RDK_apps/accelerator-home-ui/
Step 4: Install npm dependencies
$ npm install
Step 5: Run below command to generate dist folder
$ lng dist
Step 6: Generated dist folder will have directory structure > dist/es6/<compiled files>
Step 7: Copy <compiled files> into dist and remove es6 dir
Now dist folder is ready for the deployment.
Download compiled code (dist): https://drive.google.com/drive/folders/1-44Zy3tav4SIEY7vF0fm1newcE3hBUg4?usp=sharing
...
...
...
...
STANDBY and POWER_ON | |
| key Code : 228 , 116 | To deep sleep |
| key Code : 175 174 | To audio increase and decrease |
| key Code : 112,142, 116, F1 | To launch shutdown panel |
Prerequisites: Node.js , npm, Lightning-CLI should be available in PC
Step 1: Clone the RDKAPPS repo using the below command:
$ git clone "https://code.rdkcentral.com/r/components/opensource/RDK_apps"
Step 2: Switch to version 2 branch (new ui)
$ git checkout version_2
Step 3: Goto Accelerator Home Ui directory
$ cd RDK_apps/accelerator-home-ui/
Step 4: Install npm dependencies
$ npm install
Step 5: Run below command to generate dist folder
$ lng dist
Step 6: Generated dist folder will have directory structure > dist/es6/<compiled files>
Step 7: Copy <compiled files> into dist and remove es6 dir
Now dist folder is ready for the deployment.
Download compiled code (dist): https://drive.google.com/drive/folders/1-44Zy3tav4SIEY7vF0fm1newcE3hBUg4?usp=sharing
Below per-build morty and dunfell image is available for RPI device created from sd card after flashing dist (compiled version of src code) just to avoid above steps: create distribution build, download pre-build and flash, it has latest version_2 ui changes and on bootup new ui will be rendered on TV screen.
pre-build dunfell image: https://drive.google.com/file/d/1WCuzFKwENFwq_bEERuHXxDUFyO6AuX7q/view?usp=sharing
pre-build morty image: https://drive.google.com/file/d/1hxbTN-36rgLTposhTqANZs4fcv8jAQ2A/view?usp=sharing
Option 1:
$ sudo dd if=<downloaded image path> of=/dev/sdb bs=1M
ex: sudo dd if=rdk-mc-rpi.img of=/dev/sdb bs=1M
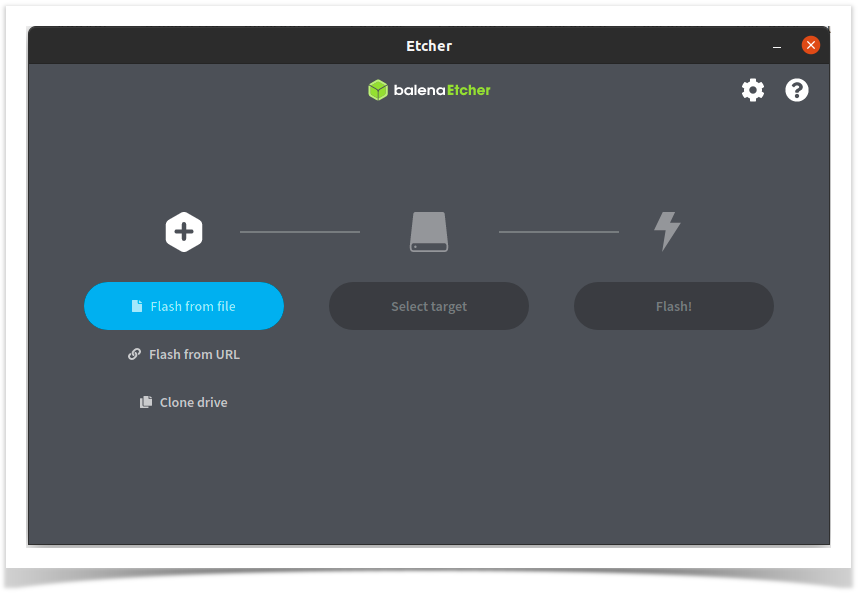
Option 2:
Note: Balena etcher is available for MAC OS, Windows and Linux.