| Status |
|---|
| subtle | true |
|---|
| colour | Red |
|---|
| title | in-progress |
|---|
|
Overview
...
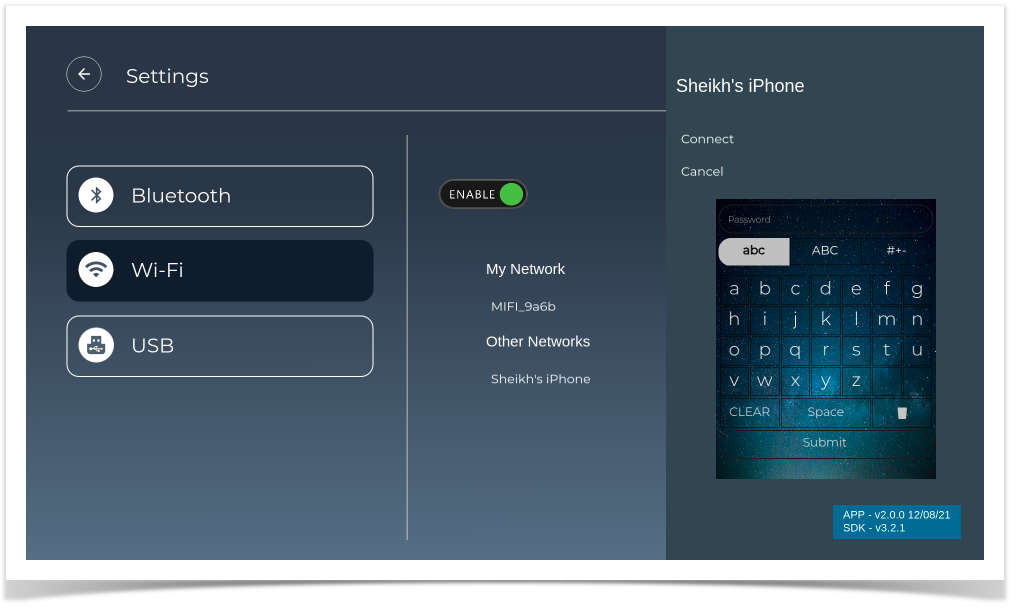
Virtual keyboard screen to connect to WiFi
USB Access Features
Steps to enable USB on box
- Connect USB/external HDD to box/device
- Launching controller UI
- $ <BOXIP>:9998
- Enable UsbAccess Plugin
- Login to box using below command:
- Mount usb on box with 'mount' command on box
- Create soft link using below command:
- $ ln -sf /usb /opt/www/usbdrive
Note:
- while creating Soft link use the path where the USB content are mounted for example in above case usb contents are mounted in /usb path
- USB access plugin should be enabled from controller UI
Key Navigation:
...
- Audio file(.mp3)
- Video file(.mp4)
- Images (.JPG and .PNG)
...
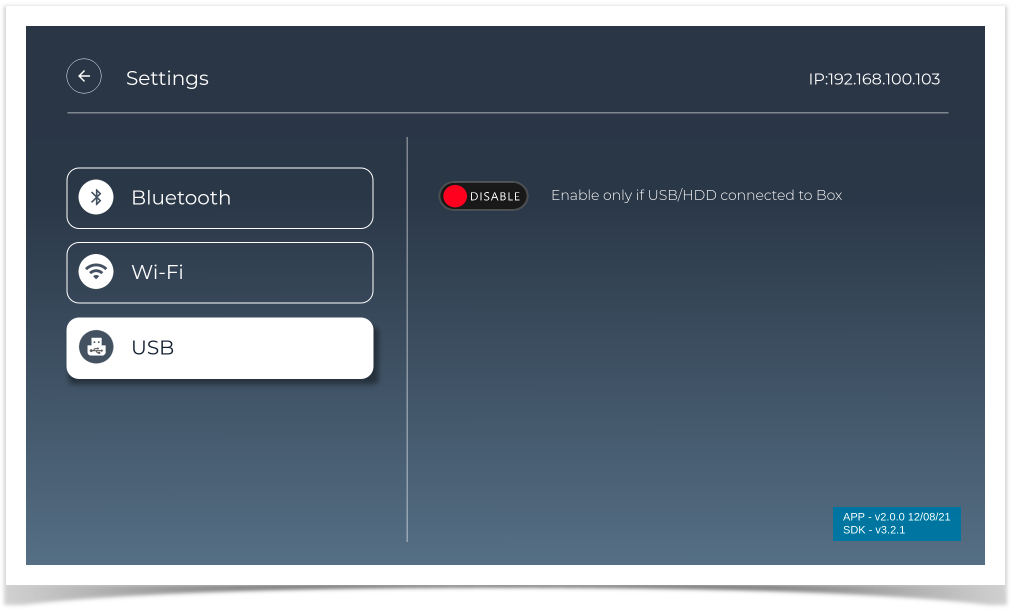
- USB tab list will be available on settings screen
- On selection of USB tab on settings screen, an enable/disable button will be shown
- Enable/Disable button will be available on settings screen
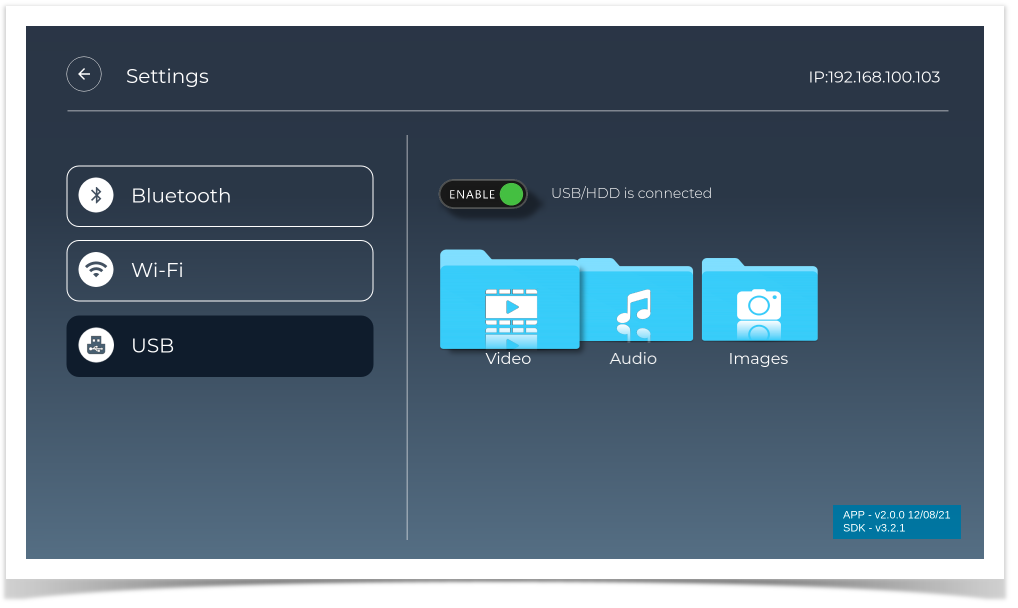
◦ Enable/disable button added to control retrieve of USB data once USB connected to Box, so enable only if USB/HDD connected to the box - Folders for video, audio, image along with title will be displayed on settings screen
- You will be able to navigate to USB tab, enable/disable button, video, audio, image folders
- You will be able to launch video, audio, image screen and navigate to the available tiles
- File formats supported to display on screens:
◦ Audio file (supports: .mp3, .MP3, .mpeg, .MPEG)
◦ Video file (supports: .mp4, .MP4, .mov, .MOV, .avi, .AVI, .m3u8, .M3U8, .mpeg2, .MPEG2)
◦ Images (supports: .png, .PNG, .jpg, .JPG, .jpeg, .JPEG) - You will be able to view usb contents on corresponding screens
- You will be able to play usb video content
- You will not be able to play audio content because audio playback is not working with aamp and uve-js. (Note: audio playback functionality not implemented)
- You will be able to see image preview in full screen, and right arrow key will be displayed
- On key right next image will be displayed, right arrow key will be hidden if no preview image available and left arrow key will be displayed
- On key left previous image will be displayed, left arrow key will be hidden if no preview image available
- For audio and video custom tiles will be shown on corresponding screens horizontally along with there name
- Actual images will be shown on image screen which are available in USB
- Preview will be shown for focused item below in all the screens
- On selecting Video items , Video will be played in Full Screen, once playback stops user has to come back to video screen and play next video
- Audio playback is not yet implemented, so playback will not work
- On Video/Audio/Images screen, in top panel back button and IP address will be displayed
- On Navigating Back button and enter, will land in setting screen and Focus will be on USB folders
Steps to enable USB on box
- Connect USB/external HDD to box/device
- Launching controller UI
- $ <BOXIP>:9998
- Enable UsbAccess Plugin
- Login to box using below command:
- Mount usb on box with 'mount' command on box
- Create soft link using below command:
- $ ln -sf /usb /opt/www/usbdrive
Note:
- while creating Soft link use the path where the USB content are mounted for example in above case usb contents are mounted in /usb path
- USB access plugin should be enabled from controller UI
...
On enable USB
USB Video Screen
...
- Method: $ curl -d '{"jsonrpc":"2.0","id":"3","method":"org.rdk.UsbAccess.1.getFileList","params":{"path":"www"}}' http://127.0.0.1:9998/jsonrpc
- Response: {"jsonrpc":"2.0","id":3,"result":{"contents":[{"name":"var","t":"f"},{"name":"..","t":"d"},{"name":"pages","t":"d"},{"name":"logs","t":"f"},{"name":".","t":"d"}],"success":true}}
...
| Key | Functionality |
|---|
| S key | To display UI Switch screen from the splash screen |
| Enter/Right/left/up/down keys | To move the focus to app list/metro apps/tv-shows/settings from Home UI screen To navigate to USB folders on settings screen To navigate to Bluetooth tab on settings screen To navigate to wifi tab on settings screen |
| Enter key | To select the UI from the UI Switch screen To launch apps from the app list To launch player from tv-shows To launch the settings screen from the home ui screen To enable/disable Bluetooth scanning in settings screen To enable/disable wifi scanning in settings screen To pause player from Player controls To connect/disconnect/pair/unpair a Bluetooth device from the settings screen To connect/disconnect a WiFi network in settings screen |
| Left/Right/Up/Down arrow | To navigate within Home UI To navigate through available Bluetooth devices on the settings screen To navigate through available wifi networks in settings screen To navigate to USB contents |
| M/Home/1 key | To exit from launched apps (ex: cobalt, cnn, vimeo) To exit from player launched |
| Esc/M key | To exit from password panel on WiFi screen |
| Down arrow | To display player controls menu from Player screen |
| key Code : 27 , 77, 49 , 36 ,158 | To display Home Page |
| key Code : 112,142 | To STANDBY and POWER_ON
Remote power key and keyboard F1 key used for STANDBY and POWER_ON |
| key Code : 228 , 116 | To deep sleep |
| key Code : 175 174 | To audio increase and decrease |
| key Code : 112,142, 116, F1 | To launch shutdown panel |
Demo Videos and Attachments
| View file |
|---|
| name | RDK_Accelerator_New_UI_Demo_V-0.2.pptx |
|---|
| height | 400 |
|---|
|
| View file |
|---|
| name | AppsLaunch_Demo-v.0.2-2021-07-15.MP4 |
|---|
| height | 400 |
|---|
|
| View file |
|---|
| name | RDK_Accelerator_NewUI_Demo-v.0.2-2021-07-15.mkv |
|---|
| height | 400 |
|---|
|
Create distribution build
Prerequisites: Node.js , npm, Lightning-CLI should be available in PC
- To install Node.js and npm - https://nodejs.org/en/download/
- To install Lightning CLI - npm install -g @lightningjs/cli
Step 1: Clone the RDKAPPS repo using the below command:
$ git clone "https://code.rdkcentral.com/r/components/opensource/RDK_apps"
Step 2: Switch to version 2 branch (new ui)
$ git checkout version_2
Step 3: Goto Accelerator Home Ui directory
$ cd RDK_apps/accelerator-home-ui/
Step 4: Install npm dependencies
$ npm install
Step 5: Run below command to generate dist folder
$ lng dist
Step 6: Generated dist folder will have directory structure > dist/es6/<compiled files>
Step 7: Copy <compiled files> into dist and remove es6 dir
Now dist folder is ready for the deployment.
Download Pre-build (dist)
Download compiled code (dist): https://drive.google.com/drive/folders/1-44Zy3tav4SIEY7vF0fm1newcE3hBUg4?usp=sharing
Procedure to Flash Distribution Build and Bring up New UI on Bootup
...
- $ ssh root@<your box ip>
- $ rm -rf lxresui
...
...
- login into box:
- goto dir:
- edit residentApp.sh:
- you will see
- Replace:
...
Create distribution build
Prerequisites: Node.js , npm, Lightning-CLI should be available in PC
- To install Node.js and npm - https://nodejs.org/en/download/
- To install Lightning CLI - npm install -g @lightningjs/cli
Step 1: Clone the RDKAPPS repo using the below command:
$ git clone "https://code.rdkcentral.com/r/components/opensource/RDK_apps"
Step 2: Switch to version 2 branch (new ui)
$ git checkout version_2
Step 3: Goto Accelerator Home Ui directory
$ cd RDK_apps/accelerator-home-ui/
Step 4: Install npm dependencies
$ npm install
Step 5: Run below command to generate dist folder
$ lng dist
Step 6: Generated dist folder will have directory structure > dist/es6/<compiled files>
Step 7: Copy <compiled files> into dist and remove es6 dir
Now dist folder is ready for the deployment.
Download Pre-build (dist)
Download compiled code (dist): https://drive.google.com/drive/folders/1-44Zy3tav4SIEY7vF0fm1newcE3hBUg4?usp=sharing
Procedure to Flash Distribution Build and Bring up New UI on Bootup
- Connect your device with lan and get the box/device ip, make sure your dev pc and device is connected with the same network
- login into box:
- $ ssh root@<your box ip>
- $ rm -rf lxresui
- Extract downloaded pre-build lxresui (dist) folder in your dev pc
- Copy lxresui folder from dev pc to box/device:
- configure residentapp.sh file
- login into box:
- goto dir:
- edit residentApp.sh:
- you will see
- Replace:
- reboot the box, on bootup new ui will be rendered on TV screen
Download pre-build (morty and dunfell) image's for RPI with Version 2 UI changes
Below per-build morty and dunfell image is available for RPI device created from sd card after flashing dist (compiled version of src code) just to avoid above steps: create distribution build, download pre-build and flash, it has latest version_2 ui changes and on bootup new ui will be rendered on TV screen.
pre-build dunfell image: https://drive.google.com/file/d/1WCuzFKwENFwq_bEERuHXxDUFyO6AuX7q/view?usp=sharing
pre-build morty image: https://drive.google.com/file/d/1hxbTN-36rgLTposhTqANZs4fcv8jAQ2A/view?usp=sharing
Flash image on SD card
Option 1:
- Execute the below command to flash the image on the SD card
$ sudo dd if=<downloaded image path> of=/dev/sdb bs=1M
ex: sudo dd if=rdk-mc-rpi.img of=/dev/sdb bs=1M
Option 2:
- Download and install Balena Etcher to write the Raspberry Pi SD card: https://www.balena.io/etcher/
- Flash it to the Raspberry Pi's SD card using Etcher
Note: Balena etcher is available for MAC OS, Windows and Linux.
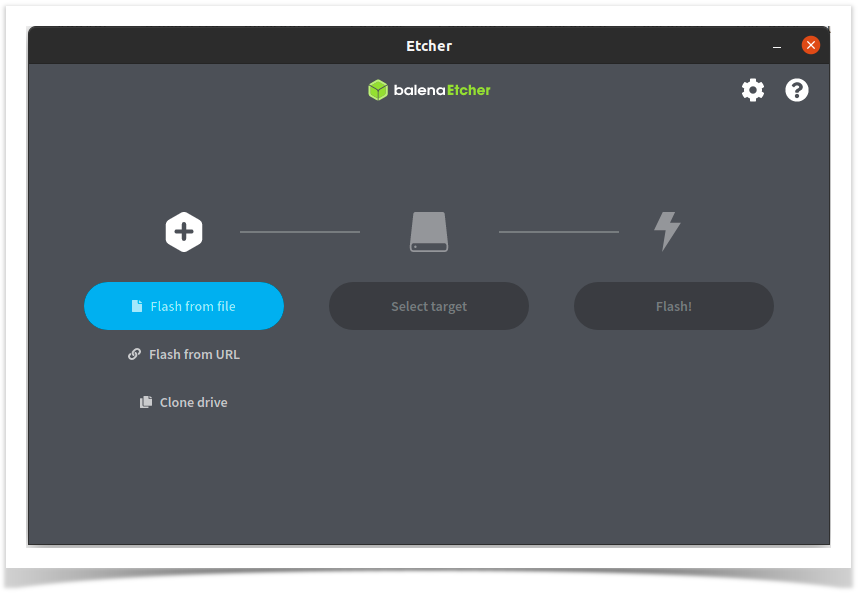 Image Added