Introduction:
RDK-C Mobile application will be used to watch live streaming from RPI Camera & Previous recordings from RPI Camera stored in Cloud Servers. In this mobile application we use WebRTC protocol for live streaming of video & audio, HTTP to play or download the previous recordings from cloud servers.
This mobile app will support android & iOS* platforms. This page is dedicated to bring up the overall picture of the mobile app and how it works.
About WebRTC:
WebRTC, short for Web Real-Time Communication, is both an API and a Protocol. The WebRTC protocol is a set of rules for two WebRTC agents to negotiate bi-directional secure real-time communication. A similar relationship would be the one between HTTP and the Fetch API. WebRTC the protocol would be HTTP, and WebRTC the API would be the Fetch API.
To establish WebRTC communication one should involve the below 4 steps:
- Signalling
- Connecting
- Securing
- Communicating
These four steps happen sequentially. The prior step must be 100% successful for the subsequent one to even begin. Each of these steps has dedicated chapters, but it is helpful to understand them at a high level first. Since they depend on each other, it will help when explaining further the purpose of each of these steps.
Signalling:
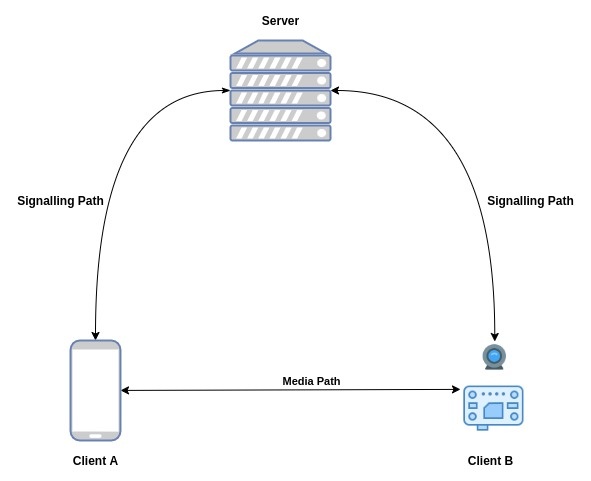
When a WebRTC Agent starts it has no idea who it is going to communicate with and what they are going to communicate about. Signalling solves this issue! Signalling is used to bootstrap the call so that two WebRTC agents can start communicating. Signaling uses an existing protocol SDP (Session Description Protocol). SDP is a plain-text protocol. Each SDP message is made up of key/value pairs and contains a list of “media sections”.
Connecting:
The two WebRTC Agents now know enough details to attempt to connect to each other. WebRTC then uses another established technology called ICE. ICE (Interactive Connectivity Establishment) is a protocol that pre-dates WebRTC. ICE allows the establishment of a connection between two Agents. These Agents could be on the same network, or on the other side of the world. ICE is the solution to establishing a direct connection without a central server. The real magic here is ‘NAT Traversal’ and STUN/TURN Servers. These two concepts are all you need to communicate with an ICE Agent in another subnet. Once ICE successfully connects, WebRTC then moves on to establishing an encrypted transport. This transport is used for audio, video, and data.
Securing:
Now that we have bi-directional communication (via ICE) we need to establish secure communication. This is done through two protocols that pre-date WebRTC. The first protocol is DTLS (Datagram Transport Layer Security) which is just TLS over UDP. TLS is the cryptographic protocol used to secure communication over HTTPS. The second protocol is SRTP (Secure Real-time Transport Protocol). First, WebRTC connects by doing a DTLS handshake over the connection established by ICE. Unlike HTTPS, WebRTC doesn’t use a central authority for certificates. WebRTC then uses a different protocol for audio/video transmission called RTP. We secure our RTP packets using SRTP. We initialize our SRTP session by extracting the keys from the negotiated DTLS session.
Communicating:
We now have two WebRTC Agents with secure bi-directional communication. we use two pre-existing protocols: RTP (Real-time Transport Protocol), and SCTP (Stream Control Transmission Protocol). Use RTP to exchange media encrypted with SRTP, and use SCTP to send and receive DataChannel messages encrypted with DTLS.
Now we are done! You now have bi-directional and secure communication. If you have a stable connection between your WebRTC Agents, this is all the complexity you may need.
Application Architecture (Live streaming)
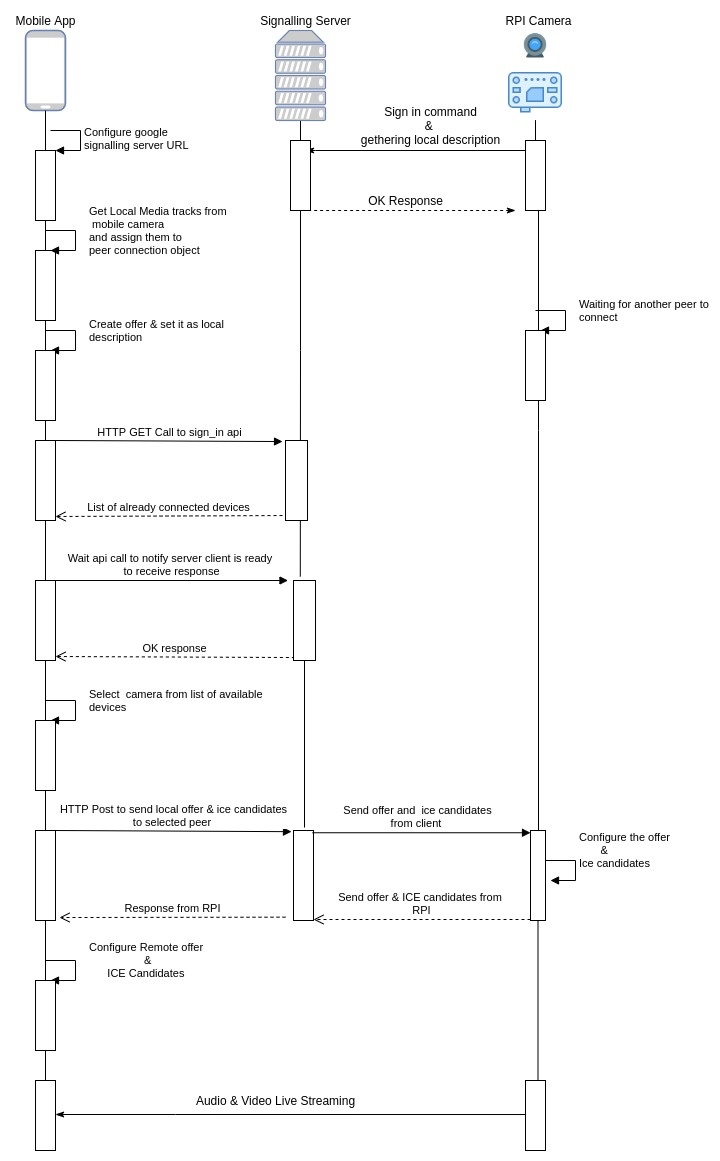
Application Flow (Live streaming)

How to Connect:
To view live streaming video from rpi-camera in your mobile mobile you need to follow the below steps
Step 1: Please download the app-release.apk and install in your android device
Step 2: Please follow the steps from this URL to start R-PI camera client and peer connection server
Step 3: After successful completion of step 2, Navigate to Open_WebRTC/openwebrtc-m72/out/Default and ./peerconnection_server hit Enter to start the server
Step 4: SSH into R-PI and enter "./peerconnection_client" which asks for the server IP & Enter Server IP (Your machine IP where peerconnection_server is running) and port number as 8888.
| Console |
|---|
| root@raspberrypi3-rdk-camera:~# peerconnection_client Inside constructor CustomSocketServer()..... Initialized thread... "Registering PeerConnectionClient::RegisterObserver()" Enter server IP Address |
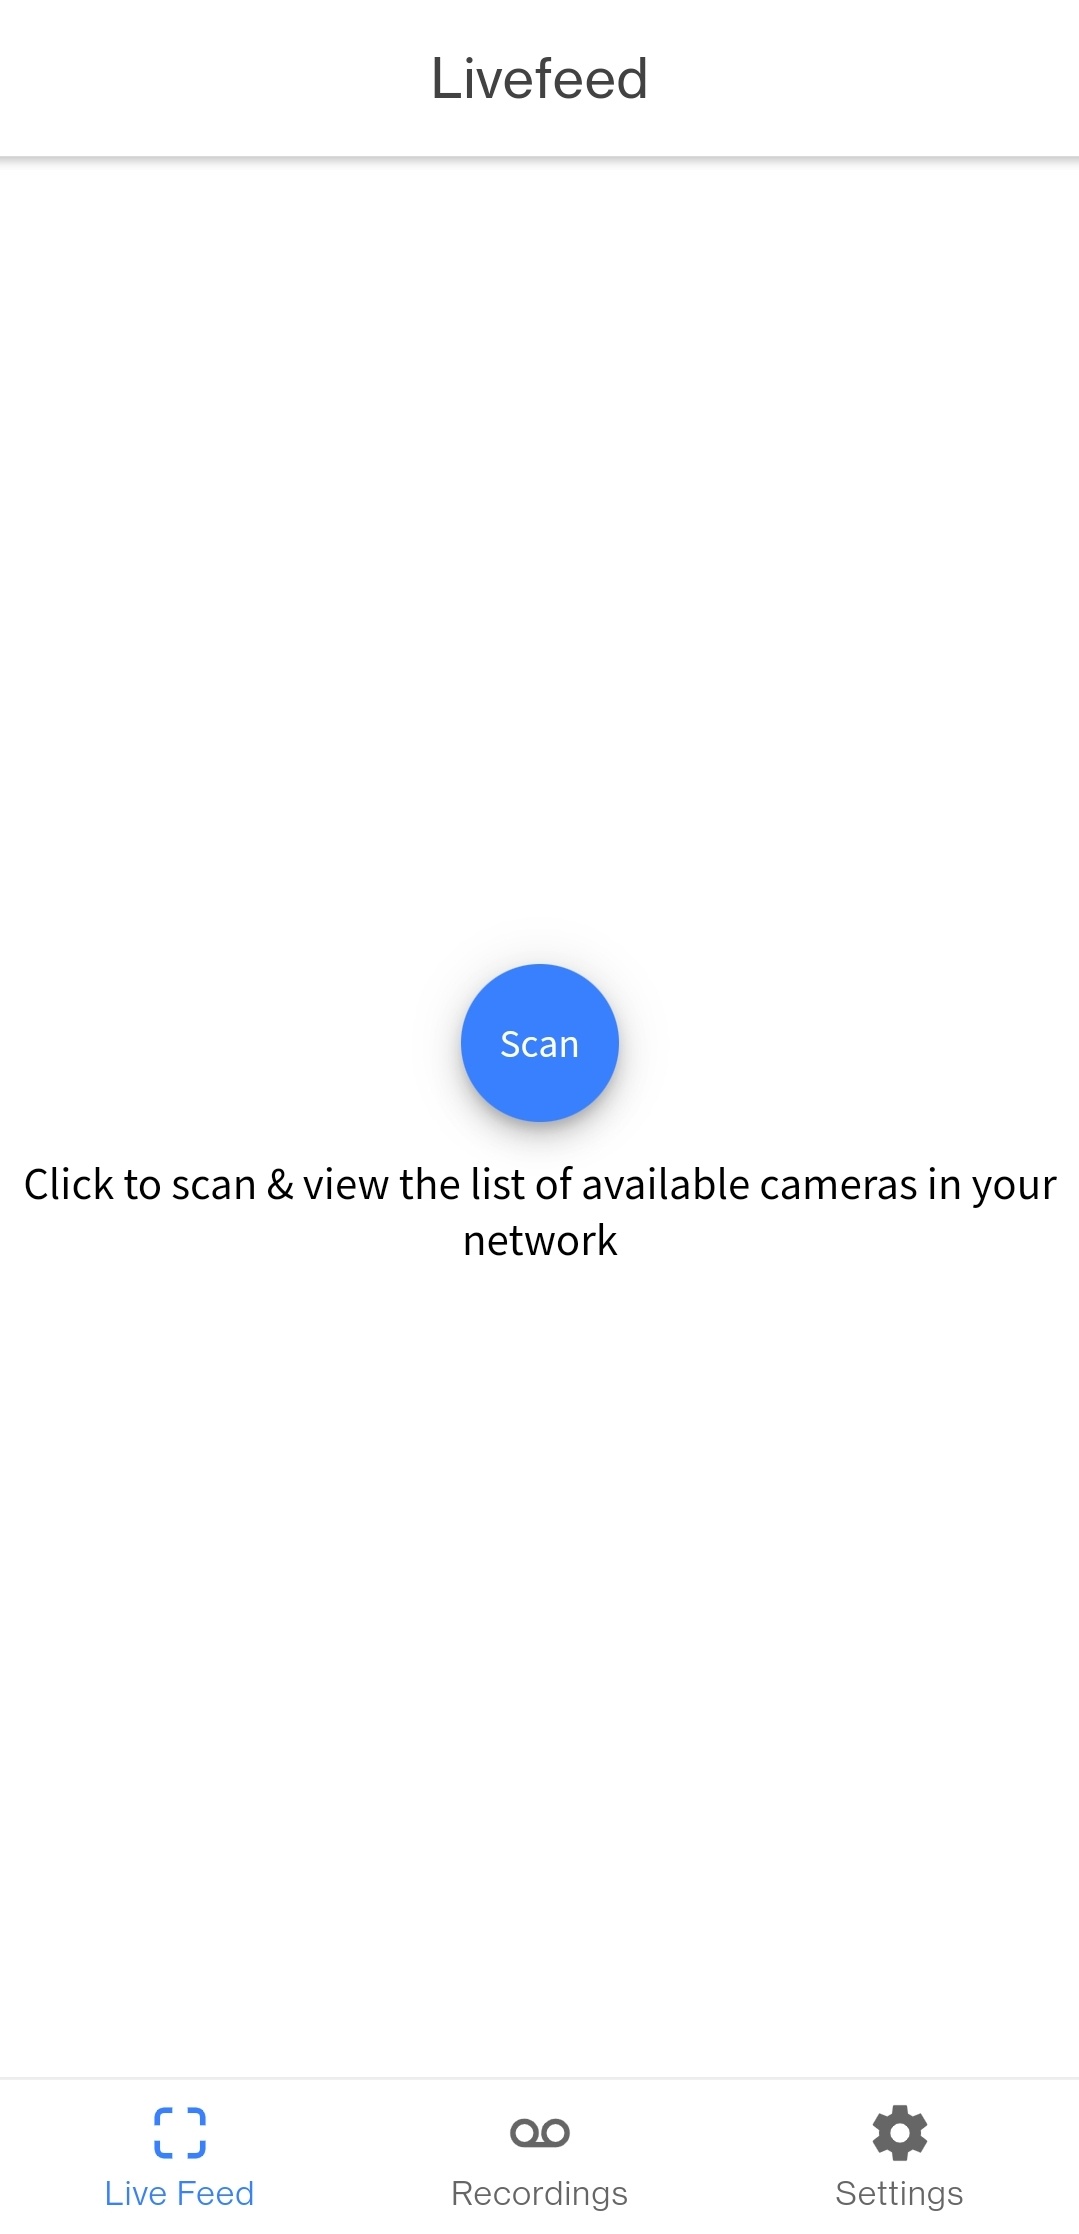
Step 5: Open your mobile app and click on scan in live-feed page to get the list of cameras in your network.
Step 6: Select the camera you want to watch the live feed.
Note: Make sure your R-PI board and mobile app should be in the same network.
Mobile App Features
Following are the mobile application features.
Sign-up: To register new user
Sign-in: To enter into the mobile app with valid user credentials.
Dashboard: In this page we are having three sections
- Live Feed - To get the live footage from the list of selected cameras.
- Recordings - To get the list of previously recorded footage from cloud.
- Today - List of current date recordings
- Last week - List of recordings up to 1 week
- Custom - List of recordings in b/w selected date range
- Settings
- Camera - Resolution, IP, Storage
- User - Add camera, Permissions, Details
- Other - Terms & Conditions, Privacy Policy, About, Rating, Logout
Mobile App Screens
Sign-In: User should enter valid email and password to sign in into the application. Click register to register new user.
Sign-up: User should enter valid details then click sign up to register into the application.
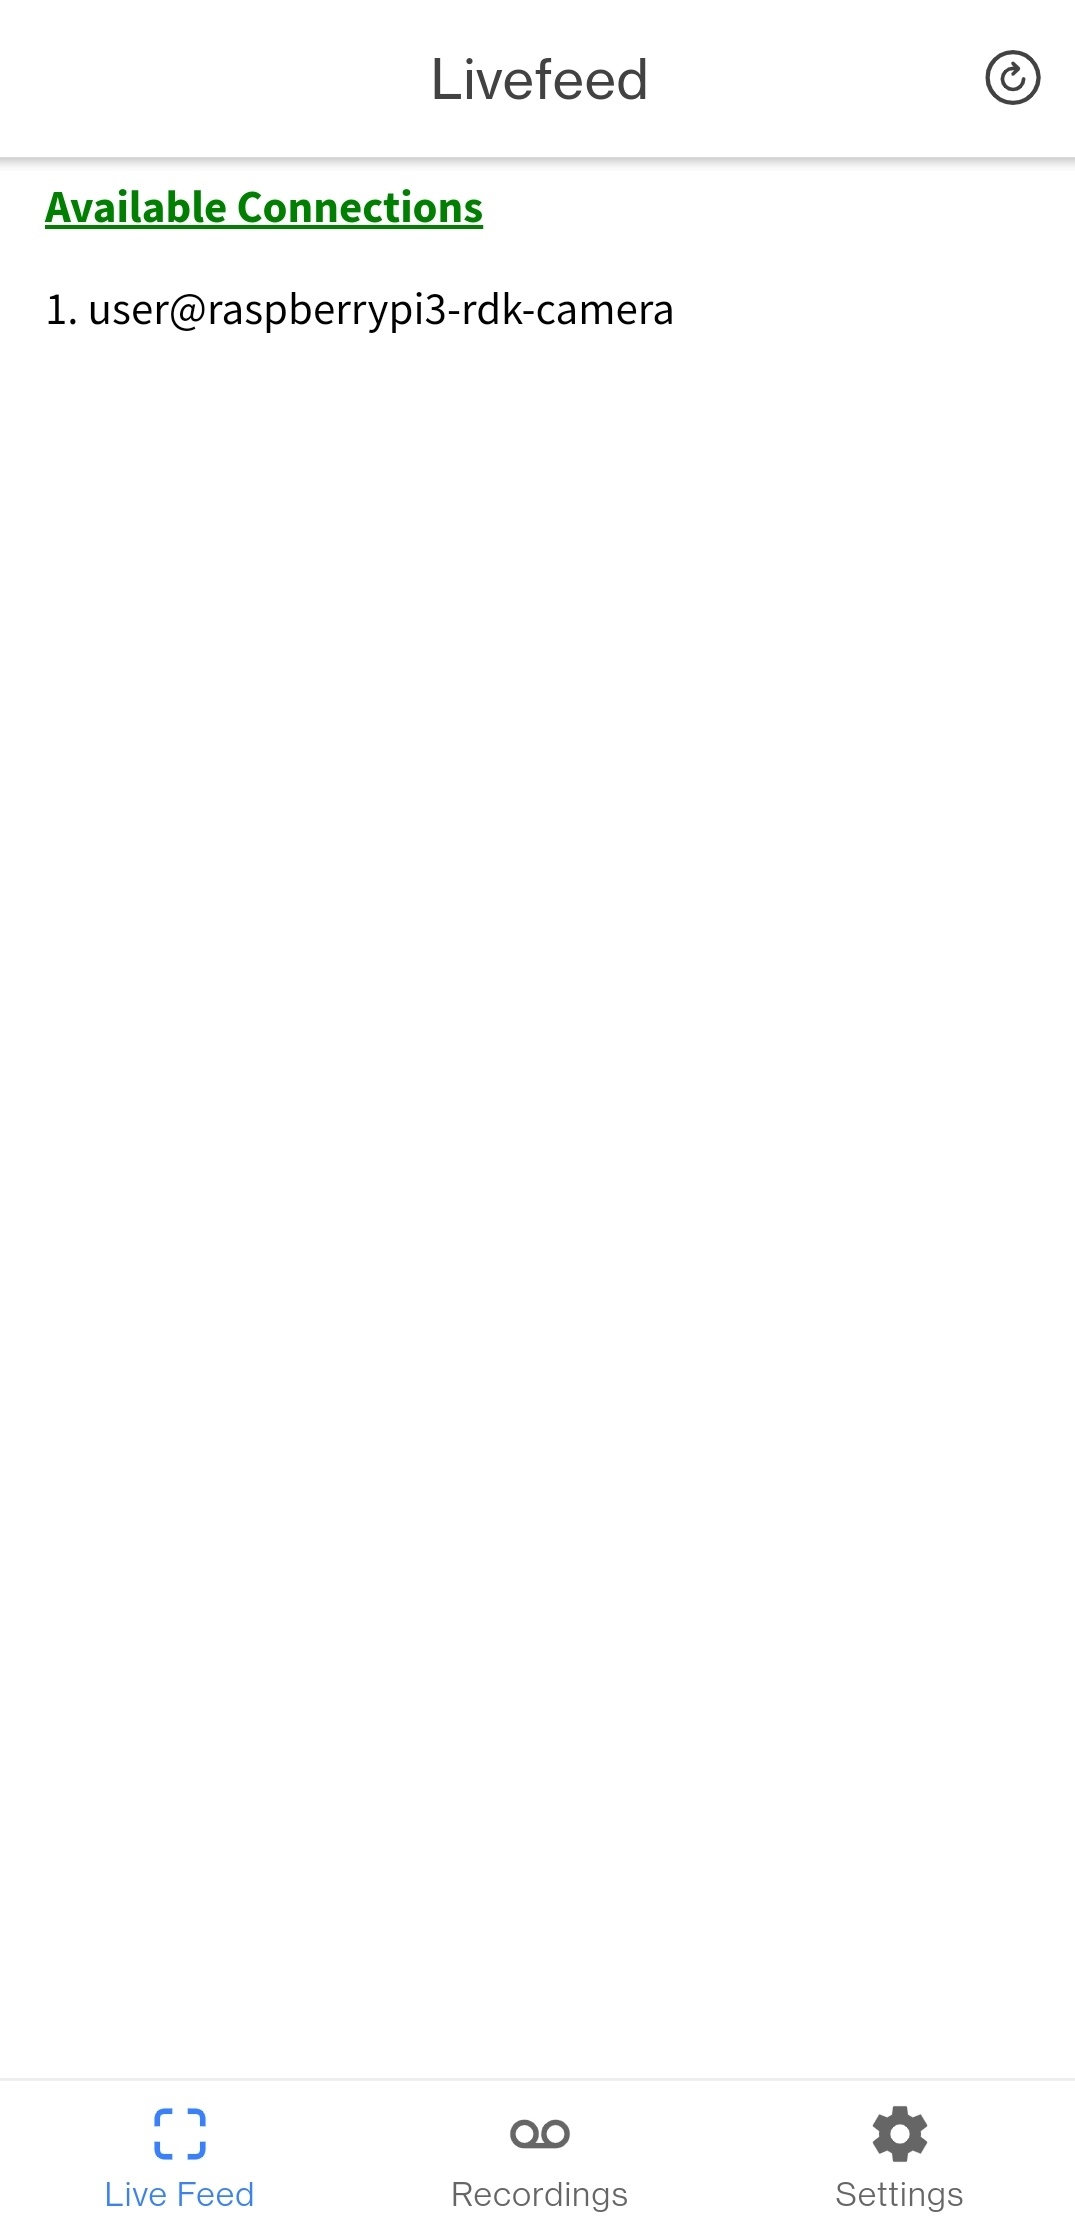
Live Feed: Populates list of available cameras in your network which are connected to server and ready to stream the content
Note: To view the list of available cameras in the network user should configure the Server IP and Port in Settings tab > Server IP option
LiveFeed: Lists the available camera connections in your network. Click on any camera name to view the live streaming
Live Streaming: Playing live streaming video from rpi camera in the mobile app
Recordings: In this user can select the specific option such as today, last week and custom range to view the list of recordings stored in the cloud under logged in user id or user name. For custom user should suppose to select start and end date to get the list of recordings. In the list of recordings user can able to see the recording name, recording date and duration of recording.
Settings: From settings user can able to edit :
- camera settings such as video resolution for live feed and recordings and IP address, Storage path which is changing the internal storage path for downloading recordings.
- User settings such as camera access permissions, Adding new camera to the account, editing user details like password etc.
- Other settings which are app related settings like terms and conditions, Privacy Policy, About application, App rating, Logout.


12 Comments
Z-Vineeth Shankar
Jan 27, 2022How to download these mobile applications?
Could you provide the links for both iOS and Android?
Unknown User (tlakshmansundeep)
Apr 21, 2022APK download link placed how to connect section. At present it's for android only. Unknown User (vineeth_shankar)
Z-Vineeth Shankar
May 25, 2022I am unable to sign up as new user in the mobile application.
After entering the username, email and password the signup button is not clickable/responding at all.
Unknown User (tlakshmansundeep)
May 26, 2022Hi,
Please try with test1@gmail.com and password as test123, As of now it wasn't integrated with the backend, We mainly focused on the streaming part, Signup and remaining features will be available soon and we are working on it now.
Z-Vineeth Shankar
May 27, 2022The scan button is not responding. I am unable to see the user@raspberry-camera3 list on the app. But I cam view in the linux machine peerconnection_client
However, there also connection is getting terminated.
I request support to get it working.
Unknown User (tlakshmansundeep)
May 27, 2022Please make sure the peerconnection_server in your local machine and peerconnection_client in Raspberry PI start first.
Make sure that Mobile application, peerconnection_server & peerconnection_client are in the same network as well.
Your points noted as well.
Z-Vineeth Shankar
May 30, 2022I am using RPI 3B board. Not 3B+
How do I ensure the correct settings? Any changes needed in
/boot/config.txt?
The camera is not getting detected in RPI 3b running rdk-c (dunfell). However I can get it to work on same RPI using raspbian OS.Seeking support on how to enable camera in rdk-c
Unknown User (e.savidha)
May 30, 2022Hi Unknown User (vineeth_shankar)
Are you using USB based Webcamera or RPI CSI camera?
Please check device availability status with below command
root@raspberrypi0-rdk-camera:~# ls /dev/video0/dev/video0By default camera will be detect in RDK-C RPI3 image, If you use CSI camera then please check the connectivity in both RPI target end and Camera end.
Again if device not detected then try below command in RPI to load v4l2
modprobe bcm2835-v4l2
Z-Vineeth Shankar
May 30, 2022Thanks for your quick support
I am using RPI camera connected to CSI camera port.
Connectivity is fine since with the same setup I am able to launch camera in raspbian os in RPI.
Unknown User (e.savidha)
May 31, 2022Hi Unknown User (vineeth_shankar)
Requesting to check below line in /boot/config.txt, If not then please add and check
# Enable video camera
start_x=1
Z-Vineeth Shankar
May 31, 2022It is enabled as default
I have even tried to enable it explicitly in the config.txt file.
Not sure what am I missing.
Unknown User (e.savidha)
May 31, 2022root@raspberrypi3-rdk-camera:~# ls /dev/video0/dev/video0can you please check video0 availability status.