RDK Resources
[*RDK Preferred*]
Code Management Facility
RDK Forums
[RDK Conferences]
RDK Support
Archives
Papers & Presentations Archive![]()
Papers & Presentations Archive![]()
...
...
cd ~/xconf/xconfserver
mvn clean install
| cassandra.keyspaceName=demo cassandra.contactPoints=127.0.0.1 cassandra.username= cassandra.password= cassandra.port=9042 cassandra.authKey= dataaccess.cache.tickDuration=60000 dataaccess.cache.retryCountUntilFullRefresh=10 dataaccess.cache.changedKeysTimeWindowSize=900000 dataaccess.cache.reloadCacheEntries=false dataaccess.cache.reloadCacheEntriesTimeout=1 dataaccess.cache.reloadCacheEntriesTimeUnit=DAYS dataaccess.cache.numberOfEntriesToProcessSequentially=10000 dataaccess.cache.keysetChunkSizeForMassCacheLoad=500 dataaccess.cache.changedKeysCfName=XconfChangedKeys4 |
|---|
cd ~/xconf/xconfserver/xconf-angular-adminmvn jetty:run -DappConfig=${path-to-service-properties} -f pom.xml
For first time run only, we need to specify the path to service.properties . For the subsequent runs execute the below command in the folder xconfserver/xconf-angular-admin: mvn jetty:run
To run the admin UI launch it as http://<XCONF-SERVER-IP>:19093/admin/ in any browser. This will redirect to the login page.
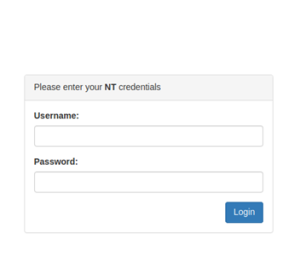
If the user wants both read and write permissions ,then enter username and password for the login are admin and admin respectively
If the user wants only read permissions ,then enter username and password for the login are user and user respectively.
For first time application deployment, create a "service.properties" file under the path xconfserver/xconf-dataservice/src/main/resources/service.properties with the following contents. The sample service.properties file will be available in xconf-dataservice/src/test/resources/service.properties, the below content is taken from there and modified with change in cassandra port.
cassandra.keyspaceName=demo cassandra.contactPoints=127.0.0.1 cassandra.username= cassandra.password= cassandra.port=9042 cassandra.authKey= dataaccess.cache.tickDuration=60000 dataaccess.cache.retryCountUntilFullRefresh=10 dataaccess.cache.changedKeysTimeWindowSize=900000 dataaccess.cache.reloadCacheEntries=false dataaccess.cache.reloadCacheEntriesTimeout=1 dataaccess.cache.reloadCacheEntriesTimeUnit=DAYS dataaccess.cache.numberOfEntriesToProcessSequentially=10000 dataaccess.cache.keysetChunkSizeForMassCacheLoad=500 dataaccess.cache.changedKeysCfName=XconfChangedKeys4 |
|---|
cd ~xconf/xconfserver/xconf-dataservice
mvn jetty:run -DappConfig=${path-to-service-properties} -f pom.xml
For first time run only, we need to specify the path to service.properties . For the subsequent runs execute the below command in the folder xconfserver/xconf-dataservice:
mvn jetty:run
To launch the application go to http://<XCONF-SERVER-IP>:19092/queries/environments . To verify, add an entry in the environments tab of the xconf admin application and check whether the same is updated here in data service.
NOTE: To run the Admin UI and data service applications in background start jetty server as follows:
nohup mvn jetty:run &