RDK Resources
[*RDK Preferred*]
Code Management Facility
RDK Forums
[RDK Conferences]
RDK Support
Archives
Papers & Presentations Archive![]()
Papers & Presentations Archive![]()
...
Flow: Xconf Xconf-server -> Common -> Environments
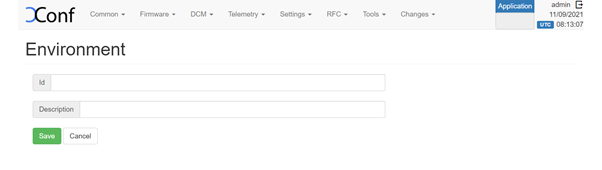
Click on Create Button.
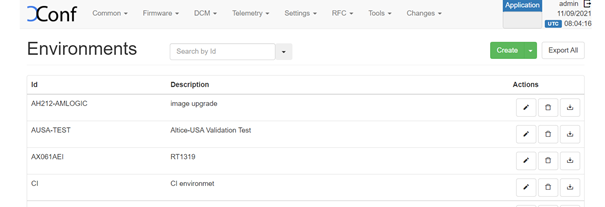
Click on Create, Enter the ID and Description fields, click on Save.
ID ID : <Unique Identifier> Identifier> ; Description : <Description>
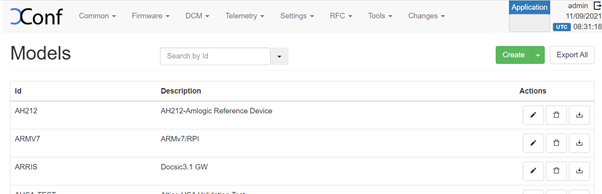
FlowFlow: Xconf-server -> Common -> Models
Click Click on Create, Enter the ID and Description fields, click on Save.
i

Define Mac List
Flow: Xconf-server -> Common -> MAC Lists -> Create -> Add your Device MAC address -> Save.
i

Flow: Xconf-server -> Common -> IP Lists -> Create-> Create -> Add your device IP address -> Save.

...

Flow: Xconf-server -> DCM -> Upload repository -> create ->save
Name: <Unique Identifier>
Description: <Unique Identifier>
URL: HTTP: http://35.161.239.220/xconf/telemetry_upload.php

Flow: Xconf-server -> DCM -> Formulas -> Create
Name: <unique name for log upload>
Description: <Short description for log upload>
Percentage: 100
Build condition: estbMacAddress IS <MAC Address> OR estbIP IS <IP Address>
(or) estbMacAddress IS <MAC Address> AND model is <Model Name> (Model name is already configured under Common Tab)


Name: Enter the name given during Log Upload Formula Creation.
Note: The formula will be effective only if we select 'Are Settings Active' option to 'true' in 'Create Device Settings' and 'Log Upload settings'.

Verification at Xconf UI.
...
...


