RDK Resources
[*RDK Preferred*]
Code Management Facility
RDK Forums
[RDK Conferences]
RDK Support
Archives
Papers & Presentations Archive![]()
Papers & Presentations Archive![]()
...

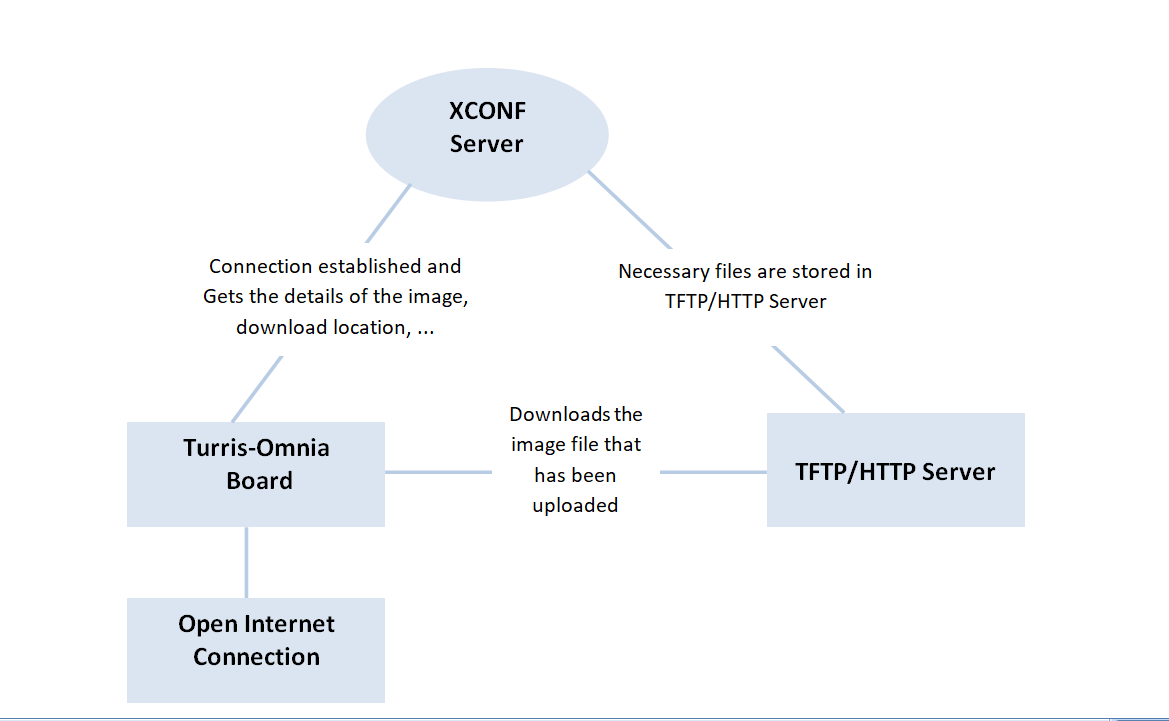
Either TFTP/ HTTP server can be used to download the image, depends on the requirement.
STEP 1:
Install xinetd and tftpd-hpa application in your local PC to setup tftp server by using below command
TFTP Server Installation Step
|
STEP 2STEP 1:
Create a .tar file and place the image files.
...
zImage--4.14.22-r0-turris-20200629035029.binrdkb-generic-broadband-image_default_20200629035029.rootfs.tar.gzarmada-385-turris-omnia.dtb
|
STEP 23:
Create checksum file for the upgrading image.
md5sum checksum creation
|
STEP 1:
Install xinetd and tftpd-hpa application in your local PC to setup tftp server by using below command
TFTP Server Installation Step
...
sudo apt-get install xinetdsudo apt-get install tftpd-hpa
...
Create new folder for example "tftp" in your PC home directory and place the checksum file and upgrading image file (the .tar file generated).
STEP 34:
Check for tftp file in /etc/xinetd.d/ directory. If not, then create tftp file under this /etc/xinetd.d/ directory and add below content.
...
|
STEP 45:
Verify /etc/default/tftpd-hpa file content
...
|
STEP 56:
Start tftp server and xinetd server
|
...
Ensure the http server in running in the local PC. If not, then activate or install it (For Example, Lighttpd)
STEP 2:
Once the server is running, place the necessary files in the below path.
Path of the image file to be placed: /var/www/html
This directory should contain the image file and the checksum file:
...
For Ex:rdkb-generic-broadband-image_default_20200629035029.tar
rdkb-generic-broadband-image_default_.txt20200629035029
XConf URL
|
...
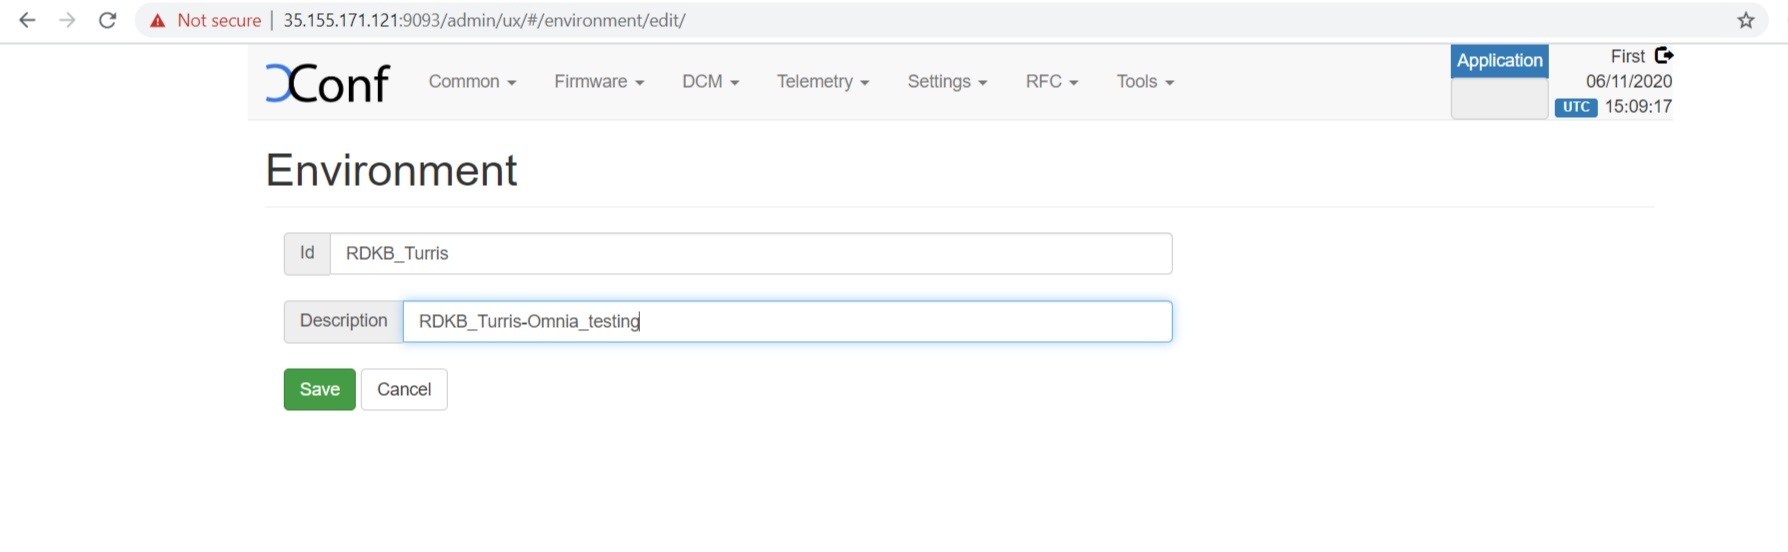
Select common → Environments. Then click edit and enter the device environment detail.
STEP 2:
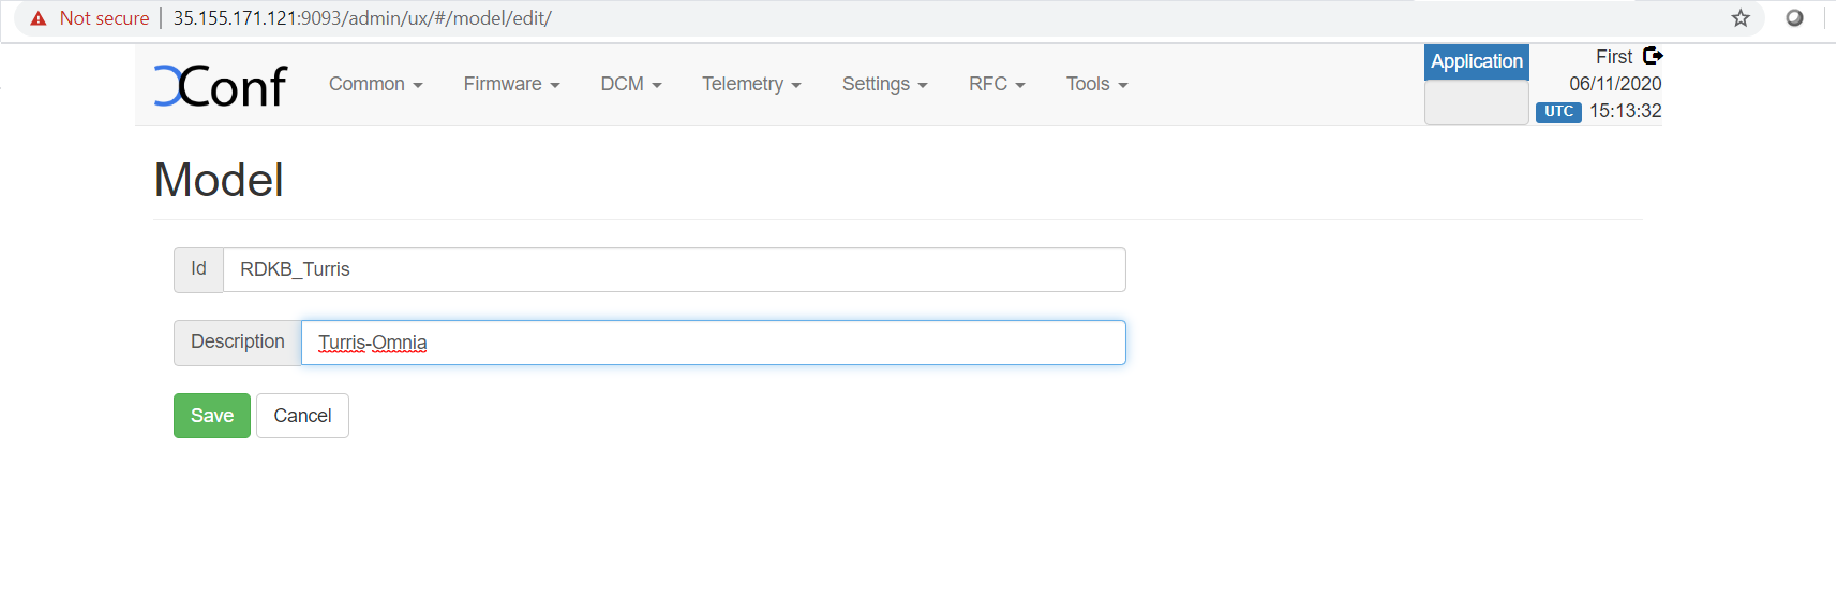
Select common → Models. Then add your device model detail.
 STEP 3:
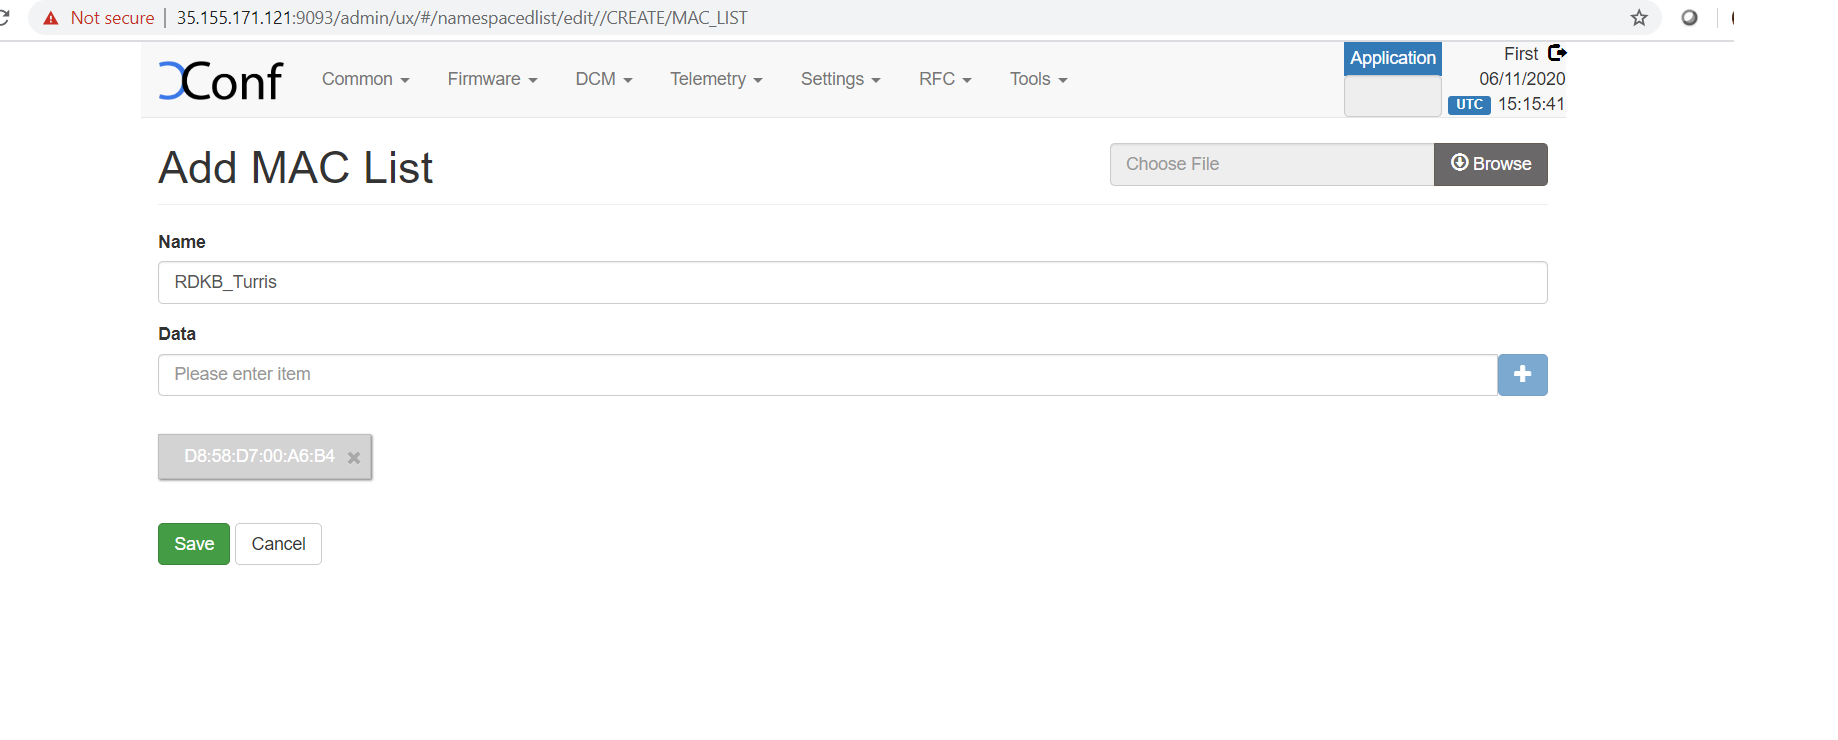
Select common → MAC Lists. Then add your device MAC detail
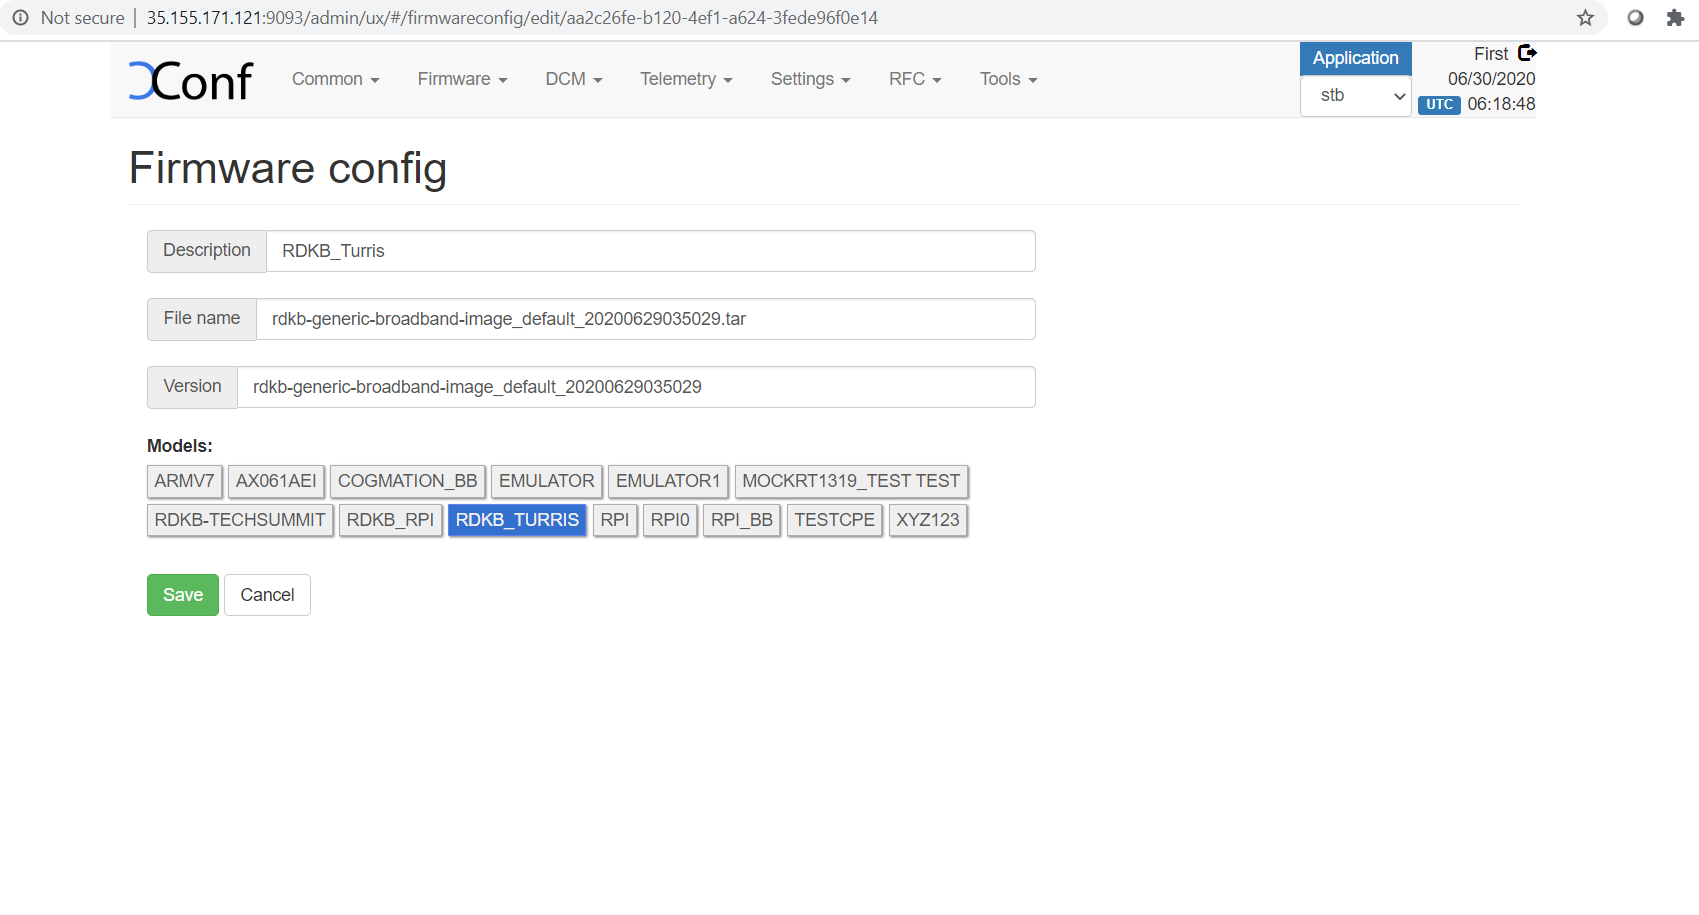
STEP 4NOTE: Before configuring Firmware essentials, Ensure application type is stb. (If the application type is xhome then change it)
Select Firmware → Firmware Configs.
Give Description,File name ( Upgrading image name ),Version( Upgrading image name without extension) and select your model name and save the details in xconf server.
 STEP 5:
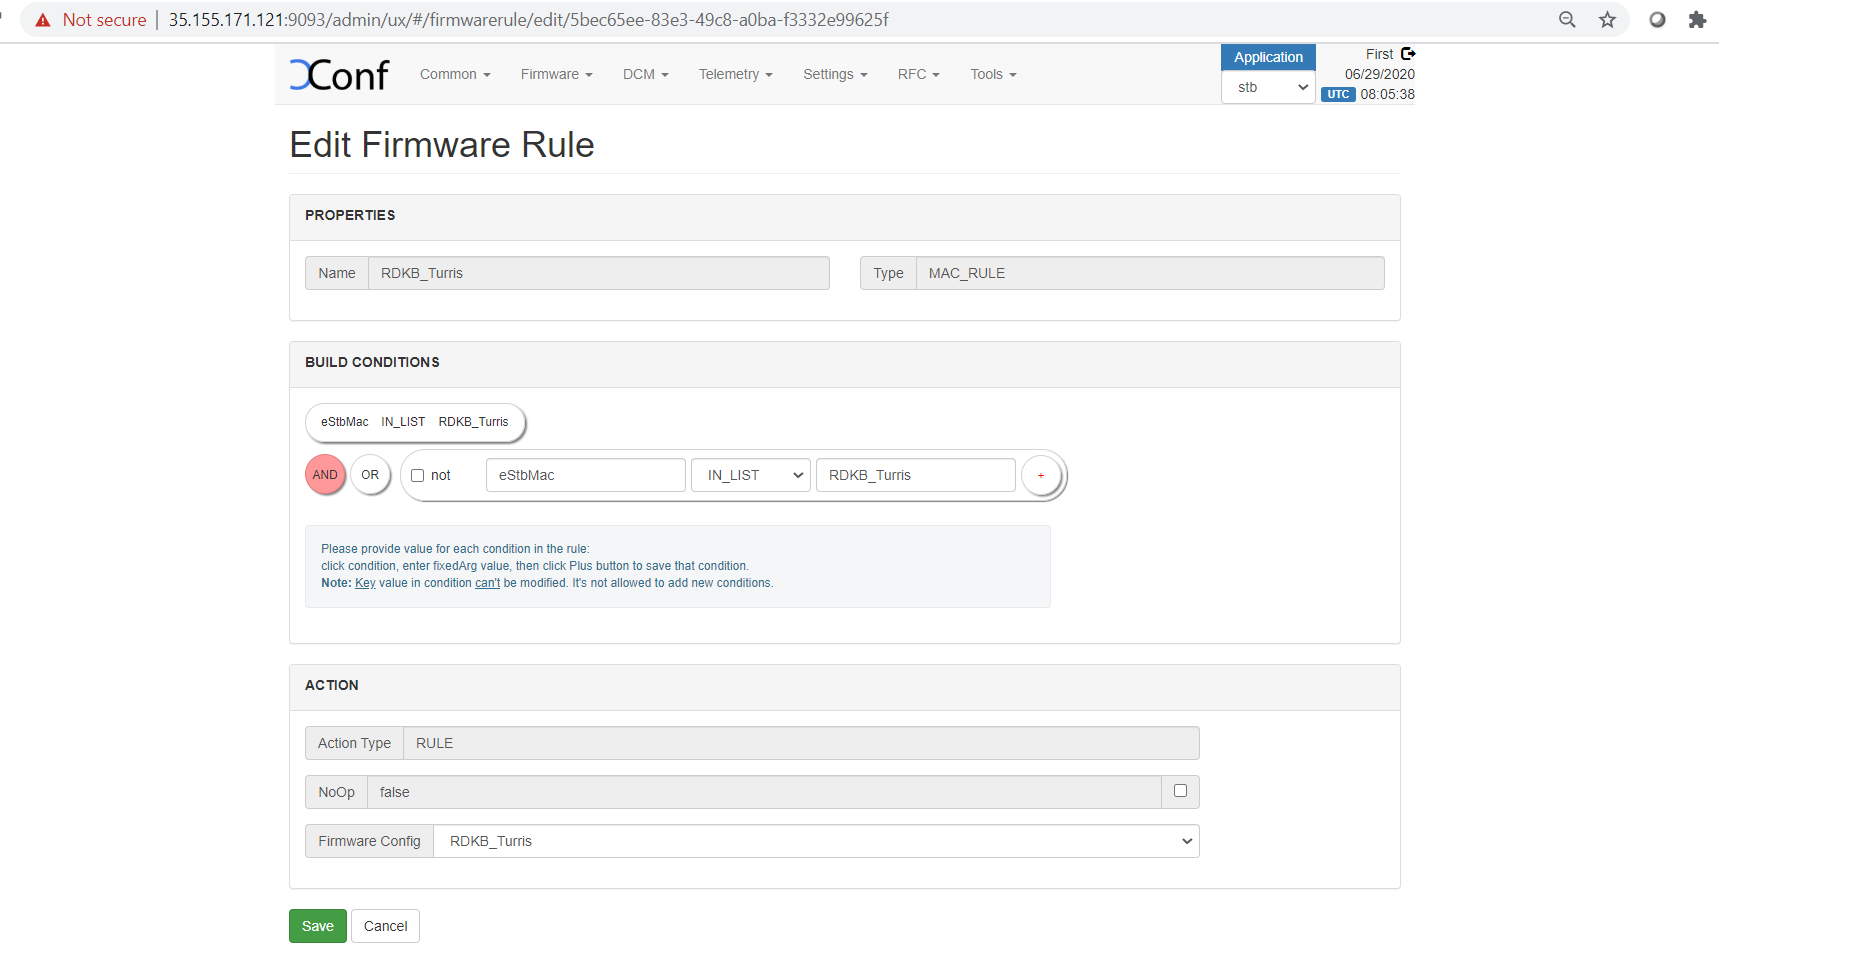
Select Firmware → Firmware Rules
...
Select your firmware config under Action option and save your Firmware rule in XConf server.
STEP 5:
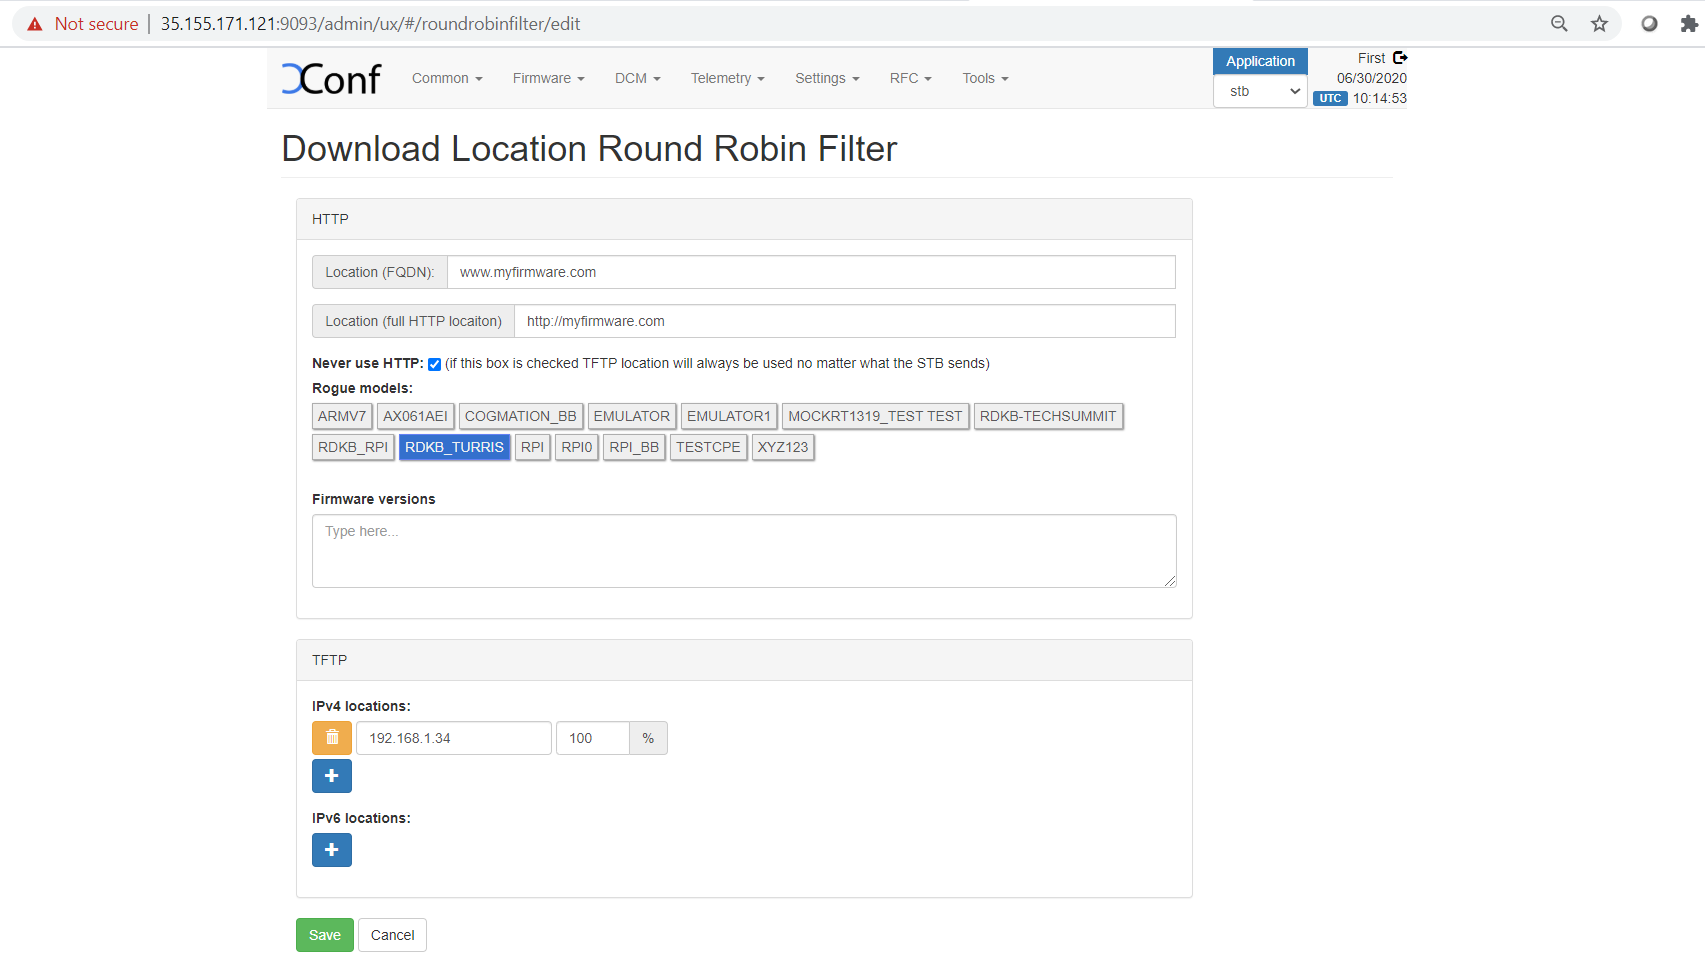
Select Firmware → Download Location Filter
After entered Download Location Round Robin filter, then edit your image downloading details.
FOR TFTP SERVER CONFIGURATION:
Enable Never use HTTP and select your Rongue Rogue model.
Give TFTP server running IP address to download image.

...
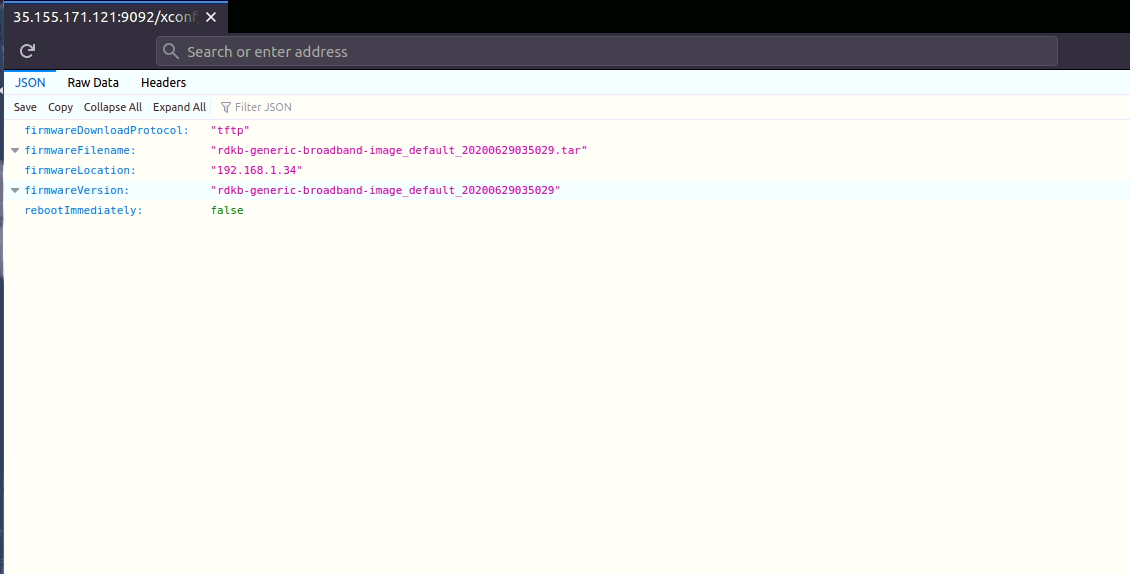
Verify that XConf Server configuration displays the Json response from the mentioned URL:
http://<Xconf Server IP:port no.>35.155.171.121:9092//xconf/swu/stb?eStbMac=<MAC address><Turris MAC address>&model=<model_name>&capabilities=RCDL&capabilities=supportsFullHttpUrl
...
1) Add the necessary firmware utilities in armada_38x_defconfig
...
Note: The U-boot Configuration is added to handle the uboot environment in linux. This is specifically to change the root value in bootargs ( to avoid the old rootfs in mmcblk0p5 and load the downloaded rootfs that has been placed in the mmcblk0p7). And so, the new rootfs comes up while the reboot.
...
1) Flash the image and confirm for the 7 partitions in the turris-omnia board(ex. mmcblk0p1, mmcblk0p2, mmcblk0p3, mmcblk0p4, mmcblk0p5, mmcblk0p6, mmcblk0p7)
...
6) Download the image in the /tmp folder(roots image, zImage, dtb file) and move the rootfs filesystem(rdk*.rootfs.tar.gz) into the 7th partition and kernel (zImage*.bin) image into 3rd partition
...
9) Verify the version of booted image which shows the downloaded image version
...
Please find the summary on firmware upgrade explained above
...
Yet to have https support
...
Image Download is verified only with TFTP server