RDK Resources
[*RDK Preferred*]
Code Management Facility
RDK Forums
[RDK Conferences]
RDK Support
Archives
Papers & Presentations Archive![]()
Papers & Presentations Archive![]()
...

...
Sign-up: User should enter valid details then click sign up to register into the application.

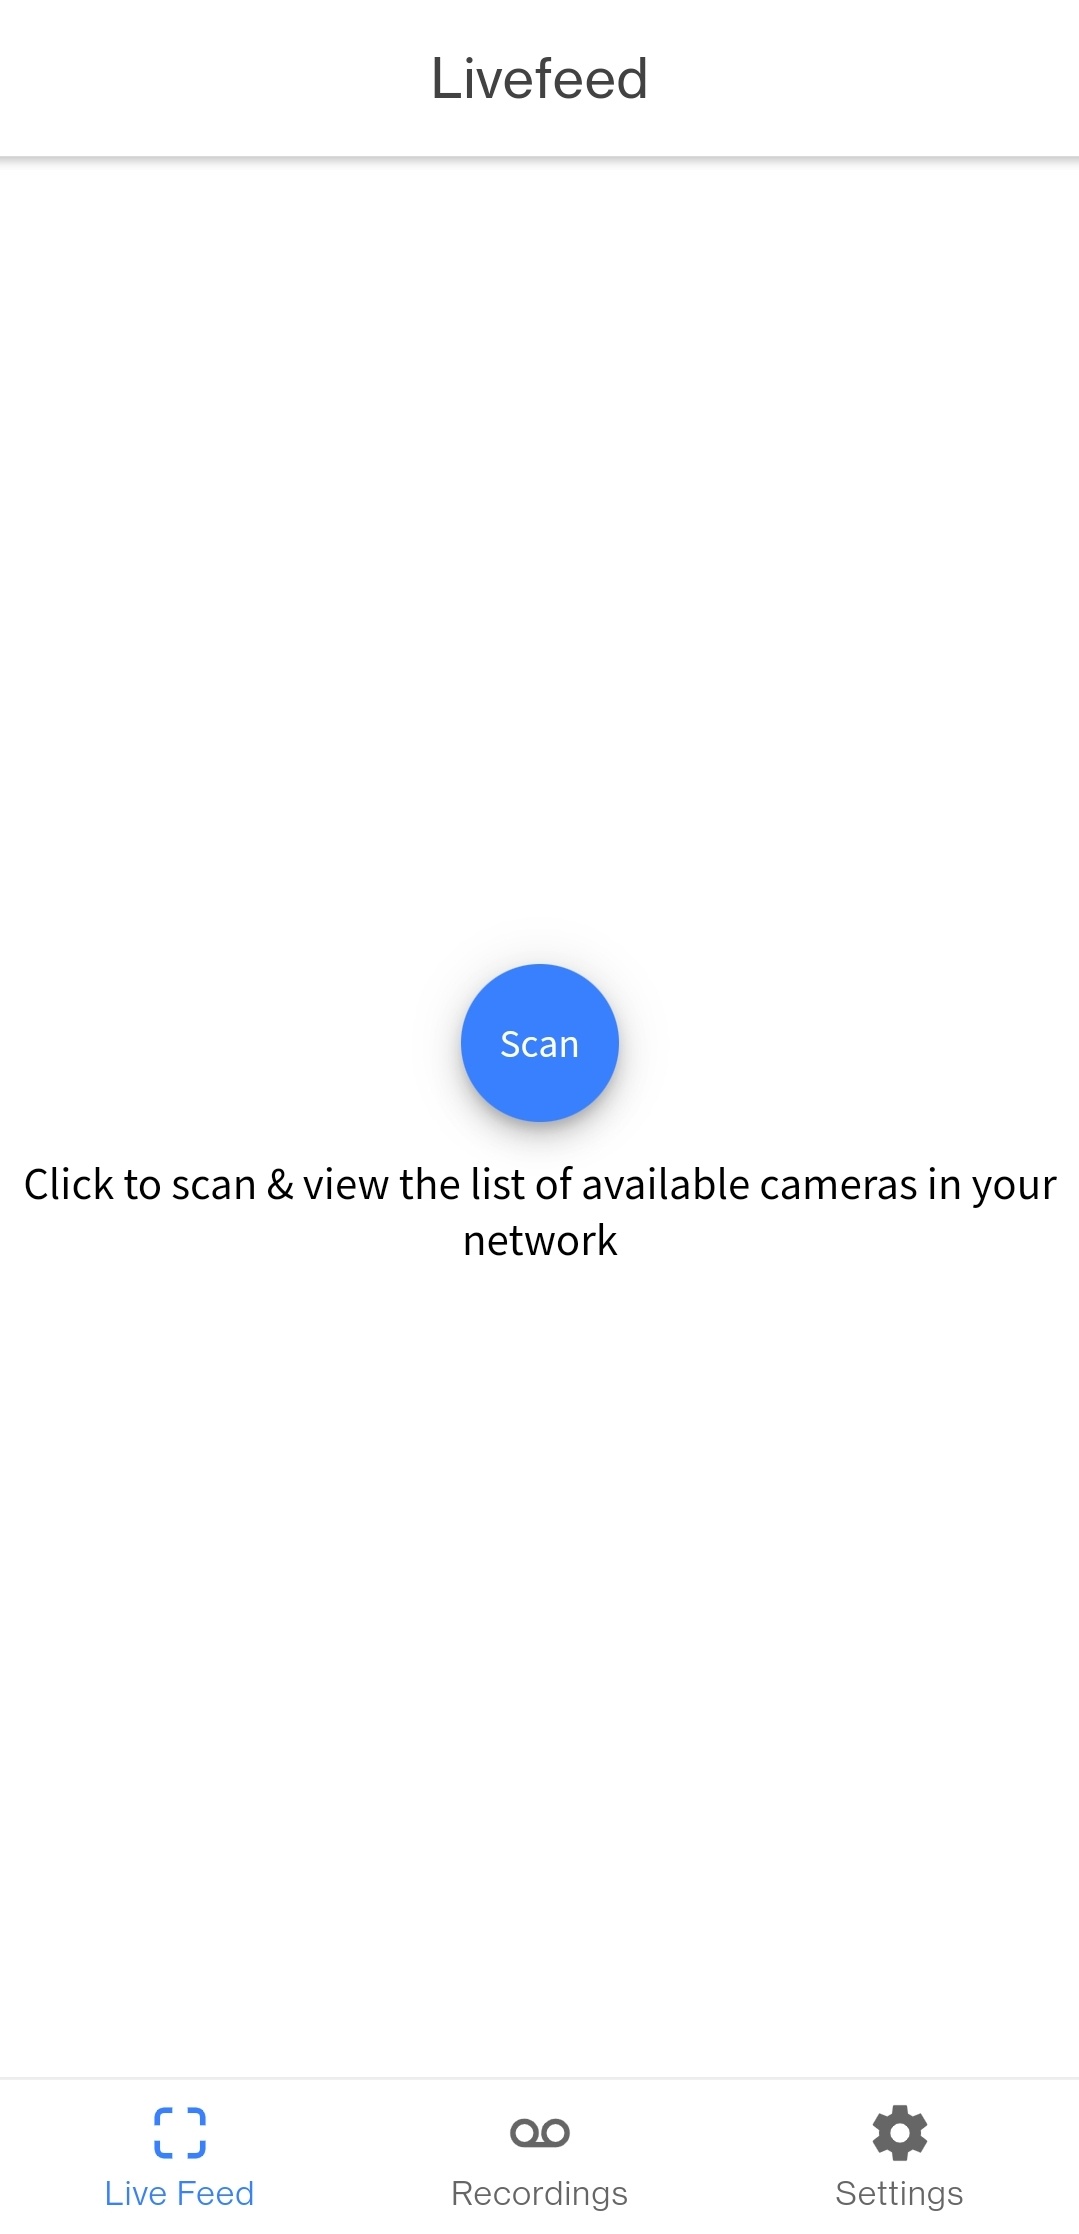
Live Feed: Populates list of available cameras in your network which are connected to server and ready to stream the content

Connection Setup: User should enter valid camera IP address and camera reference name and click on 'Connect' to view the live feed from specific RDK - Camera.
Note: To view the list of available cameras in the network user should configure the Server IP and Port in Settings tab > Server IP option

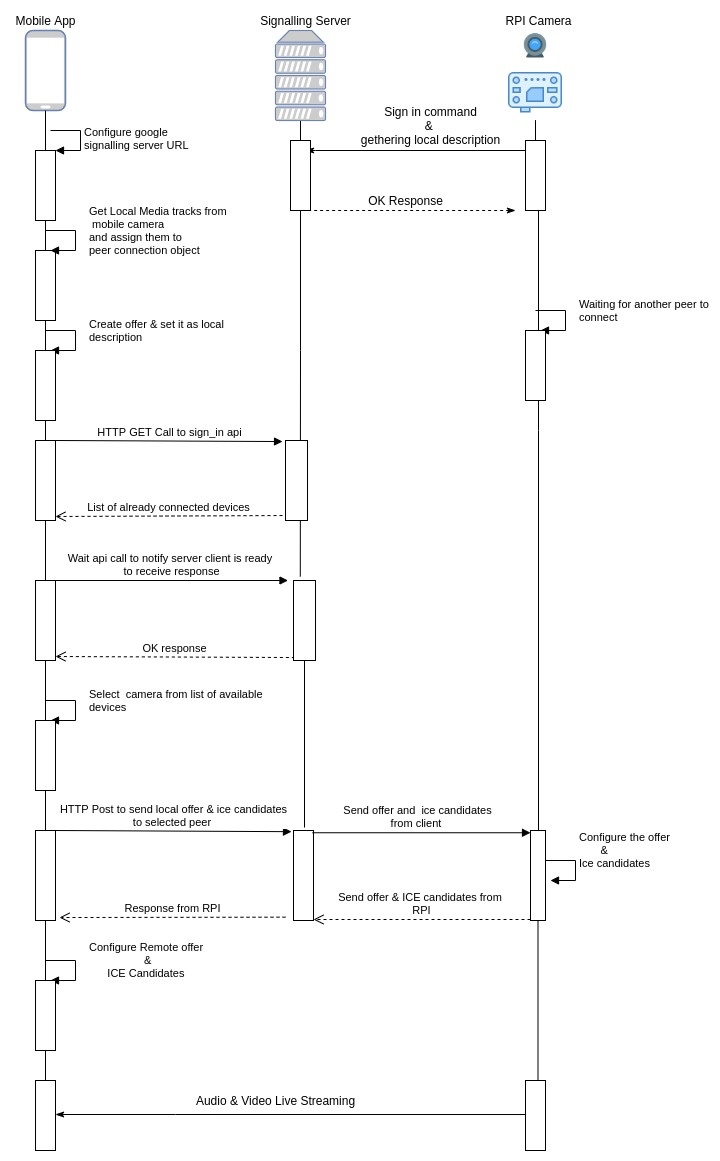
Connection Setup: To make this application work we need to run the server as well. To run the server in the local PC we need to clone the OpenWebRTC code and build the code, To build the OpenWebRTC code please execute the below commands in terminal
export PATH=$PATH:/home/user/Desktop/openwebrtc-m72/buildtools/linux64/
gn gen out/Default --args='is_debug=false target_os="linux" rtc_libvpx_build_vp9=false rtc_use_h264=true rtc_libvpx_build_vp9=false rtc_use_gtk=false
rtc_build_opus=false rtc_include_opus=false libyuv_use_neon=false rtc_include_tests=false build_libsrtp_tests=false rtc_include_pulse_audio=false
rtc_use_x11=false rtc_build_with_neon=false is_clang=false rtc_use_gtk=false treat_warnings_as_errors=false rtc_enable_protobuf=false
use_custom_libcxx=false rtc_use_metal_rendering=true'
ninja -C out/Default/
After successfully completing the above steps navigate to openwebrtc-m72/out/Default
Enter ./Peerconnection_server and hit enter to run the local server.
Next you need to have RPI Camera image embedded with the openwebrtc peerconnection_client binaries (which are located while building openwebrtc code inside out/default folder)
SSH into RPI which is connected with Camera and start the RPI peer connection client and Enter the Local server IP address, port number which is 8888.

Once RPI connected to server, Open mobile application click SCAN button in the LiveFeed page to get the list of available Cameras Connected to your local server.
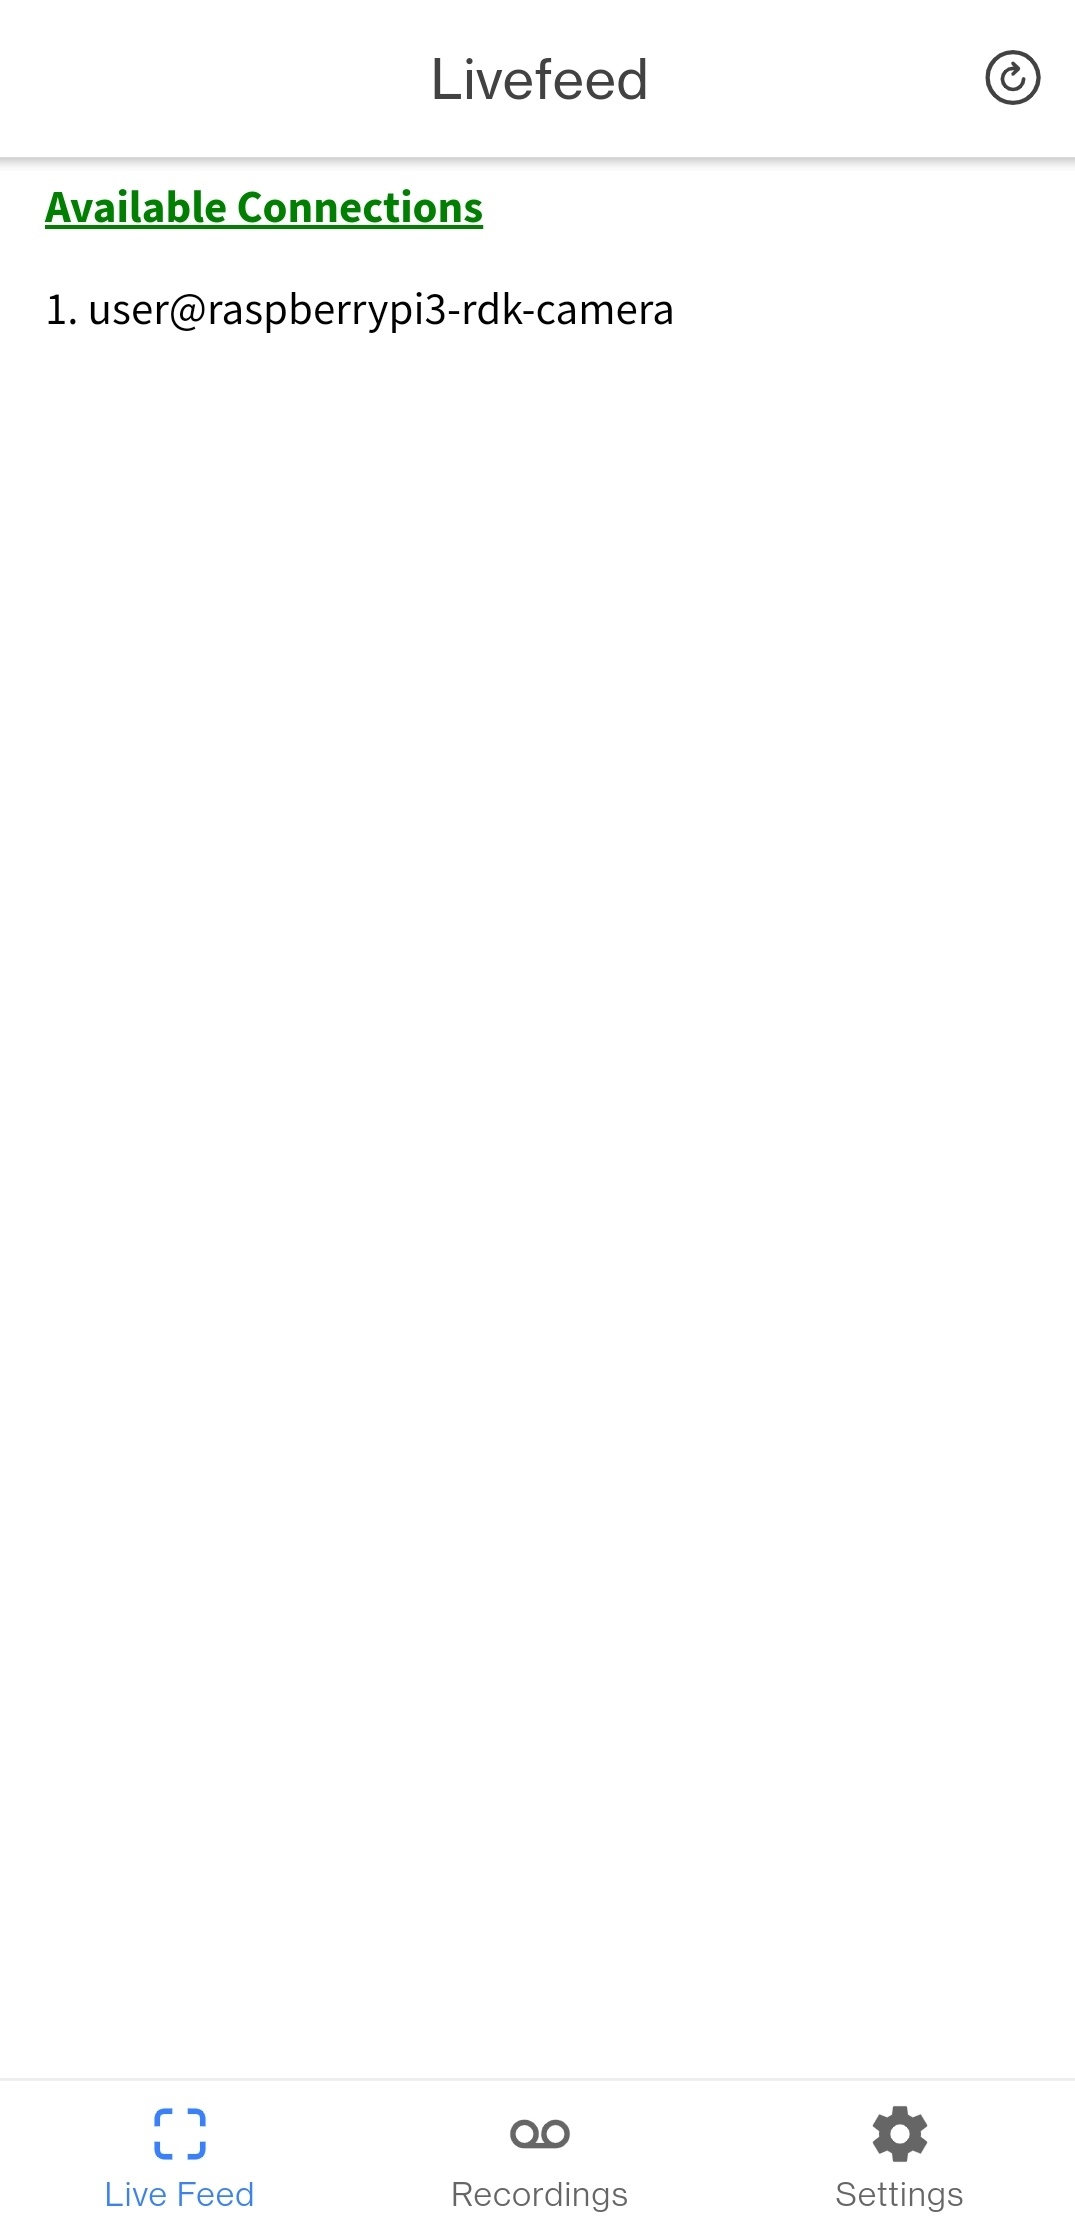
Select the camera from populated list and it'll navigate to the live streaming page which contains video player, playing live stream from RPI Camera.


Recordings: In this user can select the specific option such as today, last week and custom range to view the list of recordings stored in the cloud under logged in user id or user name. For custom user should suppose to select start and end date to get the list of recordings. In the list of recordings user can able to see the recording name, recording date and duration of recording.


Settings: From settings user can able to edit :
 
