...
- Set video memory to at least 64 MB in Display tab, and don't select the 3D acceleration
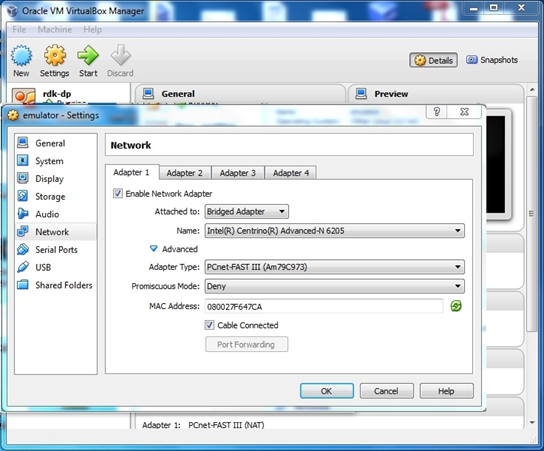
- Configure your VMs network settings
- Choose “Bridged Adapter” mode as shown in the screenshot below
- Set your partition number as the suggested default. In the example case: 1
...
- Press "Enter" key for First sector & Last sector prompts
- Select the command "p" to print the partition table on screen for review
...
- Select the command "w" to write the partition table to disk and exit fdisk
| $ Command (m for help): w |
|---|
 Image Removed
- Format your newly created partition with ext3 file system
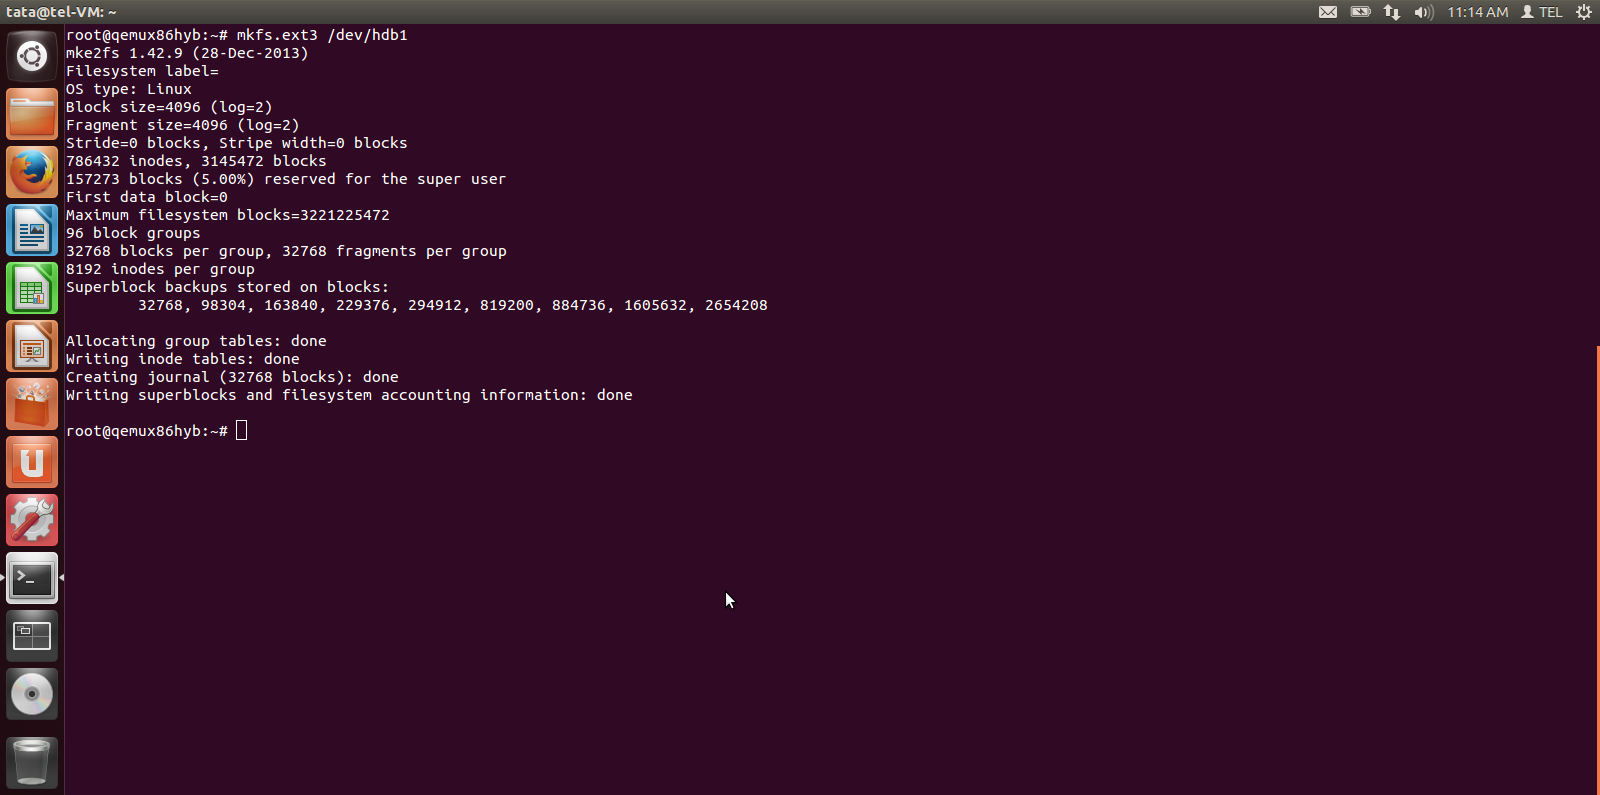 Image Removed
- Create a folder for mounting your new partition at /ext_hdd
- Mount your newly created hard disk partition to /ext_hdd
$ mkdir /ext_hdd $ mount /dev/hdb1 /ext_hdd |
|---|
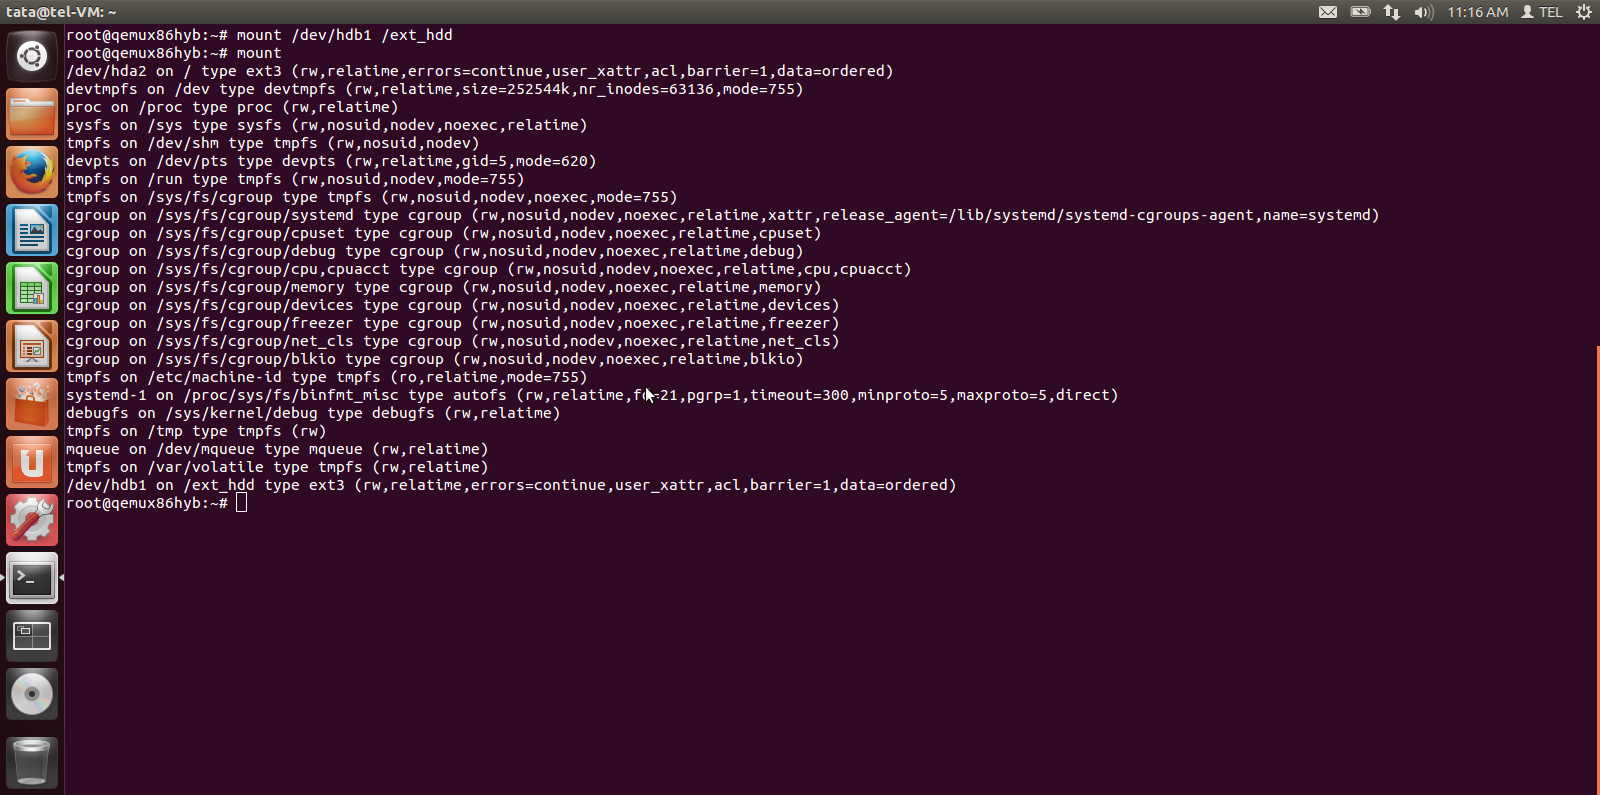 Image Removed
STEP 5: STEP 3 : ...
Your VM has been built with very limited hard drive space. In order to run emulator and play video files, you need to copy your video files into the file system for playback. For this, you will need to setup a virtual external hard drive.
- Select the vm instance on the main menu of Virtual Box
- Click Settings -> Storage -> Add Hard disk [icon]
- Click ‘Create new disk’ (Note: In the screenshot below, "Choose existing disk" may seem highlighted. Please select "Create new disk")
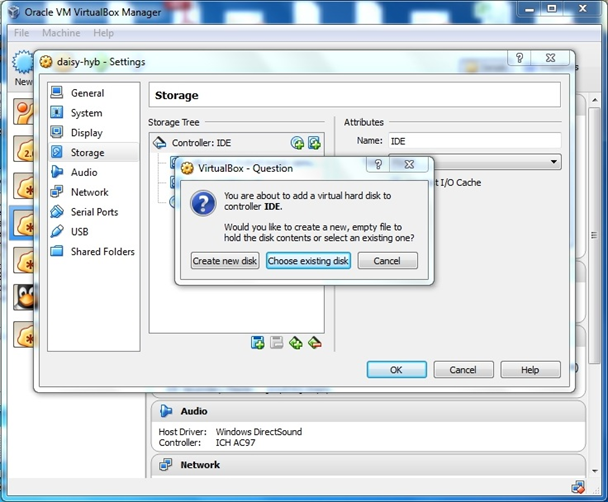 Image Removed
- Select VDI (VirtualBox Disk Image) as your Hard Drive file type:
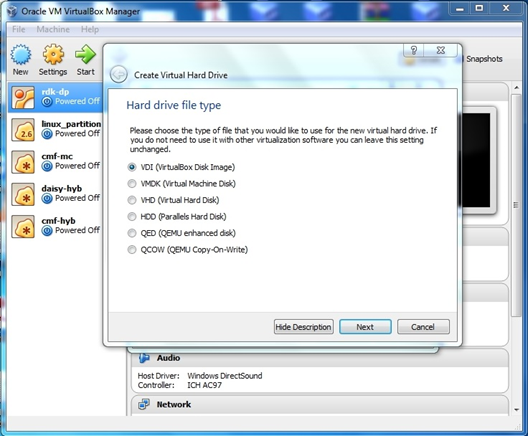 Image Removed
- Select "Dynamically allocated" storage:
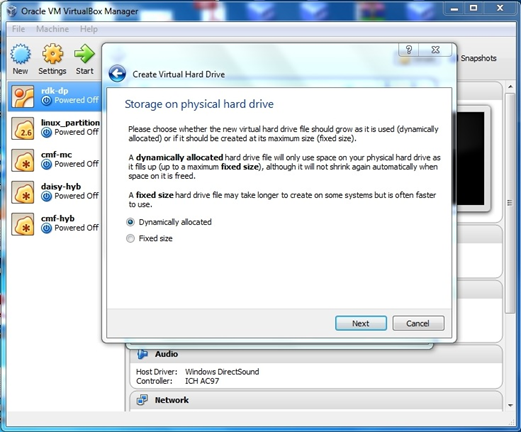 Image Removed
 Image Removed
STEP 4: Formatting and partitioning your new external hard drive:
- Boot up the image and and get IP address from ResidentApp Network info screen
- Once you have the IP address you may SSH into your VM from your linux shell console. Use root as the ssh user.
...
- Use the “mount” command to see the current status of connected hard disks
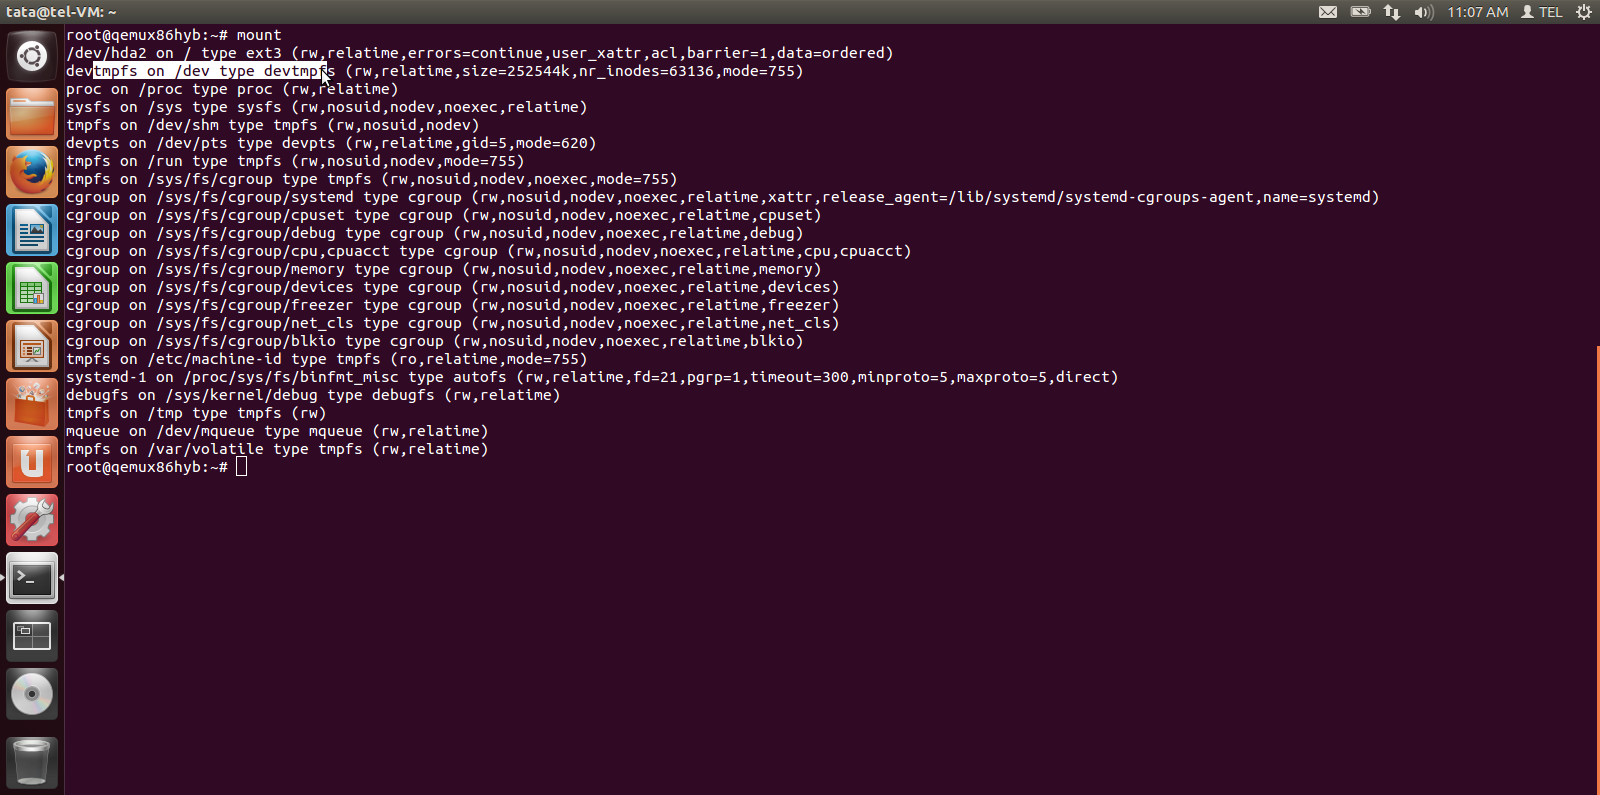 Image Removed
- Use fdisk command to list out connected hard drives. You may note that in the screenshot below, there are two hard drives listed. hda and hdb. hdb is the external hard drive that we have created in the previous step.
 Image Removed
- Use fdisk to create your new hard disk partition
Review the description of the steps during fdisk operation below and the following screenshot for reference before proceeding.
- Use fdisk to create your new hard disk partition
- Use the command "n" to add a new partition
...
- Select partition type as the suggested default "p" for primary partition
...
$ Partition type:
p primary (0 primary, 0 extended, 4 free)
e extended
Select (default p): p
Copy a video file to your file system to be used for emulator video playback.Pre-requisite to the step is assumed that /ext_hdd is already mounted with the external hard disk partition on your emulator VM
- Copy your video file from your host machine to /ext_hdd any folder folder on the emulator VM
- Note: The following command is performed from your Host Machine
| $ scp <file_name> root@<your_emulator_vm_ip>:/ext_hdd <path> |
|---|
Usage Instructions
Logging into your VM
As described in the previous section, you can log in to your emulator VM from your Host Machine using the ssh command.
Testing animation using westeros compositor test application
RDK emulator supports westeros compositor and renderer module as westeros-renderer-gl. Do the following to check westeros animation using westeros_test command line utility.
- After logging in to the Emulator via ssh, kill the already running compositor application via below command and comment the last line in westeros-init.sh so that compositor is not started automatically on bootup
| Code Block |
|---|
$ killall westeros

Comment the last line in /usr/bin/westeros-init.sh so that compositor is not started automatically on bootup
#westeros --renderer /usr/lib/libwesteros_render_gl.so.0.0.0 --display WPE |
- Restart the Emulator VM
- Run following commands in terminal for manual starting the westeros compositor application
| Code Block |
|---|
|
$ mkdir -p /run/user/0
$ export XDG_RUNTIME_DIR=/run/user/0/
$ export LD_PRELOAD=/usr/lib/libwesteros_gl.so.0.0.0
$ westeros --renderer /usr/lib/libwesteros_render_gl.so.0.0.0 --display WPE
|
- Run westeros_test application in another window as given below
| Code Block |
|---|
|
$ westeros_test |
Testing video playback using Gstreamer command line utility
- Start the westeros compositor application as mentioned before if its not already running.
- Copy video files to the VM at /hdd pathVM
- Execute below command(s) to play video
| Code Block |
|---|
|
$ gst-launch-1.0 playbin uri=file:///hdd/<filename><video file name with full path> |
Testing video streaming using aamp-cli utility
- Start the westeros compositor application as mentioned before if its not already running.
- Execute the below command to play clear-stream videos
...