Setup and Develop Thunder plugin
Steps involved in implementing new RDK services Plug-In
RDK components implemented as Thunder plugins are called as RDKServices. it is developed based on the Thunder (WPE) Framework. Services each other or a particular service can be COMRPC for (communication between plugins) or JSONRPC (for external communication). It has a web-based controller UI.
Reference : https://github.com/rdkcentral/rdkservices/pull/960
In RDK services -plugins workspace:
Cloned from https://github.com/rdkcentral/rdkservices
$ git clone https://github.com/rdkcentral/rdkservices
Inside PluginName directory
- <PluginName>.json : This file contains the plugin's information like schema, information and interface json file.
- PluginTemplate.json
- CmakeLists.txt: CMAKE based configuration file which contains a set of directives and instructions describing the project's source files and targets. This is used to compile the Plug-in code to generate the plugin library(Shared library by default; “.so”). External dependencies can be included/linked to the target with the help of CMakeLists.txt configurations.
- Module.h: This header file includes the support for JSON request, response, logging etc...
- Module.cpp: This file is used to declare the module name for the Plug-in. This file contains the plugin's information like schema, information and interface json file (defined earlier).
- <PluginName>.config: This file is used to set configurations of the Plug-in . Ex:- set (autostart true) - Used to make the Plug-in to start automatically along with wpeframework daemon
- <PluginName>.h :Declare the plugin class in this which should contains all the structures, variables and methods which are needed for plugin implementation. The interface header auto-generated earlier will be used here,
- <PluginName>.cpp: This class does contains all the definitions for the methods declared in the Plugin.h and those definitions should be defined inside the below namespace.
- Cmake / (directory) :
PluginTemplate/
├── CMakeLists.txt
├── PluginTemplate.config
├── PluginTemplate.cpp
├── PluginTemplate.h
├── PluginTemplate.json
├── Module.cpp
├── Module.h
├── README.md
├── cmake
| ├── FindDS.cmake
│ └── FindIARMBus.cmake
└── doc
└── PluginTemplate.md
<PluginName>.json
This file contains the plugin's information like schema, information and interface json file.
Syntax :
   {
    {
    "$schema": "plugin.schema.json",
    "info": {
    "title": "Plugin Name Plugin",
    "callsign": "PluginName",
    "locator": "libWPEFrameworkPluginName.so",
    "status": "production",
    "description": "The PluginName plugin allows retrieving of various plugin-related information.",
    "version": "1.0"
     },
     "interface": {
    "$ref": "{interfacedir}/PluginName.json#"
     }
   }
eg: PluginTemplate.json
 {
     "locator":"libWPEFrameworkPluginTemplate.so",
     "classname":"PluginTemplate",
     "precondition":[
      "Platform"
     ],
     "callsign":"org.rdk.PluginTemplate",
     "autostart":false
 }
<PluginName>.config
.config files are files used to configure the parameters and initial settings for some computer programs.
set (autostart false)                       #we are setting autostart condition disable
set (preconditions Platform)
set (callsign "org.rdk.PluginTemplate") 	#The callsign name was given to an instance of a plugin.

#One plugin can be instantiated multiple times. but each instance, the instance-name "callsign" must be unique. here we using org.rdk.PluginTemplate.
<PluginName>.h
Declare the plugin class in this which should contain all the structures, variables, and methods which are needed for plugin implementation.
 namespace WPEFramework {
  namespace Plugin {

   class PluginName : public PluginHost::IPlugin, public PluginHost::IWeb, public PluginHost::JSONRPC {
   public:
     PluginName()
      : _skipURL(0)
      , _service(nullptr)
      , _subSystem(nullptr)
     {
      RegisterAll();
     }

     virtual ~PluginName()
     {
      UnregisterAll();
     }
   }
   ---------------------------------------
   ---------------------------------------
  }
}
eg: PluginTemplate.h
for more information refer PluginTemplate.h
<PluginName>.cpp
This class does contain all the definitions for the methods declared in the PluginTemplate.h and those definitions should be defined inside the below namespace.
The plugin should register using service registration MACRO as declared below :
  namespace WPEFramework {
   namespace Plugin {
    SERVICE_REGISTRATION(Plugin, 1, 0);
    ---------------------------------------
    ---------------------------------------
    ---------------------------------------
   }
  }
To initialize and deinitialize or activate or deactivate handler for the plugin services :
const string PluginTemplate::Initialize(PluginHost::IShell* /* service */)
	{
	//shared pointer initialized
	//initialize external library
        LOGINFO();
        return (string());
        }
void PluginTemplate::Deinitialize(PluginHost::IShell* /* service */)
        {
 	//shared pointer deinitialized
	//deinitialize external library
        LOGINFO();
        }
eg:
namespace WPEFramework {
    namespace Plugin {
         SERVICE_REGISTRATION(Plugin, 1, 0);

          //registration
          //All the methods declared in Plugin.h should be registered here

          //initialize and deinitialize the handlers for the plug-in service

          //All the methods declared in Plugin.h should be defined here

    }
}
CMakeLists.txt
Using the CMake utility this file contains the task needed to be done to make a plug-in. Also contains packages, libraries needed to compile, its path, and other plugin-in configuration option.
This file contains a set of directives and instructions describing the project's source files and targets (executable, library, or both).
set(PLUGIN_NAME PluginTemplate)                          # to set a environment variable set(<variable> <value>)
set(MODULE_NAME ${NAMESPACE}${PLUGIN_NAME})
find_package(${NAMESPACE}Plugins REQUIRED)               # to Finds and loads settings from an external project.

#Adds a library target called <name> to be built from the source files listed in the command invocation. The <name> corresponds to the logical target name and must be globally unique within a project.
add_library(${MODULE_NAME} SHARED
        PluginTemplate.cpp
        Module.cpp
        ../helpers/utils.cpp)
Code flow
- Enable or disable the plug-in flag in the recipe file.
- Add this flag into the main CMakeLists.txt file present in the rdkservice.
- It will invoke CMakeLists file present in the <plugin name>/ (eg: PluginTemplate/CMakeLists.txt).
- When this file started to execute it finds dependencies, packages. it compiled and generate .so file.
To add plugin in rdkservices CMakeLists.txt
In rdkservices directory open CmakeLists.txt :
$ vi CmakeLists.txt
add these lines ( by default its disabled ) :
    if(PLUGIN_PLUGINTEMPLATE)
    	add_subdirectory(PluginTemplate)
    endif()
it will invoke your CMakeLists.txt file present in your plugin directory.
Compilation and Install
To include plugintemplate plugin in build sequence, Open rdkservices recipe file and add below line. By default; its configured to be disabled while building rdkservices.
$ vi meta-rdk-video/recipes-extended/rdkservices/rdkservices_git.bb
PACKAGECONFIG[plugintemplate] = " -DPLUGIN_PLUGINTEMPLATE=OFF,-DPLUGIN_PLUGINTEMPLATE=ON, "
To include the plugin in rdkservises build; add the same in packageconfig in rdkservices recipe:
PACKAGECONFIG += " plugintemplate"
to compile and install in build directory :
$ bitbake -c compile -f rdkservices
once build complete copy .json, .so file into raspberry Pi.
Copy the Plugin.json (eg: PluginTemplate.json) file to “/etc/WPEFramework/plugins” in raspberry Pi
Copy the plugin library (libWPEFrameworkPluginTemplate.so) to “/usr/lib/wpeframework/plugins”
so that the controller plugin identify it and list it in the WebUI ( controller UI ).
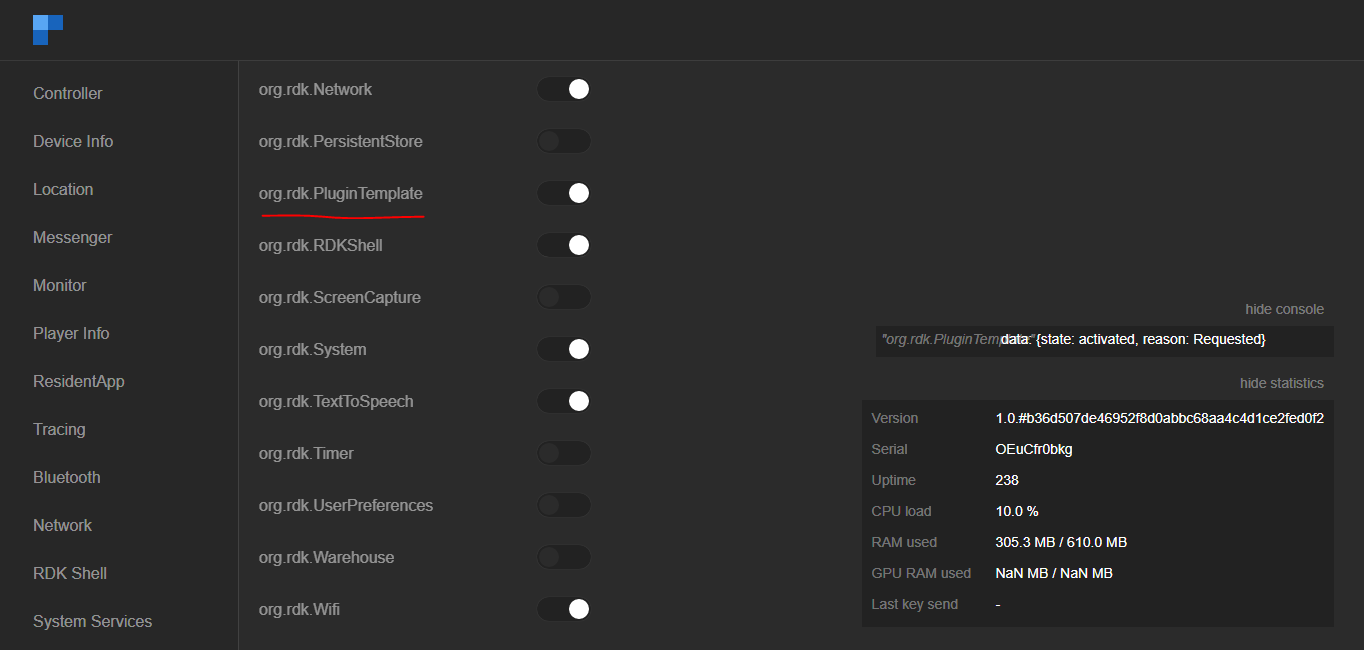
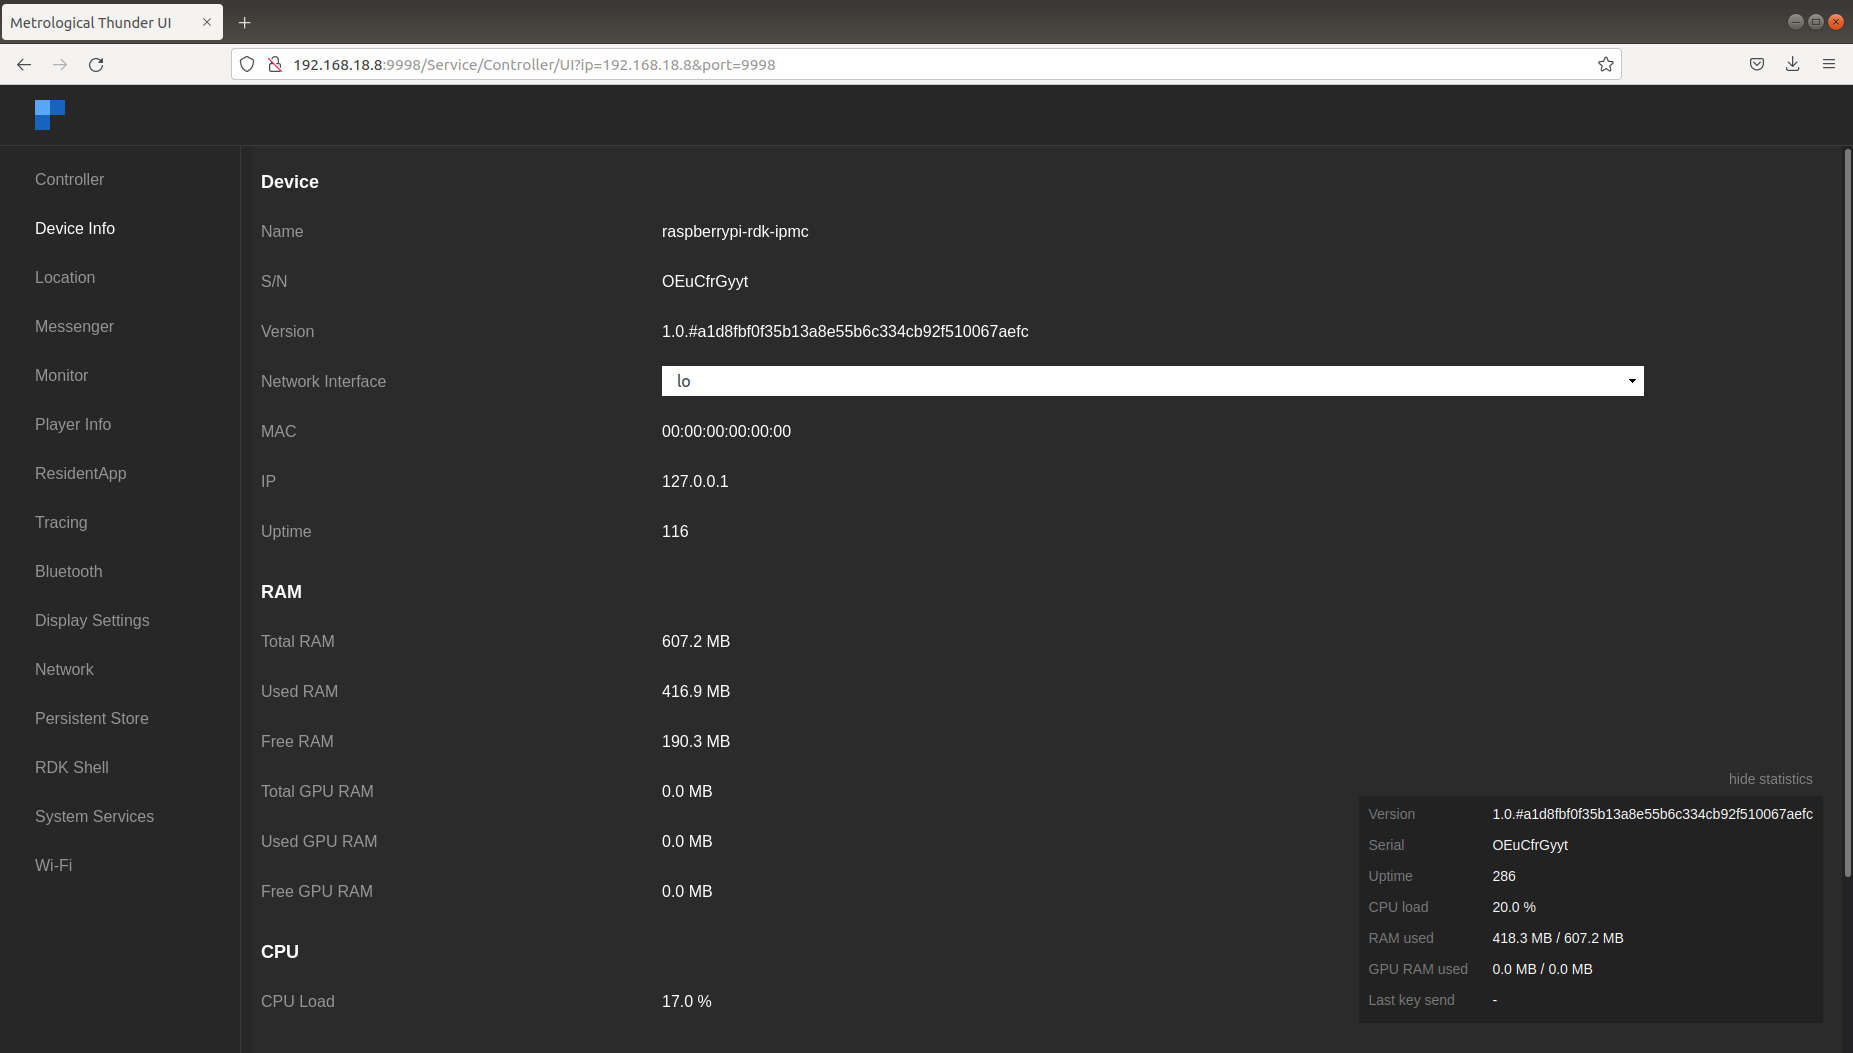
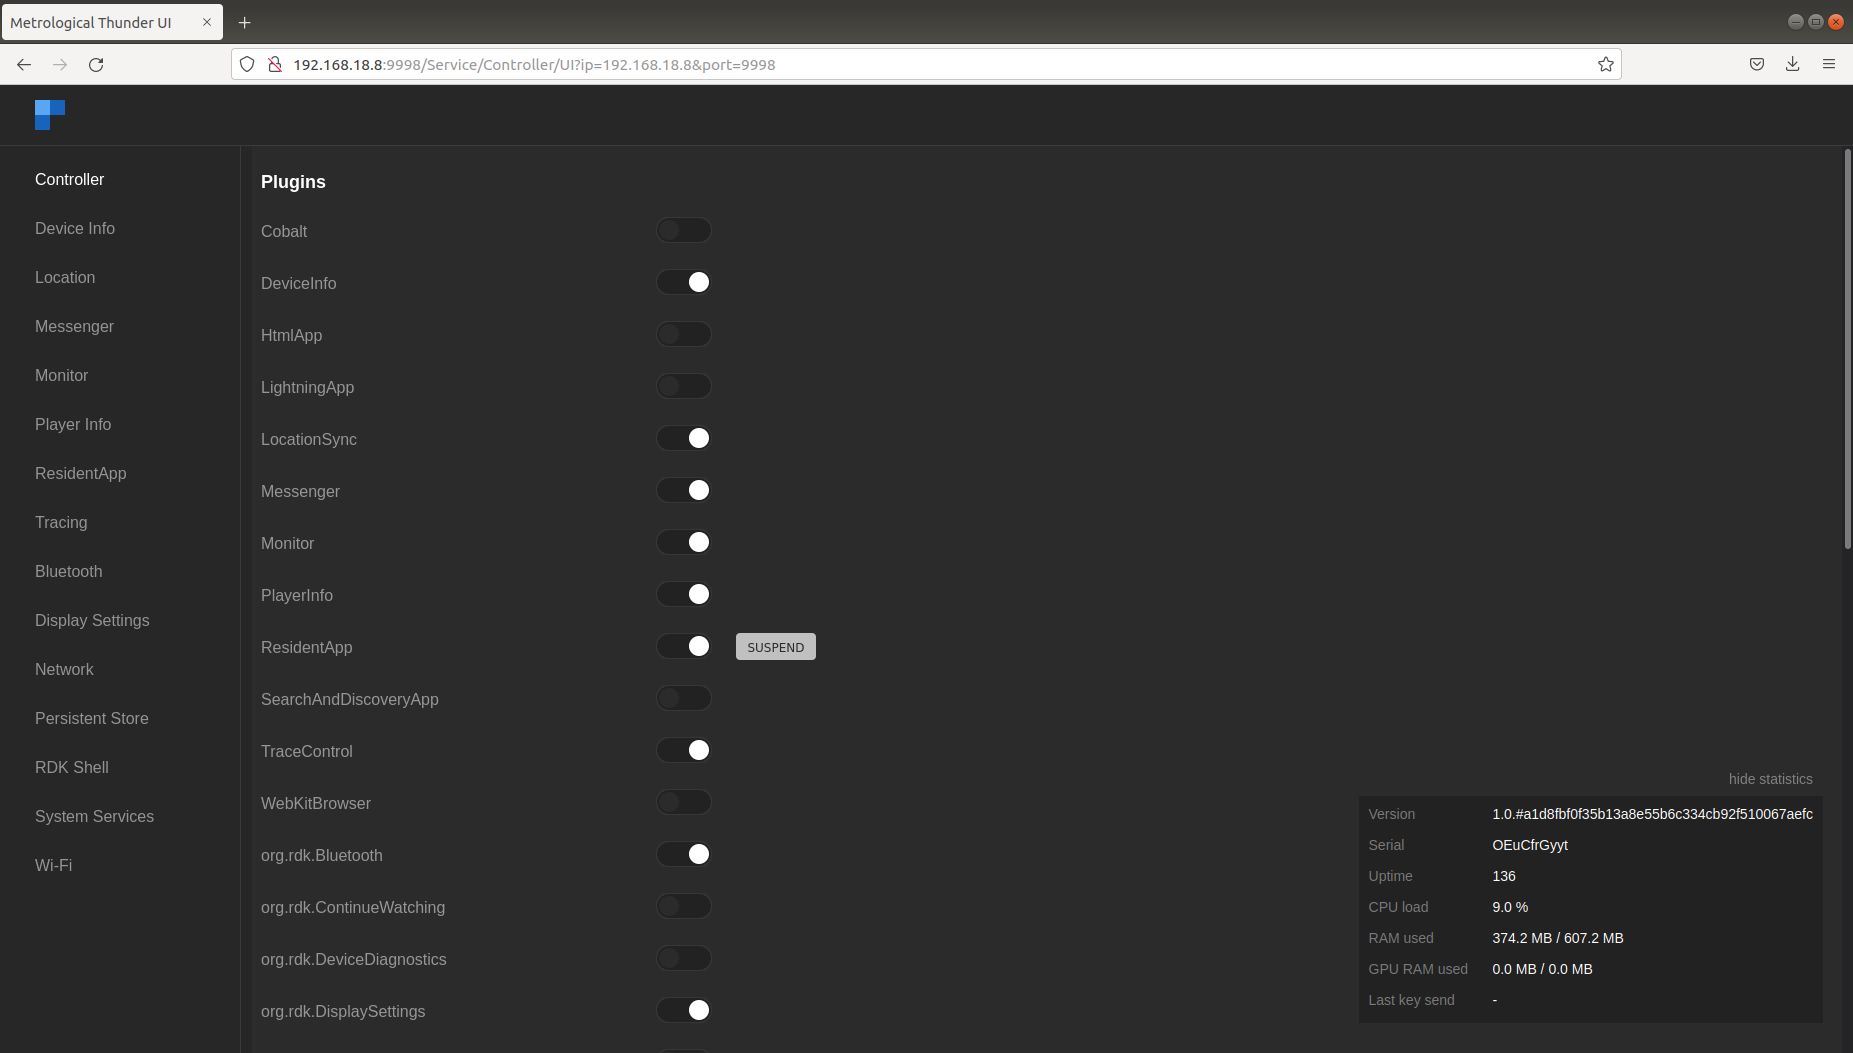
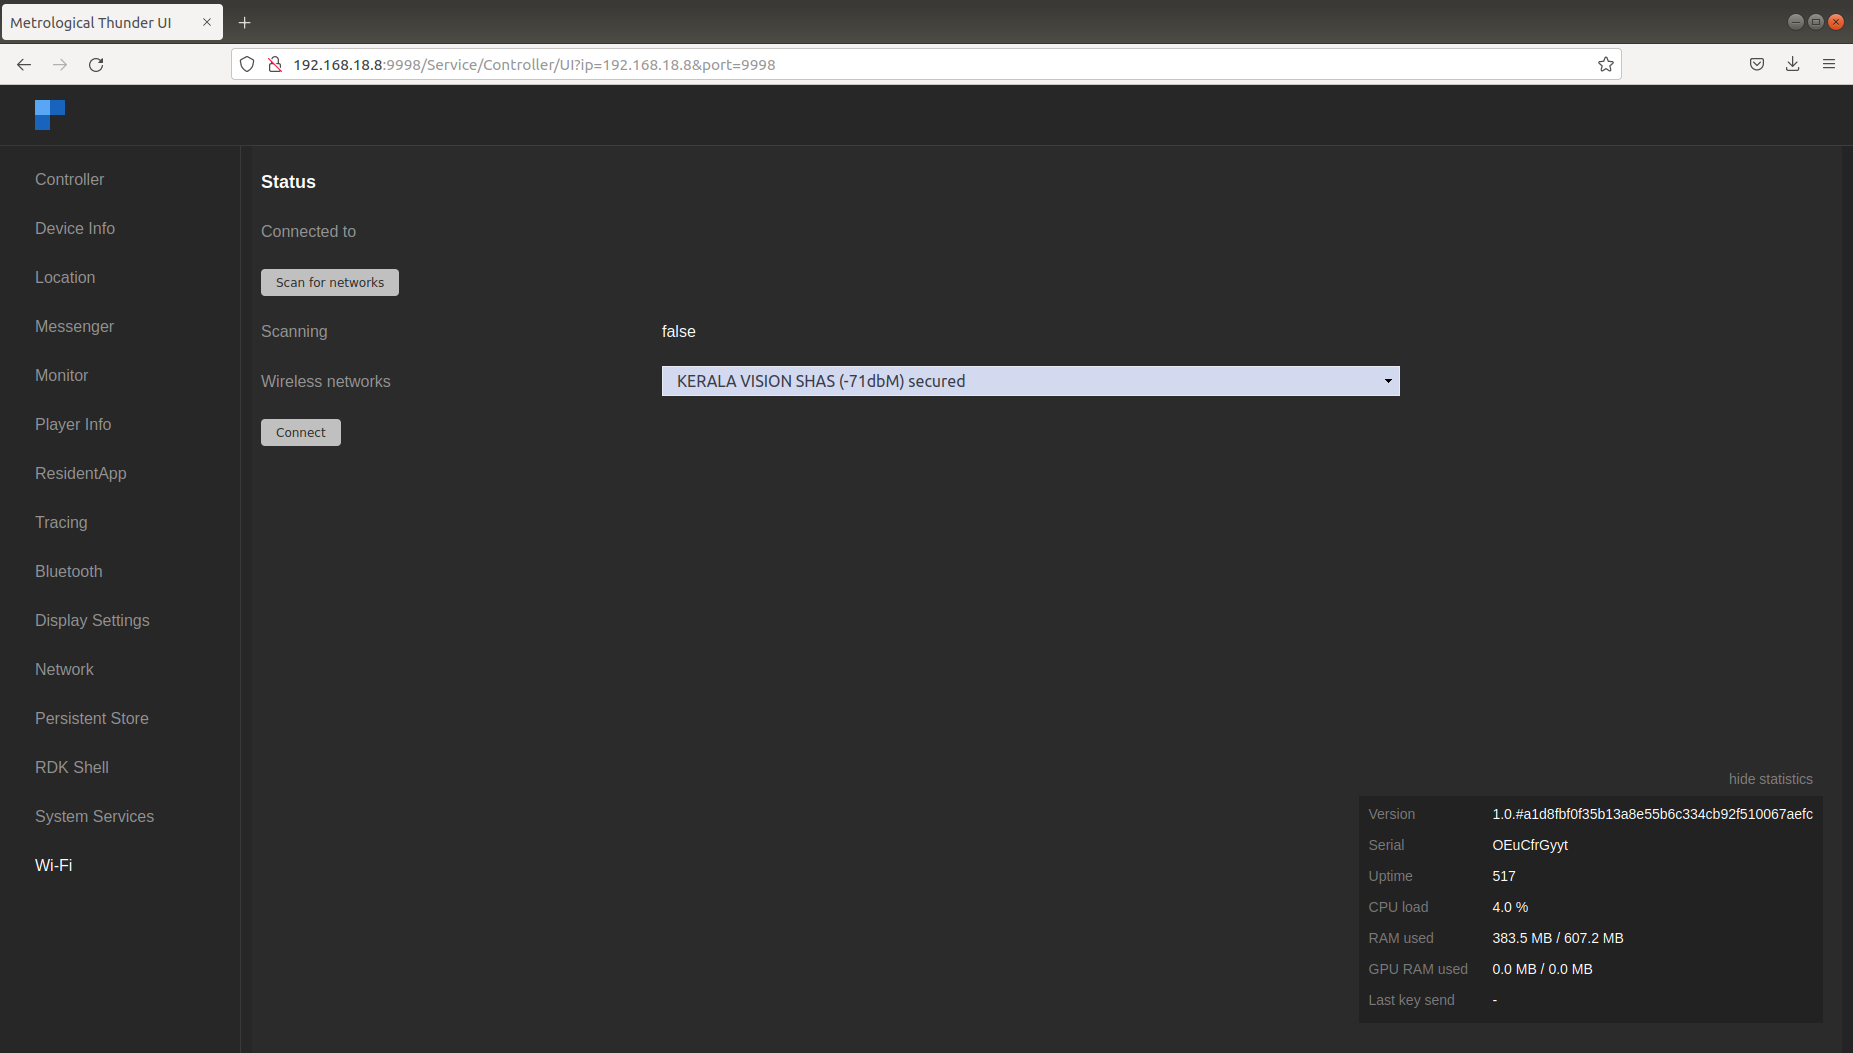
Controller UI
Controller UI is a web UI that can be launched from a host machine's (machine under the same network where Rpi resides) browser. This UI can be loaded with the Rpi box's IP address with Thunder's port number configured (here). RDKServices uses 9998 as port.
URL: http://<IP address of the Target device>:9998
Defalut page of Controller UI shall be loaded on web-browser and that will be of Controller tab. Controller tab allows all available plugins to be enabled or disabled.
PluginTemplate JSON RPC command
Each RDK Service can be validated through JSON RPC Commands through HTTP. It has a request and response in JSN format.
Note: the argument is case sensitive.
"callsign":"org.rdk.PluginTemplate"
| Function | Request | Response | Remarks |
|---|
| Activate controller | curl http://127.0.0.1:9998/jsonrpc --header "Content-Type: application/json" --request POST --data '{ "jsonrpc":"2.0", "id":3, "method":"Controller.1.activate", "params":{"callsign":"org.rdk.PluginTemplate"} }'
| {"jsonrpc":"2.0","id":3,"result":{"success":true}} |
|
| Deactivate controller | curl http://127.0.0.1:9998/jsonrpc --header "Content-Type: application/json" --request POST --data '{ "jsonrpc":"2.0", "id":3, "method":"Controller.1.deactivate", "params":{"callsign":"org.rdk.PluginTemplate"} }'
| {"jsonrpc":"2.0","id":3,"result":{"success":true}} |
|
| getPluginStatus | curl http://127.0.0.1:9998/jsonrpc --header "Content-Type: application/json" --request POST --data '{"jsonrpc":"2.0", "id":3, "method":"org.rdk.PluginTemplate.1.getPluginTemplateStatus"}'
| {"jsonrpc":"2.0","id":3,"result":{"connection status from plugin":["CONNECTED"],"success":true}} |
|
| getPluginTemplateList | curl http://127.0.0.1:9998/jsonrpc --header "Content-Type: application/json" --request POST --data '{"jsonrpc":"2.0", "id":3, "method":"org.rdk.PluginTemplate.1.getPluginTemplateList"}'
| {"jsonrpc":"2.0","id":3,"result":{"Supported plugin list":["plug-A","plug-B","plug-C","plug-D","plug-E"],"success":true}} |
|
| getPluginTemplateInfo | curl http://127.0.0.1:9998/jsonrpc --header "Content-Type: application/json" --request POST --data '{"jsonrpc":"2.0", "id":3, "method":"org.rdk.PluginTemplate.1.getPluginTemplateInfo", "params":{"plugin_name":"plug-A"}}'
| {"jsonrpc":"2.0","id":3,"result":{"supportedTvResolutions":["xyz-plugin","no:430HT5"],"success":true}}root@raspberrypi-rdk-mc:~# |
|
| event API when hdmi connected | curl http://127.0.0.1:9998/jsonrpc --header "Content-Type: application/json" --request POST --data '{"jsonrpc":"2.0", "id":3, "method":"org.rdk.PluginTemplate.1.getConnectedVideoDisplays"}'
| {"jsonrpc":"2.0","id":3,"result":{"connectedVideoDisplays":["HDMI0"],"success":true}}root@raspberrypi-rdk-mc:~# |
|
| event API when hdmi not connected | curl http://127.0.0.1:9998/jsonrpc --header "Content-Type: application/json" --request POST --data '{"jsonrpc":"2.0", "id":3, "method":"org.rdk.PluginTemplate.1.getConnectedVideoDisplays"}'
| {"jsonrpc":"2.0","id":3,"result":{"connectedVideoDisplays":[],"success":true}}root@raspberrypi-rdk-mc:~# |
|
root@raspberrypi-rdk-mc:~# curl http://127.0.0.1:9998/jsonrpc --header "Content-Type: application/json" --request POST --data '{ "jsonrpc":"2.0", "id":3, "method":"Controller.1.activate", "params":{"callsign":"org.rdk.PluginTemplate"} }'
{"jsonrpc":"2.0","id":3,"result":{"success":true}}root@raspberrypi-rdk-mc:~#
root@raspberrypi-rdk-mc:~#
root@raspberrypi-rdk-mc:~# curl http://127.0.0.1:9998/jsonrpc --header "Content-Type: application/json" --request POST --data '{ "jsonrpc":"2.0", "id":3, "method":"Controller.1.deactivate", "params":{"callsign":"org.rdk.PluginTemplate"} }'
{"jsonrpc":"2.0","id":3,"result":{"success":true}}root@raspberrypi-rdk-mc:~#
root@raspberrypi-rdk-mc:~#
root@raspberrypi-rdk-mc:~# curl http://127.0.0.1:9998/jsonrpc --header "Content-Type: application/json" --request POST --data '{"jsonrpc":"2.0", "id":3, "method":"org.rdk.PluginTemplate.1.getPluginTemplateStatus"}'
{"jsonrpc":"2.0","id":3,"result":{"connection status from plugin":["CONNECTED"],"success":true}}root@raspberrypi-rdk-mc:~#
root@raspberrypi-rdk-mc:~#
root@raspberrypi-rdk-mc:~# curl http://127.0.0.1:9998/jsonrpc --header "Content-Type: application/json" --request POST --data '{"jsonrpc":"2.0", "id":3, "method":"org.rdk.PluginTemplate.1.getPluginTemplateList"}'
{"jsonrpc":"2.0","id":3,"result":{"Supported plugin list":["plug-A","plug-B","plug-C","plug-D","plug-E"],"success":true}}root@raspberrypi-rdk-mc:~#
root@raspberrypi-rdk-mc:~#
root@raspberrypi-rdk-mc:~# curl http://127.0.0.1:9998/jsonrpc --header "Content-Type: application/json" --request POST --data '{"jsonrpc":"2.0", "id":3, "method":"org.rdk.PluginTemplate.1.getPluginTemplateInfo", "params":{"plugin_name":"plug-A"}}'
{"jsonrpc":"2.0","id":3,"result":{"supportedTvResolutions":["xyz-plugin","no:430HT5"],"success":true}}root@raspberrypi-rdk-mc:~#
root@raspberrypi-rdk-mc:~#
root@raspberrypi-rdk-mc:~# curl http://127.0.0.1:9998/jsonrpc --header "Content-Type: application/json" --request POST --data '{"jsonrpc":"2.0", "id":3, "method":"org.rdk.PluginTemplate.1.getConnectedVideoDisplays"}'
{"jsonrpc":"2.0","id":3,"result":{"connectedVideoDisplays":["HDMI0"],"success":true}}root@raspberrypi-rdk-mc:~#
root@raspberrypi-rdk-mc:~#
root@raspberrypi-rdk-mc:~# curl http://127.0.0.1:9998/jsonrpc --header "Content-Type: application/json" --request POST --data '{"jsonrpc":"2.0", "id":3, "method":"org.rdk.PluginTemplate.1.getConnectedVideoDisplays"}'
{"jsonrpc":"2.0","id":3,"result":{"connectedVideoDisplays":[],"success":true}}root@raspberrypi-rdk-mc:~#
root@raspberrypi-rdk-mc:~#
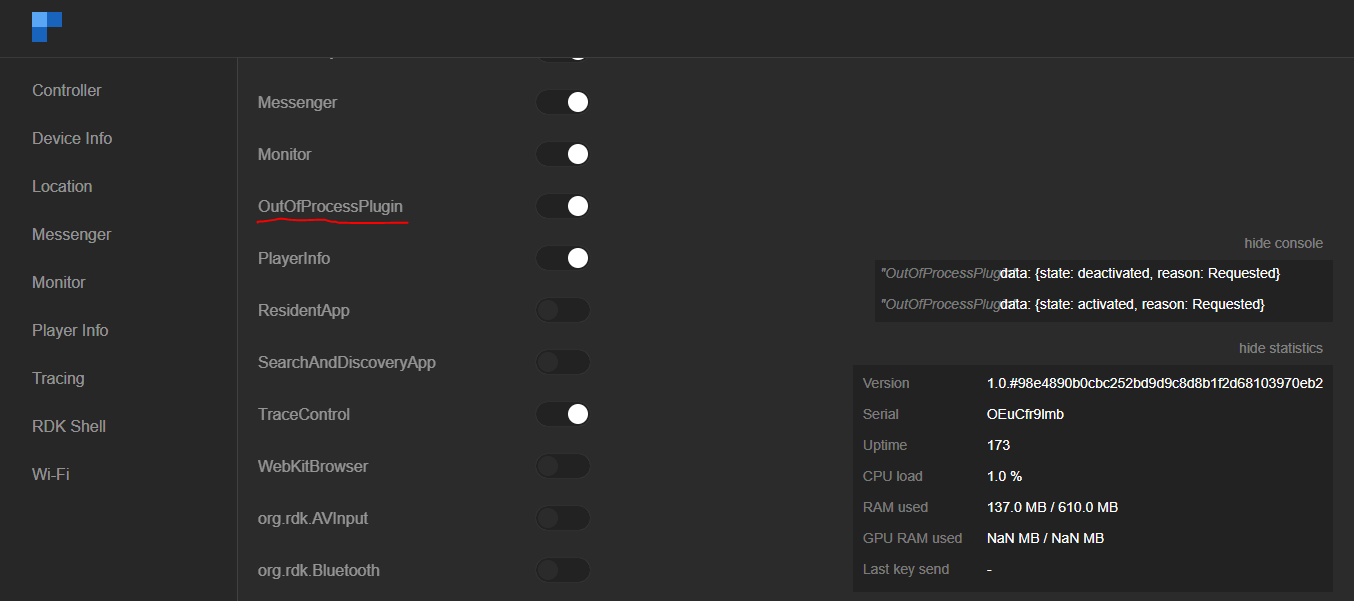
OUT OF PROCESS Plugin
Here the plugin is developed as out of process, which runs as a separate thread from WPEFramework. Services each other or a particular service can be COMRPC ( for communication between plugins) or JSONRPC (for external communication). it has a web-based controller UI.
Inside PluginName directory
OutOfProcessPlugin/
├── CMakeLists.txt
├── OutOfProcessPlugin.config
├── OutOfProcessPlugin.cpp
├── OutOfProcessPlugin.h
├── OutOfProcessPluginJsonRpc.cpp
├── OutOfProcessPlugin.json
├── Module.cpp
├── Module.h
├── OutOfProcessPlugin.md
<PluginName>.json
This file contains the plugin's information like schema, information and interface json file. Here the outofprocess will be true, which indicates that the plugin run as a seperate process.
eg: OutOfProcessPlugin.json
{

 "locator":"libWPEFrameworkOutOfProcessPlugin.so",

 "classname":"OutOfProcessPlugin",

 "precondition":[

  "Platform"

 ],

 "autostart":true,

 "configuration":{

  "root":{

   "outofprocess":true

  }

 }

}
<PluginName>.config
.config files are files used to configure the parameters and initial settings for some computer programs.
Here outofprocess is set to true, to make plugin as out of process plugin.
set (autostart true)

set (preconditions Platform)

map()

    kv(outofprocess true)

end()

ans(rootobject)
<PluginName>.h
Declare the plugin class in this which should contain all the structures, variables, and methods which are needed for plugin implementation.
 namespace WPEFramework {

  namespace Plugin {

   class PluginName : public PluginHost::IPlugin, public PluginHost::IWeb, public PluginHost::JSONRPC {

   public:

     PluginName()

      : _skipURL(0)

      , _service(nullptr)

      , _subSystem(nullptr)

     {

      RegisterAll();

     }

     virtual ~PluginName()

     {

      UnregisterAll();

     }

   }

   ---------------------------------------

   ---------------------------------------

  }

}
<PluginName>.cpp
This class does contain all the definitions for the methods declared in the Plugin.h and those definitions should be defined inside the below namespace.
The plugin should register using service registration MACRO as declared below :
 namespace WPEFramework {

   namespace Plugin {

    SERVICE_REGISTRATION(Plugin, 1, 0);

    ---------------------------------------

    ---------------------------------------

    ---------------------------------------

   }

  }
To initialize and deinitialize or activate or deactivate handler for the plugin services :
const string OutOfProcessPlugin::Initialize(PluginHost::IShell* /* service */)

    {

    //shared pointer initialized

    //initialize external library

        LOGINFO();

        return (string());

        }

void OutOfProcessPlugin::Deinitialize(PluginHost::IShell* /* service */)

        {

    //shared pointer deinitialized

    //deinitialize external library

        LOGINFO();

        }
Process handler plugin services to receive request and sent responses based on the services :
Core::ProxyType<Web::Response> OutOfProcessPlugin::Process(const Web::Request &request)

{

  Core::ProxyType<Web::Response> result(PluginHost::IFactories::Instance().Response());


  //Handle the service request and send the responses

  -----------------

  -----------------

  return result;

}
eg: refer OutOfProcessPlugin.cpp
<PluginNameJsonRpc>.cpp>
The PluginNameJsonRpc file contains the registration for methods and properties which are declared in PluginName.h
namespace WPEFramework {

    namespace Plugin {

          //registration

         void OutOfProcessPlugin::RegisterAll()

          {

               // methods and properties declared in Plugin.h are registered here

                  -------------------

                  -------------------

          }

         void OutOfProcessPlugin::UnregisterAll()

         {

         }

    }

}
CMakeLists.txt
Using the CMake utility this file contains the task needed to be done to make a plug-in. Also contains packages, libraries needed to compile, its path, and other plugin-in configuration option.
This file contains a set of directives and instructions describing the project's source files and targets (executable, library, or both).
set(PLUGIN_NAME OutOfProcessPlugin)                          # to set a environment variable set(<variable> <value>)

set(MODULE_NAME ${NAMESPACE}${PLUGIN_NAME})

find_package(${NAMESPACE}Plugins REQUIRED)               # to Finds and loads settings from an external project.


#Adds a library target called <name> to be built from the source files listed in the command invocation. The <name> corresponds to the logical target name and must be globally unique within a project.

add_library(${MODULE_NAME} SHARED

    OutOfProcessPlugin.cpp

    OutOfProcessPluginJsonRpc.cpp

    Module.cpp)
The Code flow, Compilation and Install steps are similar to the PluginTemplate.
The last step,
Copy the Plugin.json (eg: OutOfProcessPlugin .json) file to “/etc/WPEFramework/plugins” in Raspberry Pi
Copy the plugin library (libWPEFrameworkOutOfProcessPlugin.so) to “/usr/lib/wpeframework/plugins”
so that the controller plugin identify it and list it in the WebUI ( controller UI ).
Controller UI
Controller UI is a web UI that can be launched from a host machine's (machine under the same network where Rpi resides) browser.
URL: http://<IP address of the Target device>:9998
OutOfProcessPlugin JSON RPC command
Each RDK Service can be validated through JSON RPC Commands through HTTP. It has a request and response in JSON format.
Note: the argument is case sensitive.
"callsign":"OutOfProcessPlugin"
| Function | Request | Response | Remarks |
|---|
| Activate controller | curl http://127.0.0.1:9998/jsonrpc --header "Content-Type: application/json" --request POST --data '{ "jsonrpc":"2.0", "id":3, "method":"Controller.1.activate", "params":{"callsign":"OutOfProcessPlugin"} }'
| {"jsonrpc":"2.0","id":3,"result":{"success":true}} |
|
| Deactivate controller | curl http://127.0.0.1:9998/jsonrpc --header "Content-Type: application/json" --request POST --data '{ "jsonrpc":"2.0", "id":3, "method":"Controller.1.deactivate", "params":{"callsign":"OutOfProcessPlugin"} }'
| {"jsonrpc":"2.0","id":3,"result":{"success":true}} |
|
| Get fps | curl http://127.0.0.1:9998/jsonrpc --header "Content-Type: application/json" --request POST --data '{"jsonrpc":"2.0", "id":3, "method":"OutOfProcessPlugin.1.fps"}'
| {"jsonrpc":"2.0","id":3,"result":32} |
|
| Get plugin id | curl http://127.0.0.1:9998/jsonrpc --header "Content-Type: application/json" --request POST --data '{"jsonrpc":"2.0", "id":3, "method":"OutOfProcessPlugin.1.getpluginid"}'
| {"jsonrpc":"2.0","id":3,"result":6501} |
|


1 Comment
Muthukumar
Is this valid url for amlogic?
repo init -u https://code.rdkcentral.com/r/rdk/soc/amlogic/aml-manifests -b rdk-next -m aml_ipstb.xmlError while executing.fatal: unable to access 'https://code.rdkcentral.com/r/rdk/soc/amlogic/aml-manifests/': The requested URL returned error: 403