RDK Resources
[*RDK Preferred*]
Code Management Facility
RDK Forums
[RDK Conferences]
RDK Support
Archives
Papers & Presentations Archive![]()
Papers & Presentations Archive![]()
| Table of Contents | ||
|---|---|---|
|
...
New deployment Deployment ready Branch Product Branch has been created for RDK components that the community will push changes to review
With higher& It is with higher standards of test qualification
| Gliffy Diagram | ||||||||
|---|---|---|---|---|---|---|---|---|
|
Developer clones component repository from Gerrit server https://code.rdkcentral.com/r/ into local work space
| Panel |
|---|
| git clone https://user@code.rdkcentral.com/r/component |
• The Developer creates a topic branch in the local work area, makes the necessary changes and then squashes the commits prior to pushing for review.
| Panel |
|---|
| git checkout -b <Branch Name> |
Developer pushes the new change to Gerrit for review, i.e. to refs/for/master
| Panel |
|---|
| git push origin HEAD:refs/for/master |
• When interfacing with Gerrit you push to a virtual branch, /refs/for/<branch>, representing "code review before submission to branch".
• Gerrit will subsequently assign a unique URL for the change, to facilitate access and review via the web UI.
Review notifications and addition of new reviewers.
| draw.io Diagram | ||||||
|---|---|---|---|---|---|---|
|
...
Component owners/reviewers/approvers, defined as specific groups in
...
Gerrit, will be added
...
Post Checkin process
Uses TDK for component validation
Run BlackDuck, copyright scanning and build on code submission.
• If applicable, BlackDuck, copyright scanning and build jobs will be triggered from Jenkins.
• The output of these jobs is integrated into the Gerrit voting process via custom labels and will reflect any 'red flag' in a file that has new code changes, whether introduced in the new Change/Patch Set or not.
Code review and scoring process
Reviewers can comment on and score a given change.
• The default set of rules for enabling a code change for submission requires a Code Review score of +2 and a +1 score on any mandatory Gerrit labels configured for the project.
• The result of the scoring process and validation rules is to enable the Submit action on the Gerrit Web UI and subsequent merge capability to the target branch.
+2 Value approval
‐2 Do not submit.
+1 Enables a submit
‐1 Block a submit
Changeset needs to be reworked
| Panel |
|---|
| git fetch https://user@code.rdkcentral.com/r/component1 refs/changes/02/2/1 && git checkout FETCH_HEAD |
...
| Panel |
|---|
git commit --amend |
A new patch set is now appended to the Gerrit review item, and this will go through the same review process as before.
Gerrit conflict resolution
...
git checkout -b topic_branch
git fetch https://user@code.rdkcentral.com/r/rdk_component_1 refs/changes/58/58/2 && git checkout FETCH_HEAD
git rebase origin/master
[Edit the conflicting file, cleaning up the <<<<, ==== >>> markers surrounding the conflicting lines]
to the review by default. You may request additional feedback by specifically adding reviewers via the Gerrit web GUI.
Product branch is a deployment ready branch is created for RDK components that the community will push changes to review.
Refer to Product Branch for the Components hosted in CMF Gerrit (https://code.rdkcentral.com)
Refer to RDK Central GitHub Components & its Branches hosted in https://github.com/rdkcentral/
Monthly Sprint Branch (rdk-dev-yymm) is a new CMF integration branch, created monthly and baseline off Product Branch. This branch will be hosted per repository in conjunction with Product branch with the goal of incorporating community changes at the earliest juncture.
Once community changes is approved, will be cherry-picked to Monthly Sprint branch (rdk-dev-yymm) and will thus be available prior to the completion of down-streaming to Regression Branch / round-trip process.
Regression branch is the branch used for validation of the contributions. Approved contributions will be down-streamed to Regression Branch for pre-deployment validation using their test process.
Down streamed Community changes, successfully merged to Regression branch, after pre-deployment test validation, the code changes will be cherry-picked to Product Branch.
Code Submission Process - RDK Central Gerrit
Code Submission Process - RDK Central GitHub
...
After this change a new patch set is created for the change.
Submit change
Abandon change.
...
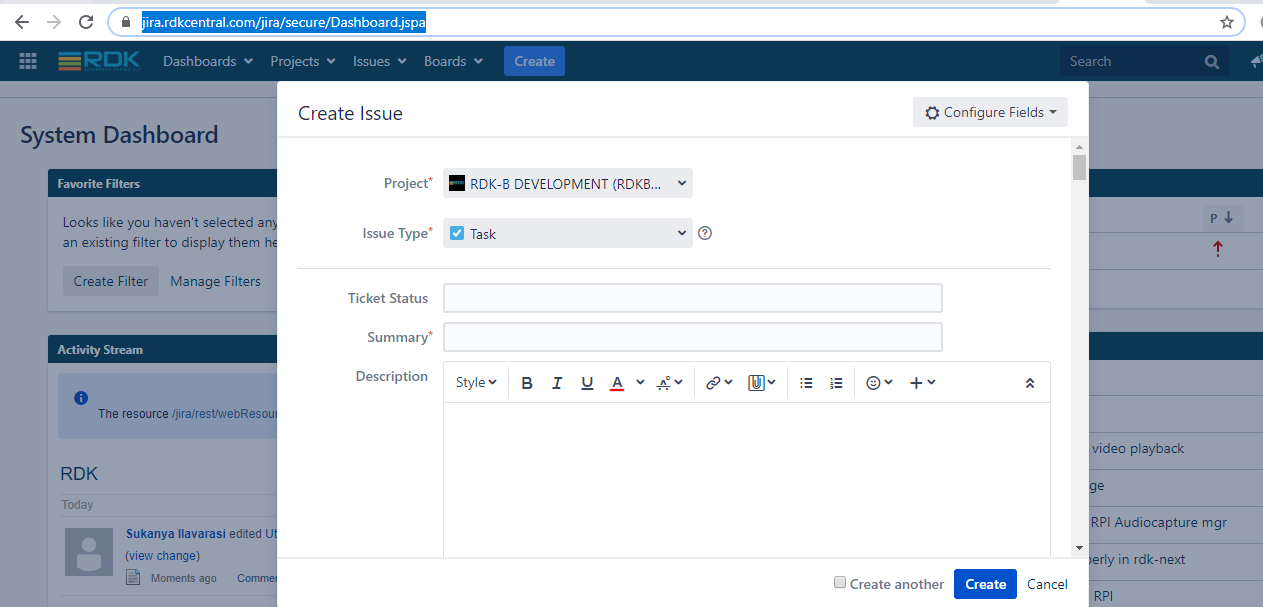
Once the changes got merged in CMF, ticket will gets automatically updated with those information.
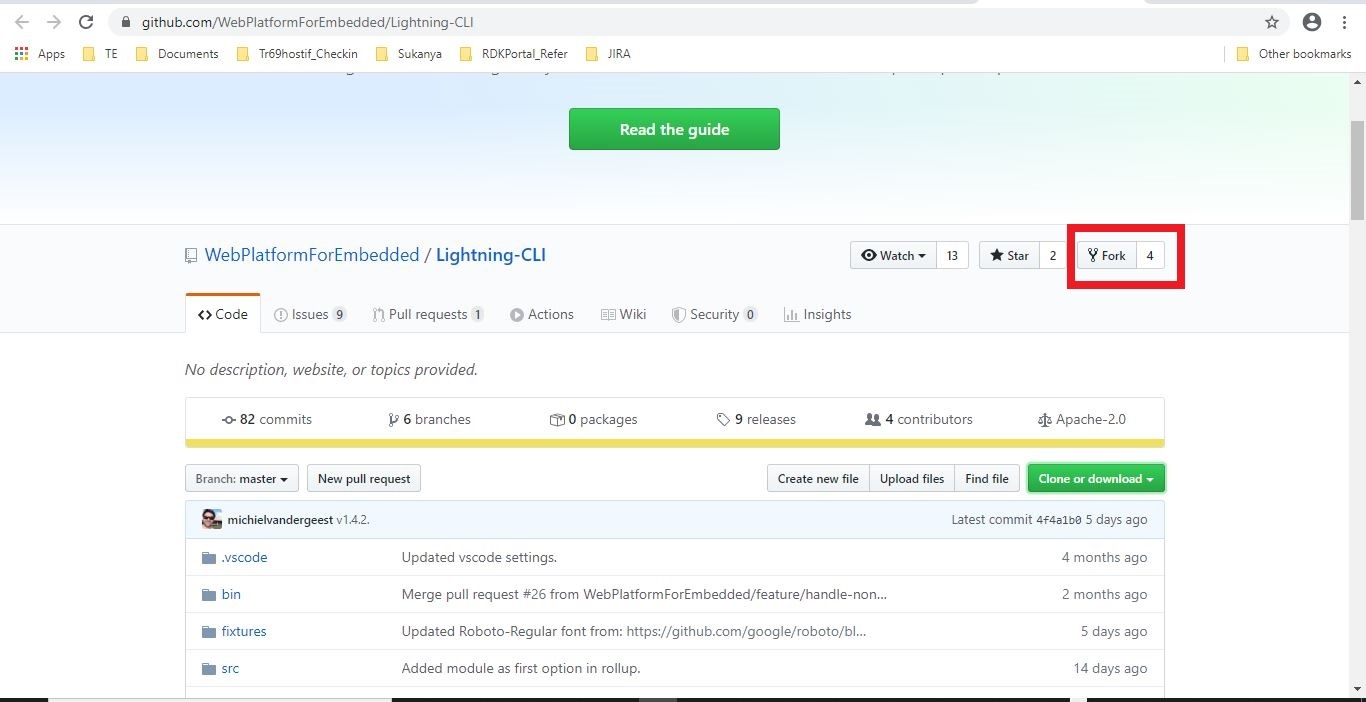
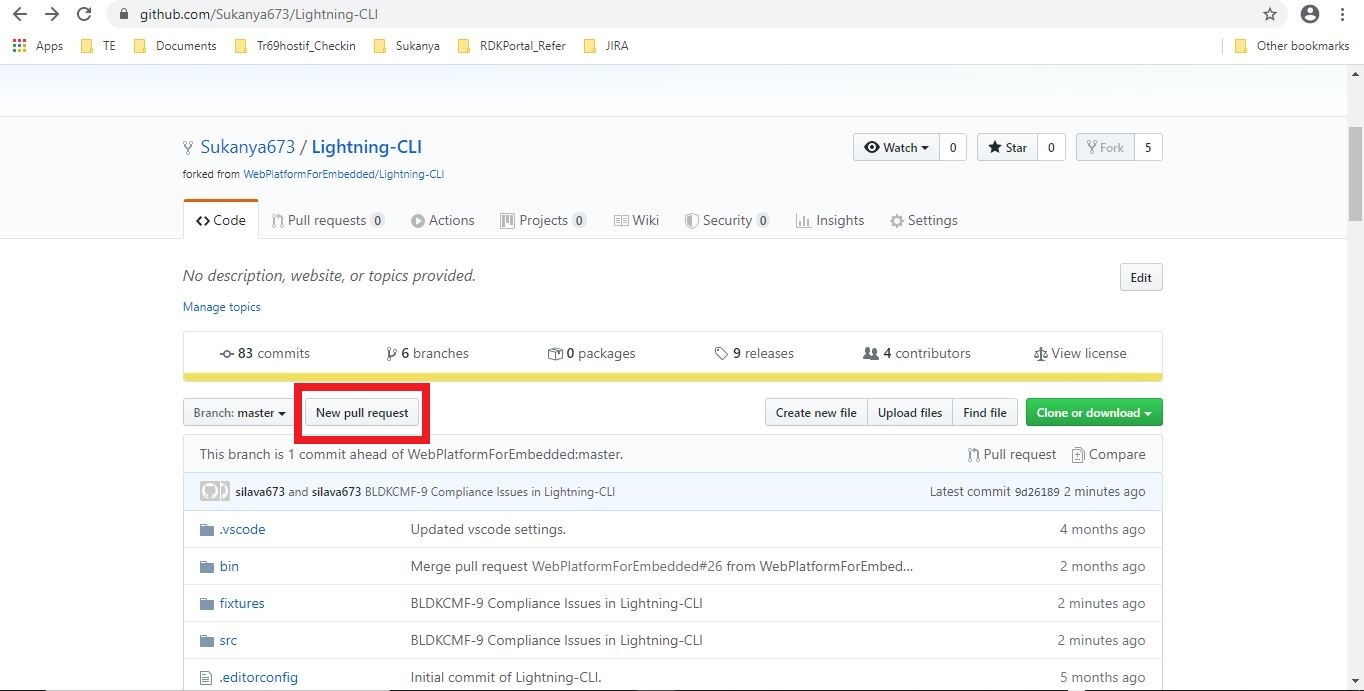
Sign-in to github with your own credentials.
Search for the Component.
Fork the component from github. Forking will create a copy(i.e, your own WORKSPACE) of an original component to work.
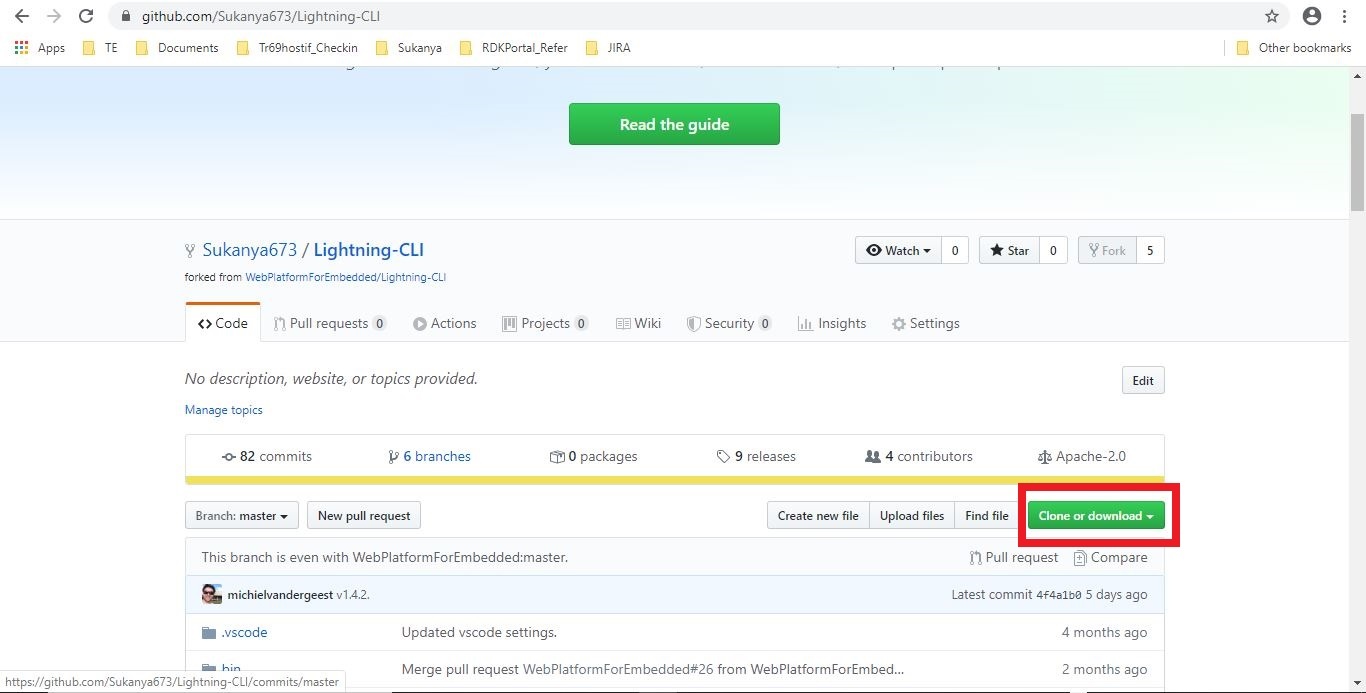
Click on the "Clone or download" button to get the clone url from github. Ensure your github username present in the url to start work with your own workspace.

Make the code changes, and commit the changes
| Code Block |
|---|
$ git add .
$ git status
$ git commit -m "<JIRA_TICKET_ID> <COMMIT_DESCRIPTION>"
$ git push |
Once submitted the changes need to create pull request from github for review. Pull requests let you tell others about changes you've pushed to a branch in a repository on GitHub. Once a pull request is opened, you can discuss and review the potential changes with collaborators and add follow-up commits before your changes are merged into the base branch.
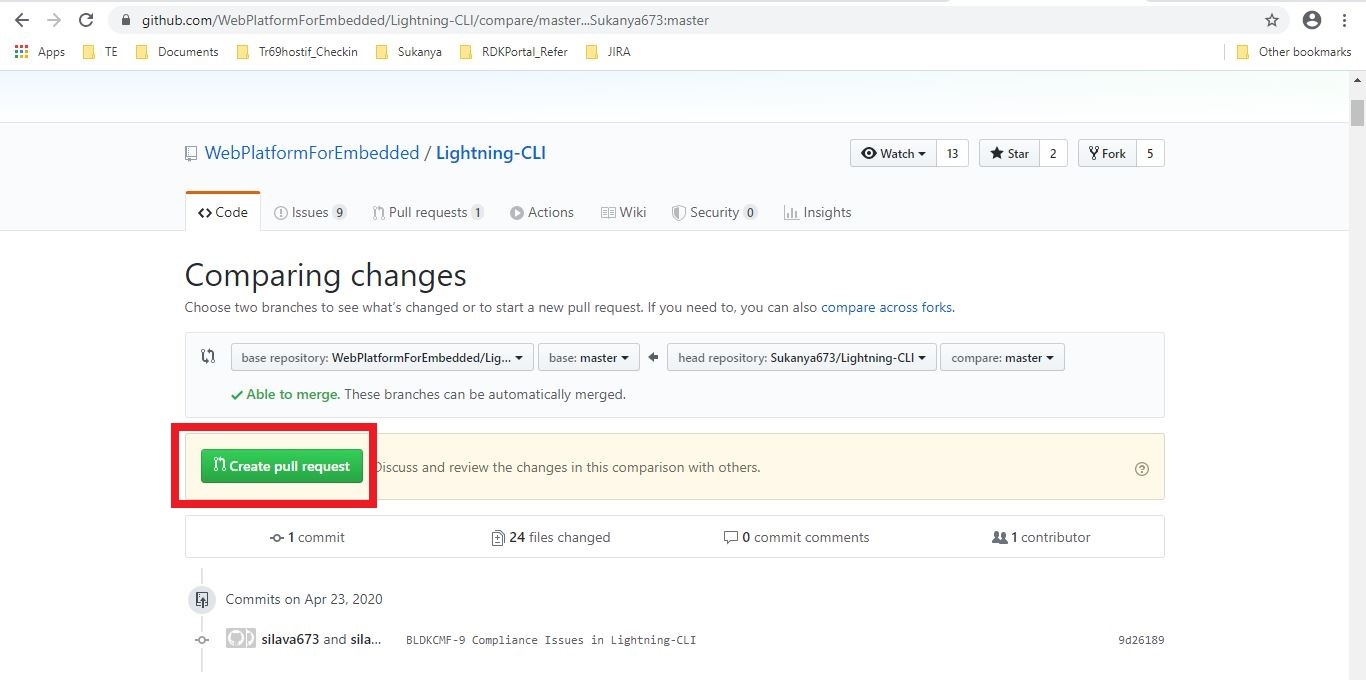
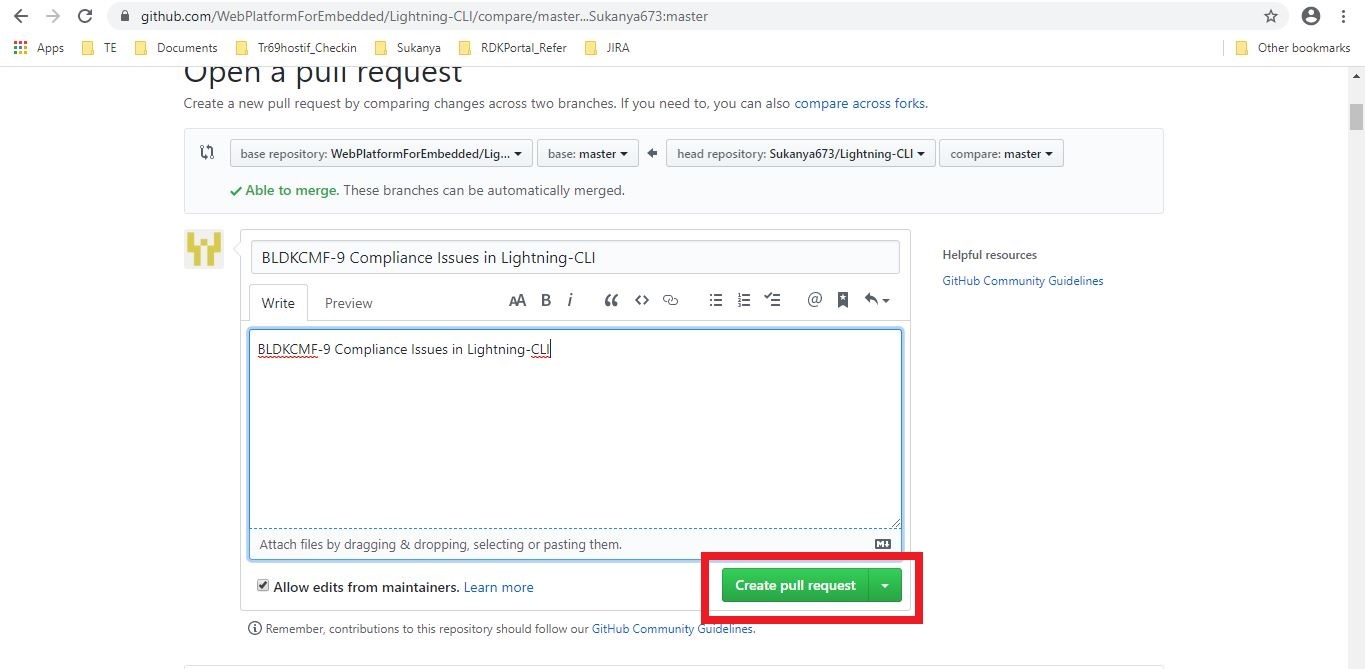
Pull Request page will be created.
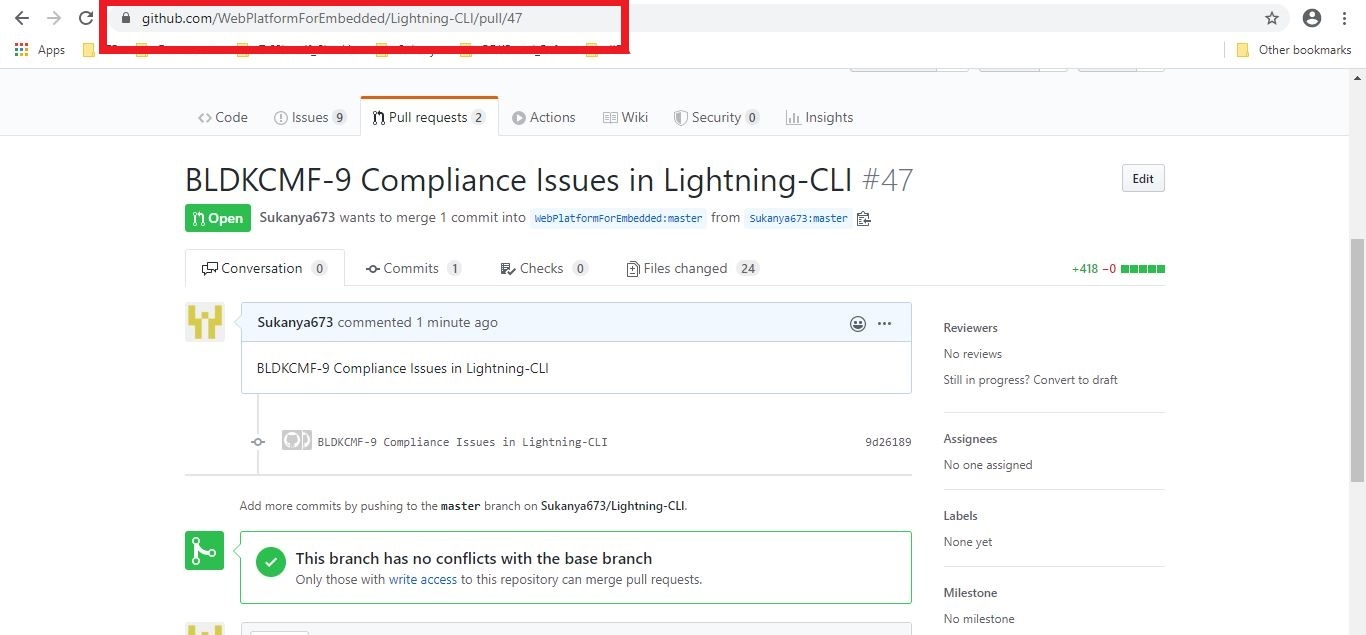
Once you've created a pull request, you can push commits from your workspace to add them to your existing pull request. These commits will appear in chronological order within your pull request and the changes will be visible in the "Files changed" tab.
Other contributors can review your proposed changes, add review comments, contribute to the pull request discussion, and even add commits to the pull request.