RDK Resources
[*RDK Preferred*]
Code Management Facility
RDK Forums
[RDK Conferences]
RDK Support
Archives
Papers & Presentations Archive![]()
Papers & Presentations Archive![]()
Default with out DRM enabled with RDK reference UI:
repo init -u https://code.rdkcentral.com/r/rdk/soc/amlogic/aml-manifests -b rdk-next -m aml_ipstb_google_rdk_starboard.xml |
|---|
Execute below command to check if you have PlayReady access git clone ssh://git@openlinux.amlogic.com/vendor/playready.git Execute below command to check if you have Widevine access git clone ssh://git@openlinux.amlogic.com/yocto/vendor/widevine |
If Widevine and PlayReady access is available, please pass additional arguments as
repo init -u https://code.rdkcentral.com/r/rdk/soc/amlogic/aml-manifests -b rdk-next -m aml_ipstb_google_rdk_starboard.xml |
|---|
Build Steps to build RDKstarboard with Amlogic pre-builds(github) and non-drm :
|
|---|
1) Using Burning tool:
Download AMlogic Burning tool from the link Amlogic Video Accelerator Collaboration).
NOTE: Please reachout to Amlogic to get USB Burning tool if no access to the wiki page.
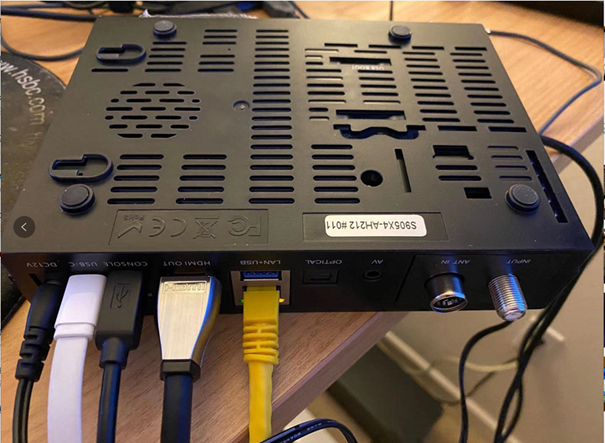
Connect all necessary cables to AH212 box as below. It’s easy to do with place AH212 up-side-down.
From left to right: Power, USB-C, Console, HDMI, Ethernet
USB-C is only using for flash image.
USB-Micro is for Console connection.
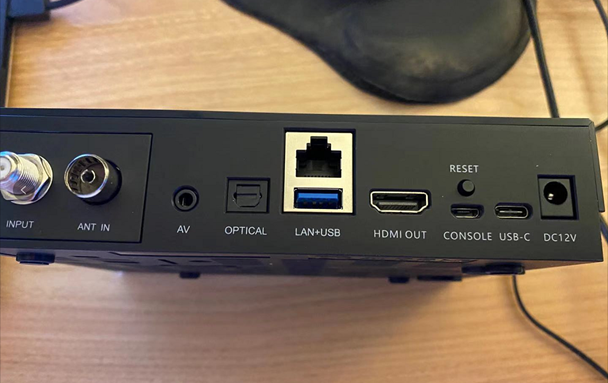
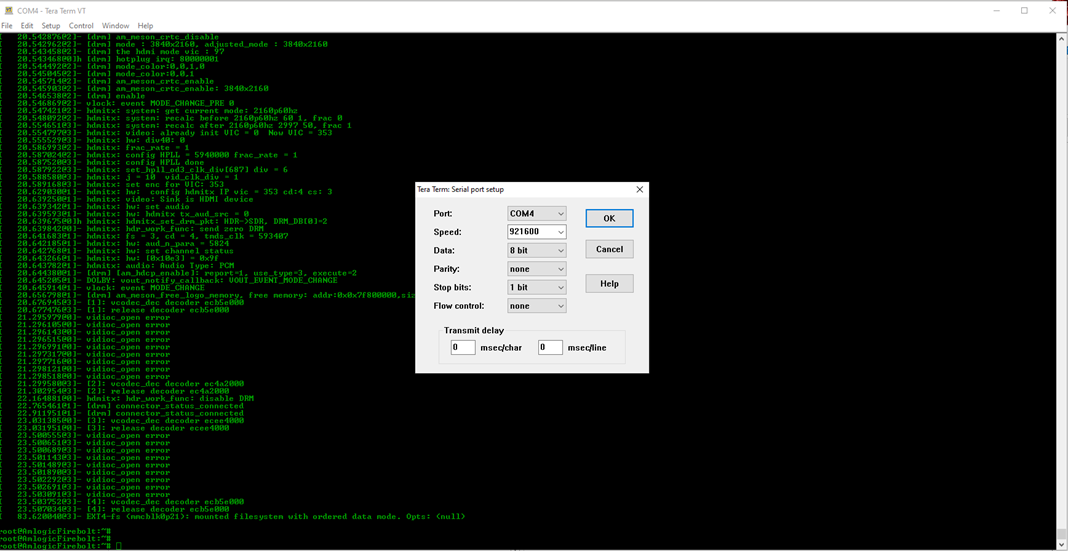
Setup the serial port settings (921600 baud rate 8N1)
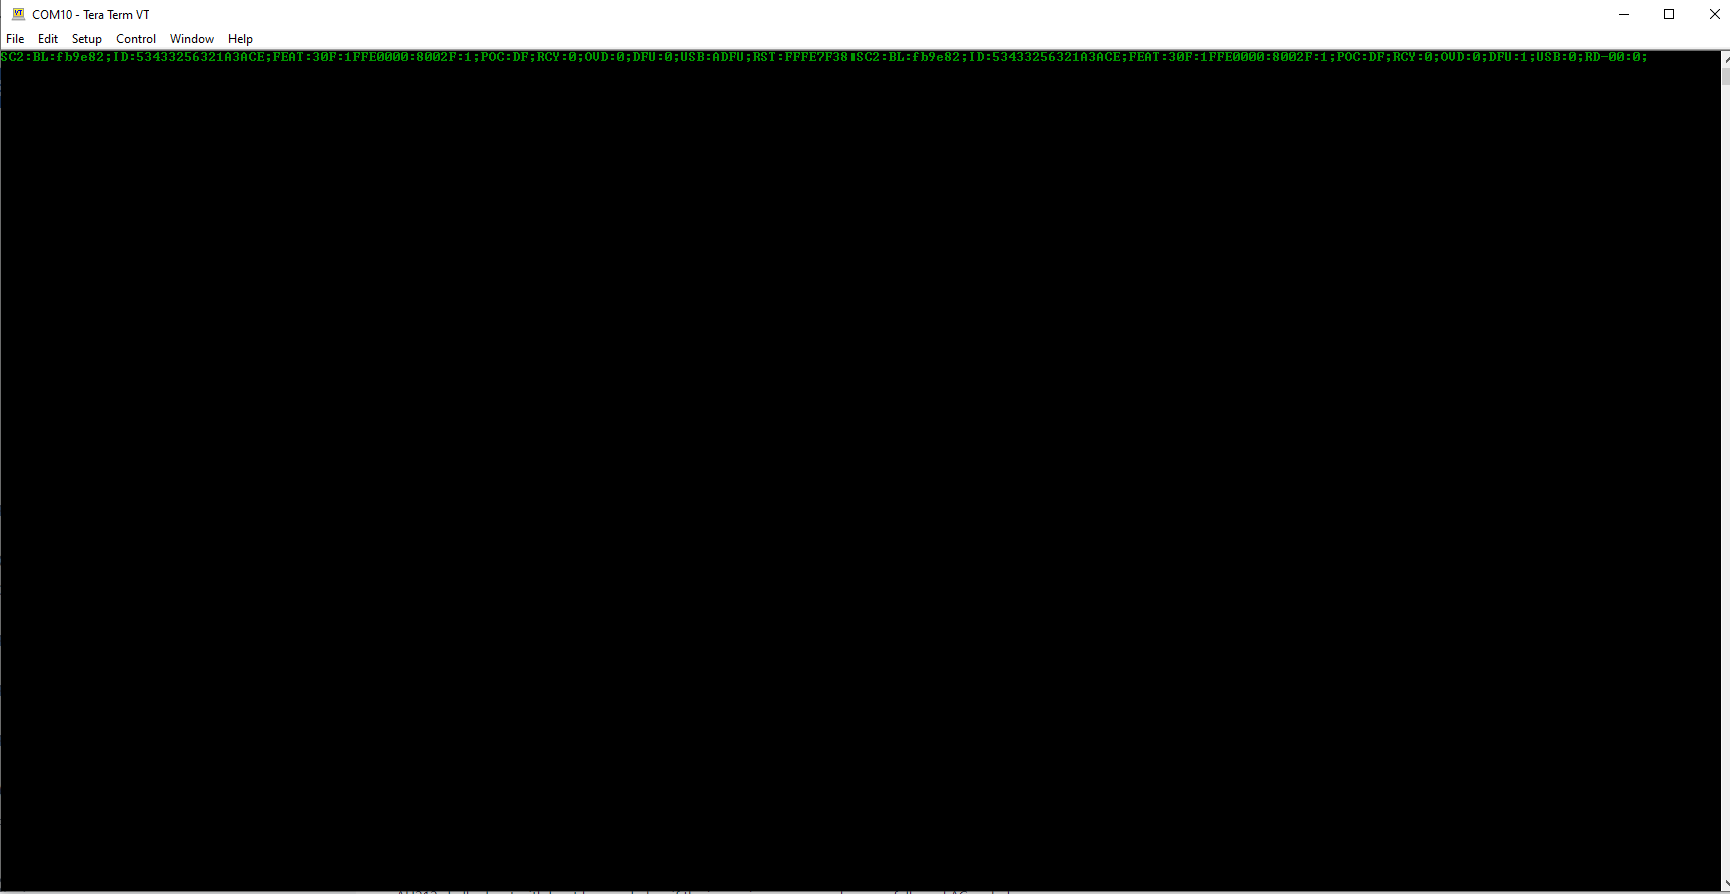
Option 1: Enable USB buring mode for V3 Buring Tool App by holding USB BOOT button and apply AC to box as below

You shall see below bootloader print out on the console window indicating USB burning mode enabled.
Option 2: Apply power and press "enter" on console to access uboot prompt then execute "run update" command to start USB burning mode.

Launch USB Burn Tool V3.1.1 and verify it’s connected with AH212. We shall see the “connection 0%” status
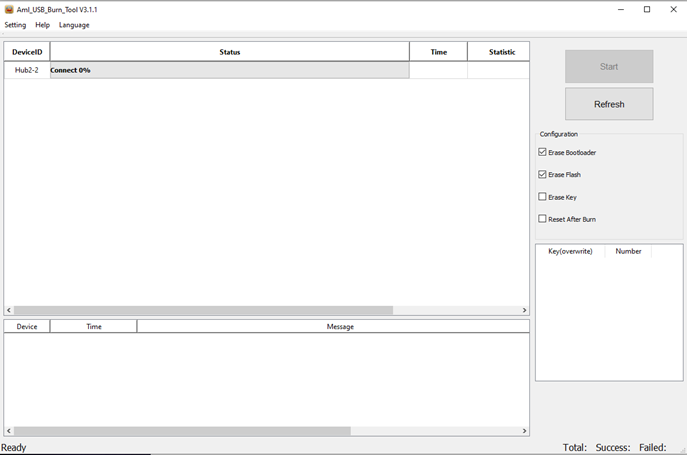
Load the image and start to program the AH212.
Once the flashing is completed, click on STOP and disconnect USB-C cable.
Close the USB Burning Tool App and cycle the AC.
If driver is not properly installed and you cannot see the device , please manually install the driver with below steps:
If a yellow exclamation point "!" appears when the device is connected in the device manager, it means that the driver has not been installed successfully, and you need to install the driver manually.

1) First enter the directory specified by the tool installation, first click dpscat.exe to sign the driver.
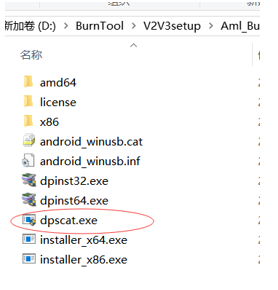
2)During the signing process, if security prompt when need signature or authorization, need allow this operation.
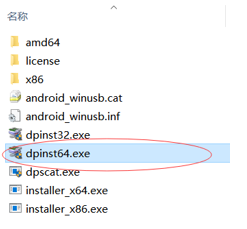
3)Choose the corresponding installation according to the system bit requirement of your own machine, choose dpinst64.exe for 64 bit and dpinst32.exe for 32 bit.
4)Or manually update the driver in the device manager, right-click on the problematic device and select update driver.

5)Select "Browse my computer for driver software", select C:\Amlogic\Aml_Burn_Tool\V3\Driver in the tool installation directory to update the driver.
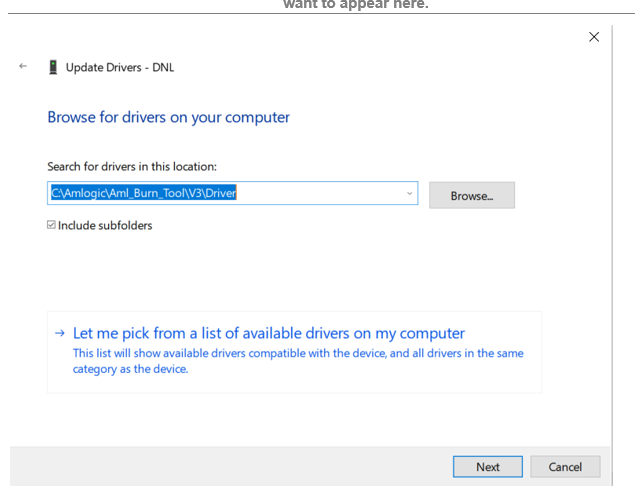
6. The driver is installed successfully.

AH212 shall reboot with boot logo as below if the image is programmed successfully and AC cycled.
A generic RDK UI shall be launched with active ethernet.

Use Amlogic IR remote to check YouTube and verify 2K and 4K playback.
Other Methods to update the firmware:
2) MfrUtils
Download the image to /data/ path on the device.
mfrUtil -u /data/aml_upgrade_package.img
Youtube RDK CommonPort Archtecture:

