RDK Resources
[*RDK Preferred*]
Code Management Facility
RDK Forums
[RDK Conferences]
RDK Support
Archives
Papers & Presentations Archive![]()
Papers & Presentations Archive![]()
This page presents an brief overview about webPA 2.0 (xmidt) components required for a reference webPA cluster setup and explains how to setup the cluster & establish an end-to-end connection with CPE devices.
WebPA is a secure web protocol messaging system for bi-directional communication between cloud server and RDK devices. It was built from the ground up specifically with security and performance as priorities. It is currently used by millions of devices and services and will continue to expand in scale into the future.
WebPA 2.0 commonly known as Xmidt (pronounced "transmit") is a combination of a server cluster and client that provide a highly available data path to devices deployed all over the world.
| Operating system | Centos 6.8 |
|---|---|
| Architecture | x86_64 |
| Memory | 2048 MB |
| Disk space | N/A |
Supervisor is a client/server system that allows its users to monitor and control a number of processes on UNIX-like operating systems.
Unlike other system initialization services, it is not meant to be run as a substitute for init. Instead it is meant to be used to control processes related to a project or a customer, and is meant to start like any other program at boot time.
a) Enable Extra Packages for Enterprise Linux (EPEL)
	$ wget http://dl.fedoraproject.org/pub/epel/6/x86_64/epel-release-6-8.noarch.rpm
	$ rpm -Uvh epel-release-6-8.noarch.rpm
b) Install Python meld3
	$ yum install python-meld3
c) Install supervisor
	$ yum install supervisor
ZooKeeper is a high-performance coordination service for distributed applications. It exposes common services - such as naming, configuration management, synchronization, and group services - in a simple interface so you don't have to write them from scratch. You can use it off-the-shelf to implement consensus, group management, leader election, and presence protocols. And you can build on it for your own, specific needs.
$ yum install zookeeper
# cat /etc/init.d/zookeeper
#!bin/bash
#
# zookeeper Startup Script
#
# chkconfig: 345 90 14
# description: Zookeeper Application Startup Script

# Source function library
. /etc/rc.d/init.d/functions

#-------------------------------------------------------------------------------

start() {
	echo -n $"Starting Zookeeper: "
	/usr/lib/zookeeper/bin/zkServer.sh start
	RETVAL=$?
	echo
	[ $RETVAL -eq 0 ] && echo "[ OK ]"
}

stop() {
	echo -n $"Stopping Zookeeper: "
	/usr/lib/zookeeper/bin/zkServer.sh stop
	RETVAL=$?
	echo
	[ $RETVAL -eq 0 ] && echo "[ OK ]"
}

restart() {
	stop
	start
}

case "$1" in
  start)
	start
	;;
  stop)
	stop
	;;
  restart|force-reload|reload)
	restart
	;;
  status)
	/usr/lib/zookeeper/bin/zkServer.sh status
	RETVAL=$?
	;;
  *)
	echo $"Usage: $0 {start|stop|status|restart|reload|force-reload}"
	exit 1
esac

exit $RETVAL
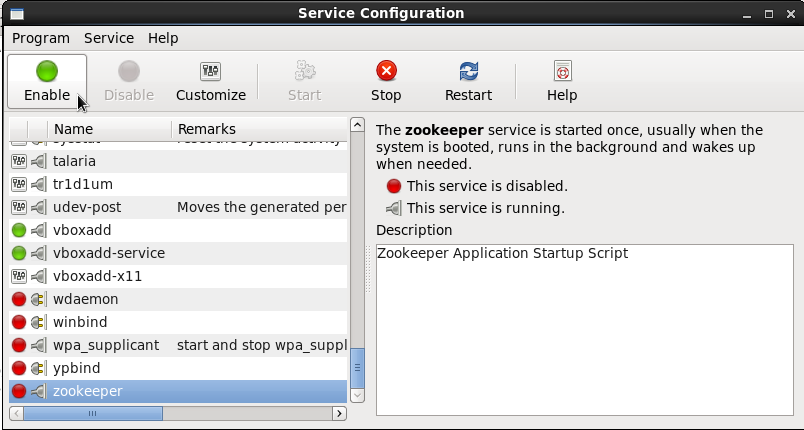
Launch system-config-services from a console and enable the zookeeper service from the services list.
Below is the list of components needed for a Xmidt (webPA 2.0) cluster setup. For a single node reference setup, few of the services are not mandatory hence not used.
| Component | Type | Description | Used in current setup |
|---|---|---|---|
| Talaria | Server | Talaria maintains the secure websocket connections from the device and passes the messages from or to the device. | Yes |
| Scytale | Server | Scytale accepts the inbound requests, fans out across data centers and delivers the messages to the Talaria machines that could be hosting the device connection. | Yes |
| tr1d1um | Server | The Webpa micro-service that encode TR-181 requests. | Yes |
| petasos | Server | Petasos helps reduce the load on the Talaria machines during mass reboot cases by calculating which specific Talaria a device should connect to & redirecting the incoming request. | No |
| caduceus | Server | Caduceus provides the pub-sub message delivery mechanism for xmidt. | No |
| parodus | Client | Parodus is the light weight client that reaches out to the xmidt cloud to establish the connection. | Yes |
a) Import the GPG Key (Required once, common for all the packages)
	$ rpm --import https://github.com/Comcast/tr1d1um/releases/download/0.0.1-65/RPM-GPG-KEY-comcast-webpa
b) Install the packages
	$ rpm -Uvh https://github.com/Comcast/scytale/releases/download/0.1.1-83/scytale-0.1.1-83.el6.x86_64.rpm
	$ rpm -Uvh https://github.com/Comcast/talaria/releases/download/0.1.1-153/talaria-0.1.1-153.el6.x86_64.rpm
	$ rpm -Uvh https://github.com/Comcast/tr1d1um/releases/download/0.1.1-228/tr1d1um-0.1.1-228.el6.x86_64.rpm
Note: Change version number for downloading the required package.
If pre-built packages are already installed as explained in previous section & we want to use the same, skip to configuration section
Required for compiling server components written in go language.
$ sudo yum install golang
Glide is a package manager for Go that is conceptually similar to package managers for other languages. Glide provides the following functionality:
glide.yaml file. This includes a name, version or version range, version control information for private repos or when the type cannot be detected, and more.glide.lock file. This enables reproducibly fetching the dependency tree.vendor/ directories, known as the Vendor Experiment, so that different projects can have differing versions of the same dependencies.$ wget -c https://github.com/Masterminds/glide/releases/download/v0.13.1/glide-v0.13.1-linux-amd64.tar.gz $ tar -xzf glide-v0.13.1-linux-amd64.tar.gz -C /opt $ echo "export PATH=$PATH:/opt/linux-amd64/" >> $HOME/.bash_profile
1. create a directory in $HOME say webpa_modules
$ mkdir $HOME/webpa_modules && cd $HOME/webpa_modules

2. Checkout the components from GitHub repository.
$ git clone https://github.com/Comcast/talaria.git
$ git clone https://github.com/Comcast/scytale.git
$ git clone https://github.com/Comcast/tr1d1um.git
1. Set the GOPATH & change to the source directory, e.g.
	$ export GOPATH=$HOME/webpa_modules/petasos/
	$ cd $HOME/webpa_modules/petasos/src/petasos

2. Resolve package dependencies using glide.
	$ glide install --strip-vendor

3. Build the component from source
	$ go build petasos

4. Create the package
	$ mkdir $HOME/rpmbuild
	$ ./build_rpm.sh --no-sign

5. Install the locally built webPA component package
e.g. $ cd /root/rpmbuild/RPMS/x86_64/
     $ rpm -Uvh petasos-0.1.1-87.el6.x86_64.rpm
If running build_rpm.sh complains about following:
error: Macro %_releaseno has empty body
error: Macro %_releaseno has empty body
Then, modify the following in script to change build number to appropriate value
If build_rpm.sh prompts for password, modify the rpmbuild command to disable the signing option
yes "" | rpmbuild -ba \
--define "_signature gpg" \
--define "_ver $release" \
--define "_releaseno ${BUILD_NUMBER}" \
--define "_fullver $new_release" \
${NAME}.spec
If the script terminates with "error: Bad owner/group: /root/webpa_modules/petasos/petasos.spec"
change the ownership to match current user name
$ chown root.root petasos.spec
WebPA server components as well as requesting application has to use a autorization token for bearer authentication. We can either use a basic authorization token or make use of a key server for obtaining a bearer token.
For example, a UI application needs to invoke some Preference setting or to obtain some diagnostics information on behalf of a MSO partner, deviceId, serviceAccountId or combination of the three. It will first obtain or use a pre-defined auth token, set it as a HTTP header and then invoke the GET/SET operation.
In a production environment, webPA server components & requesting applications use SAT as a bearer token for AUTHZ and AUTHN. SAT stands for Service Access Token. As the name implies, it is used by the calling applications to request access to CPE API's. From a implementation point of view, A SAT is a Json Web Token which if shortened to "jwt". It is a base64 encoded strings of pre-defined bytes with 3 distinct parts separated by a period.
However in the standalone setup, we have used basic base64 encoded autherization token because SAT requires access to operator specific key servers. This auth token will be used when configuring different webPA components as well while performing GET/SET requests to the CPE from a 3rd party application.
We can use either of the below 2 methods to generate a basic authorization string.
1. Using openssl command to generate the base64 encoded token.
[root@webpa-node1 ~]# openssl enc -base64 <<< "webpa@1234567890"
[OUTPUT] : d2VicGFAMTIzNDU2Nzg5MAo=
2. Using Linux coreutils tools to generate the base64 encoded token
[root@webpa-node1 ~]# echo "webpa@1234567890"|base64
[OUTPUT] : d2VicGFAMTIzNDU2Nzg5MAo=
Talaria configuration
Edit the configuration file & modify port number for running talaria service in a different port (default value is 8080).
{
        "port": 8080,
        "hcport": 8888,
        "pprofport": 9999,
        "discoveryClient": {
                "staticNodes": ["https://localhost:8585" ]
        },

        "log" : {
                "file"      : "talariaLog.log",
                "level"     : "DEBUG",
                "maxSize"   : 5242880,
                "maxBackup" : 3
        }
}
Edit the configuration file under /etc/scytale and modify following values
"fqdn" : Fully qualified domain name of the server
"server" : Listening IP address (using "localhost" will allow connections only from the current machine.)
"endpoints" : Under "fanout" section, change the port value to match to the one where talaria service is listening.
"authHeader" : Auth token Use the auth token which was generated in previous section
"file" : Under "log" section, change the value from "stdout" to a file name if we need to redirect debug messages to a separate log file.
Add the "aws" section with following values for supressing few error messages
"aws": {
"accessKey": "fake",
"secretKey": "fake",
"env": "fake",
"sns": {
"region": "us-east-1",
"topicArn": "arn:aws:sns:us-east-1:999999999999:fake",
"urlPath" : "/api/v2/aws/sns"
}
},
This will set AWS & SNS parameters with fake ones since we don't use actual keys and SNS (amazon simple notification service) in the current setup.
{
	"fqdn": "192.168.30.105",
	"server": "192.168.30.105",

	"primary": {
		"address": ":6000"
	},

	"health": {
		"address": ":6001"
	},

	"pprof": {
		"address": ":6002"
	},

	"fanout": {
		"method": "POST",
		"endpoints": ["http://192.168.30.105:8080/api/v2/device/send"],
		"authorization": "QWxhZGRpbjpPcGVuU2VzYW1l"
	},


	"log" : {
		"file"      : "stdout",
		"level"     : "DEBUG",
		"json": true
	},

	"aws": {
		"accessKey": "fake",
		"secretKey": "fake",
		"env": "fake",
		"sns": {
	                  "region": "us-east-1",
	                  "topicArn": "arn:aws:sns:us-east-1:999999999999:fake",
	                  "urlPath" : "/api/v2/aws/sns"
	        }
	},
	"authHeader": "d2VicGFAMTIzNDU2Nzg5MA=="
}
Edit the configuration file from /etc/tr1d1um to set following parameters
"fqdn" : Fully qualified domain name of server
"server" : IP Address to which the service has to listen
"version" : Current version of the service
"region" : Region of deployment
"flavor" : Development, Production etc.
"address" : Under "primary" section, change the value to point to the port where tr1d1um service will listen for incoming requests.
"targetURL" : Change to IP-Address:Port value where SCYTALE service is running.
"authHeader" : Auth token Use the auth token which was generated in previous section.
"aws" : Add fake values as described previously.
{
	"fqdn": "192.168.30.105",

	"server": "192.168.30.105",
	"version": "0.1.1-228",
	"region": "india",
	"flavor": "lab",

	"primary": {
		"address": ":6003"
	},

	"health": {
		"address": ":6004",
		"logInterval": "60s",
		"options": [
			"PayloadsOverZero",
			"PayloadsOverHundred",
			"PayloadsOverThousand",
			"PayloadsOverTenThousand"
		]
	},

	"pprof": {
		"address": ":6005"
	},

	"metrics": {
		"address": ":8082"
	},

	"log": {
		"file"      : "tr1d1um.log",
		"level"     : "DEBUG",
		"maxSize"   : 52428800,
		"maxBackup" : 10,
		"json"      : true
	},

	"aws": {
		"accessKey": "fake-accessKey",
		"secretKey": "fake-secretKey",
		"env": "fake-env",
		"sns": {
			"region": "fake-region",
			"topicArn": "fake-sns-topic",
			"urlPath" : "/api/v2/aws/sns"
		}
	},

	"targetURL": "http://192.168.30.105:6000",
	"supportedServices": ["config"],
	"authHeader": "d2VicGFAMTIzNDU2Nzg5MA=="
}
