RDK Resources
[*RDK Preferred*]
Code Management Facility
RDK Forums
[RDK Conferences]
RDK Support
Archives
Papers & Presentations Archive![]()
Papers & Presentations Archive![]()
Telemetry is the automatic recording and transmission of data from remote or inaccessible sources to an IT system in a different location for monitoring and analysis.
1. Xconf Server
2. Rpi Board with RDK Broadband image
3. Tftp Server
Rpi board will connect to Xconf Server to get the device configuration information, telemetry profile information and log upload repository (ip address of tftp server). It will search for the markers (contents mentioned in the permanent profile) in the mentioned log file. If it is found in the log file, it will process those information and create a text file and upload that file in the tftp server. This way all the critical data related to device health will be available on timely basis in the tftp server for further analysis.
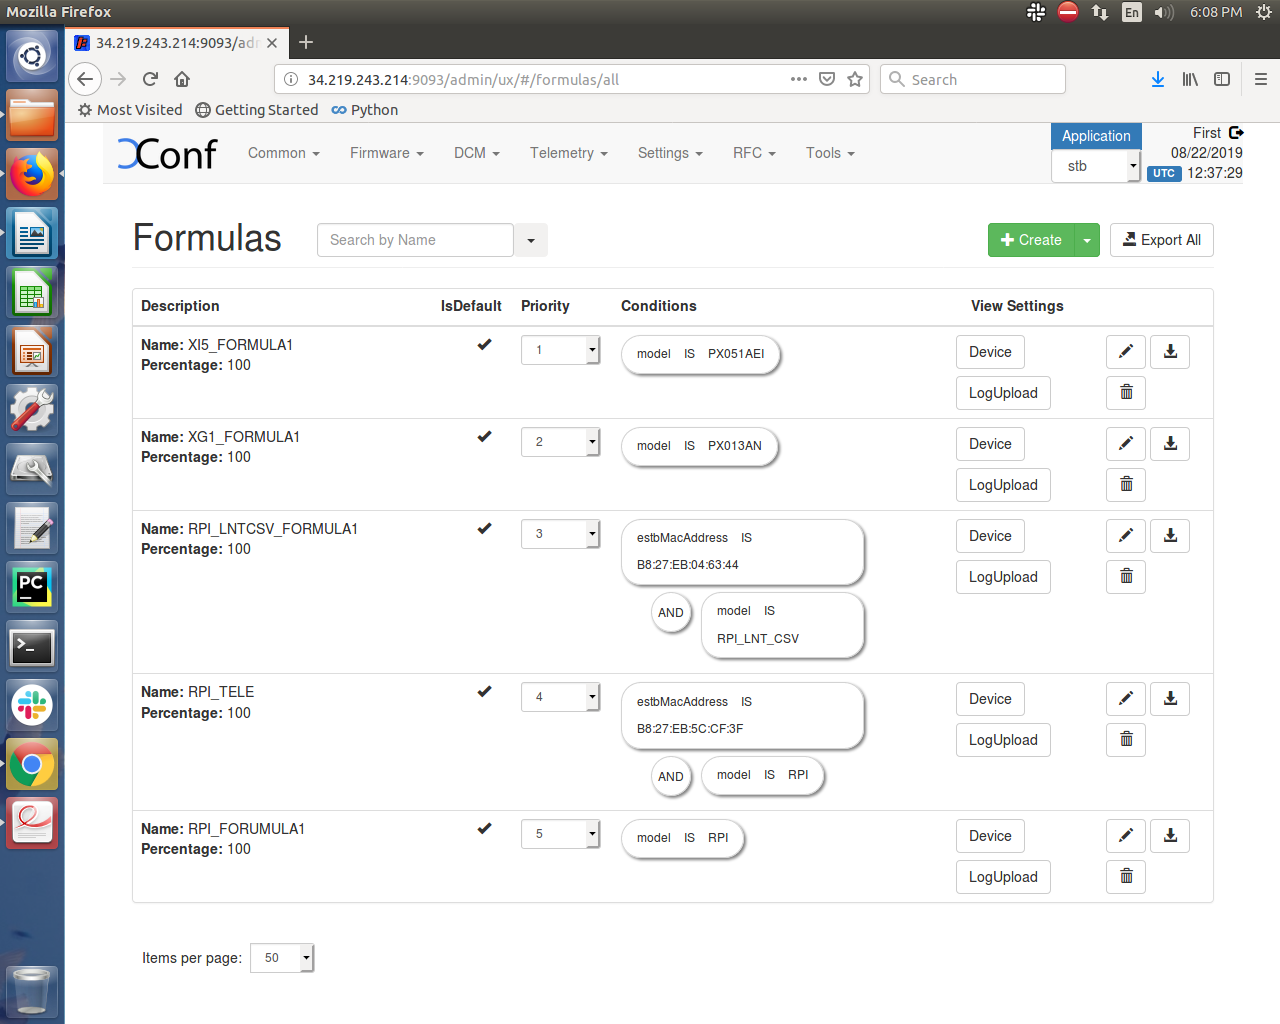
1. Login to Xconf Server and go to DCM menu item and click on “Formulas” sub menu
2. Click on Create button
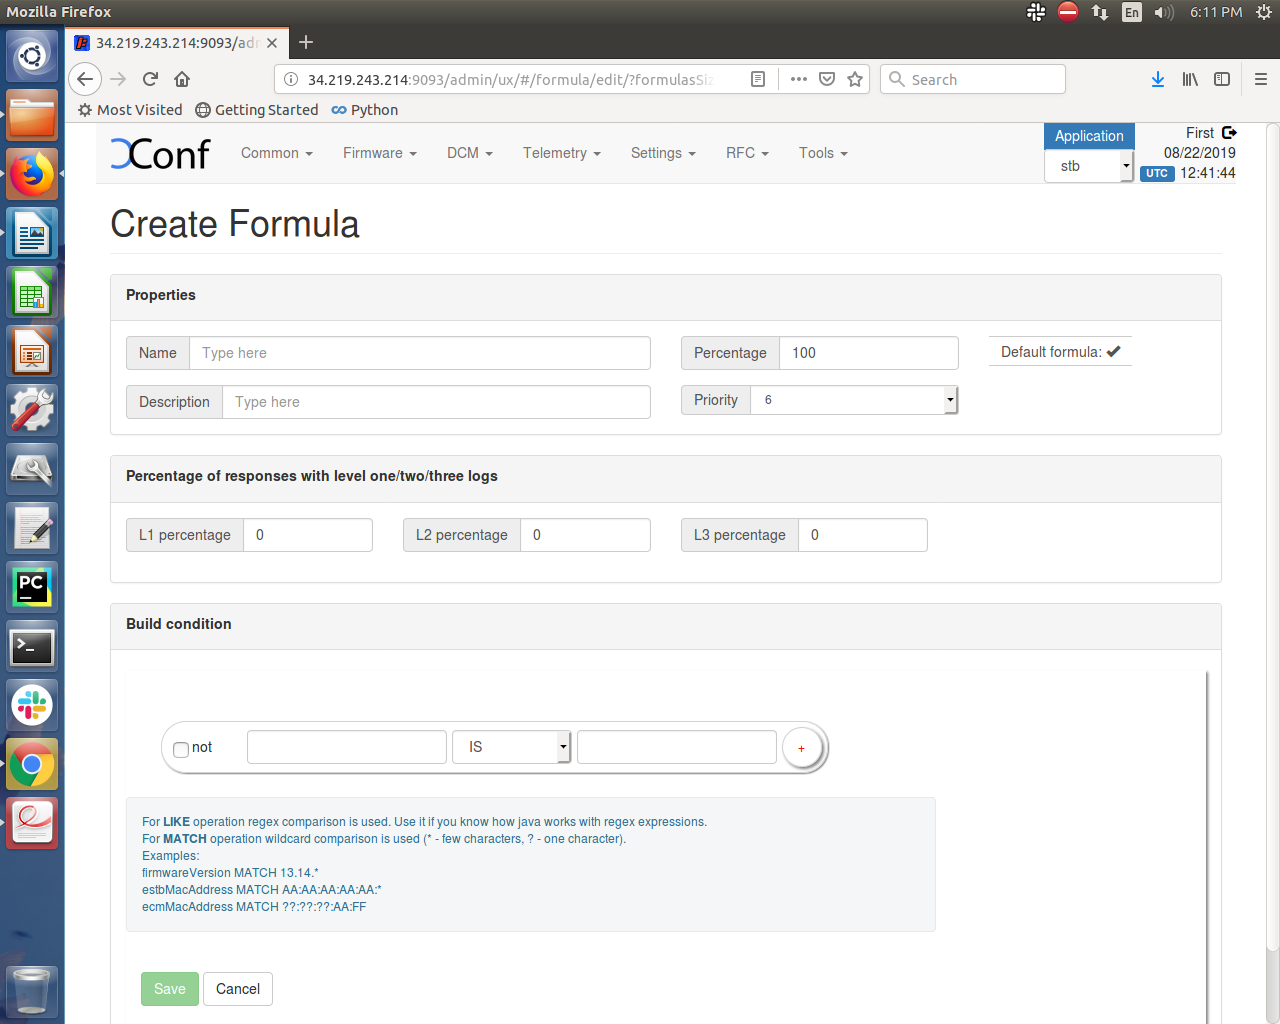
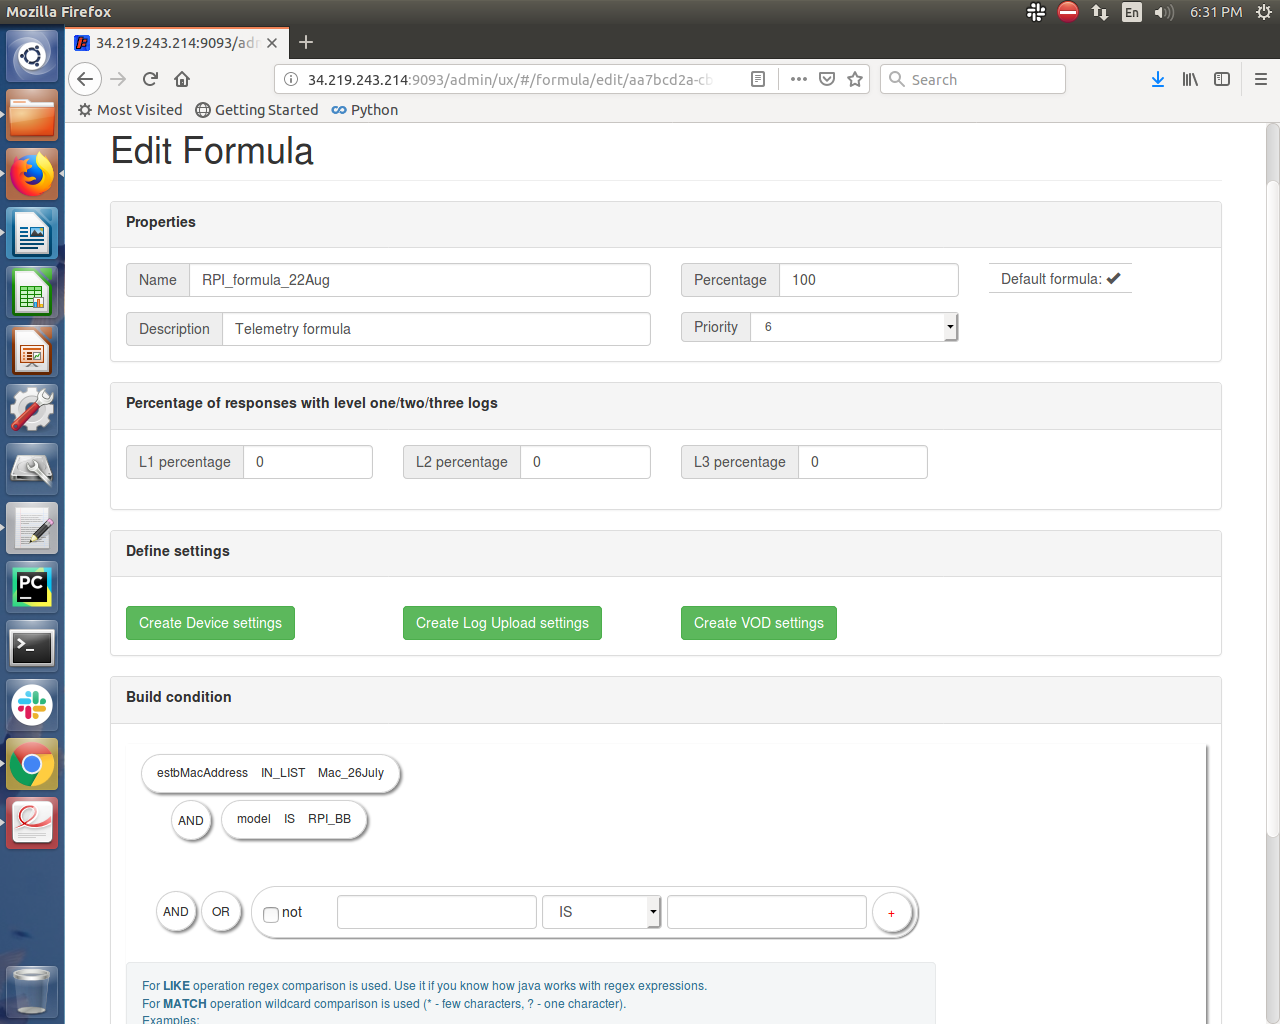
3. i) Provide “Name”, “Description”, and build conditions and save the formula.
ii) Verify Percentage and Priority field(normally it displays the sequence number of formula, can be changed to make the formula higher/lower priority) is auto field up with their respective values
iii) Go to “Build condition” section and click on the first empty field to get all the available field displayed there
iv) Select estbMacAddress and provide the MAC address of Rpi board
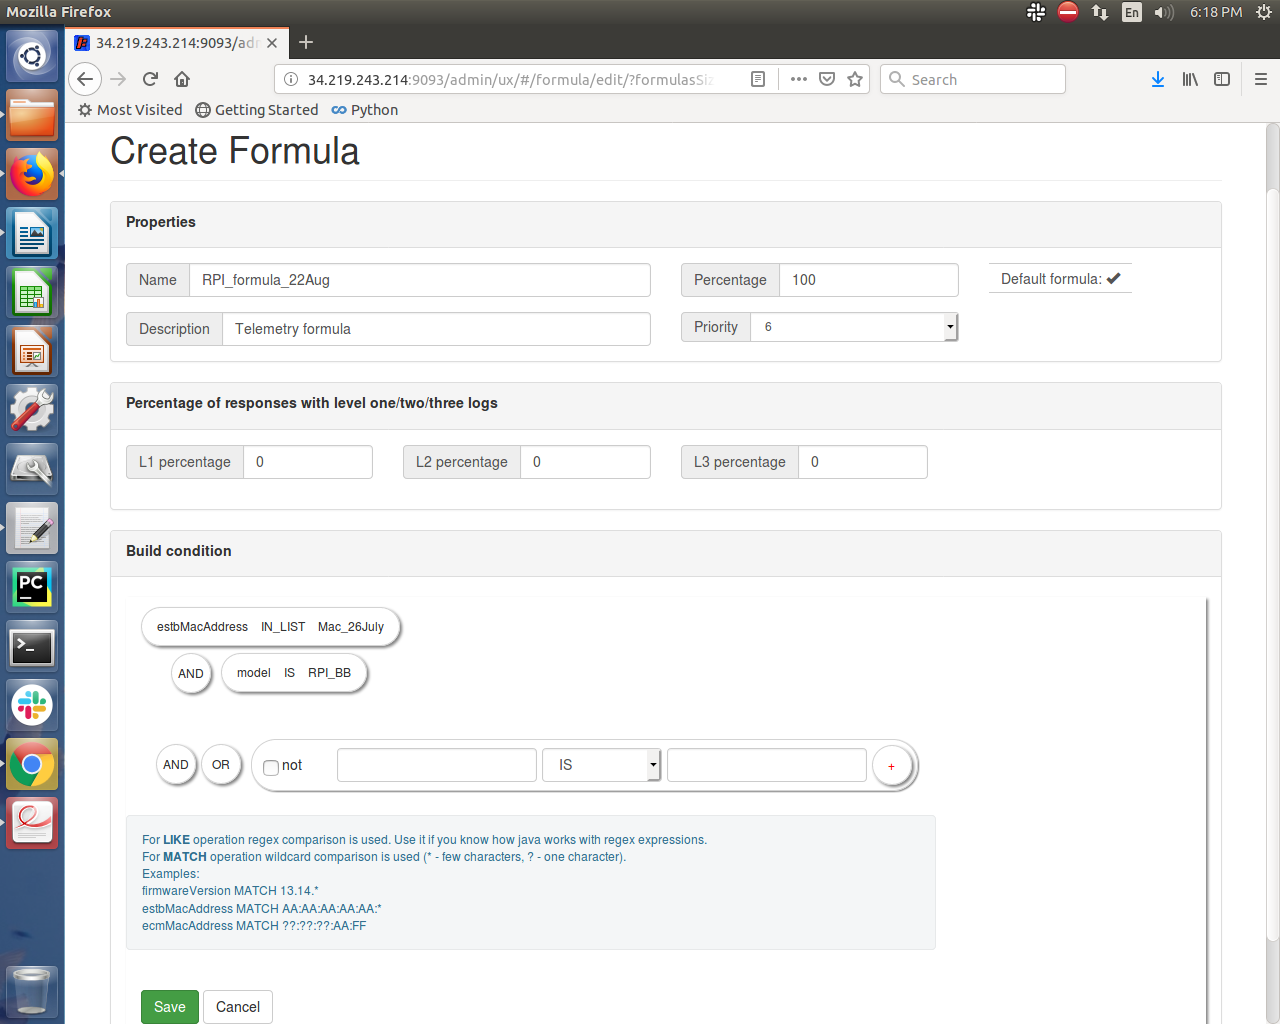
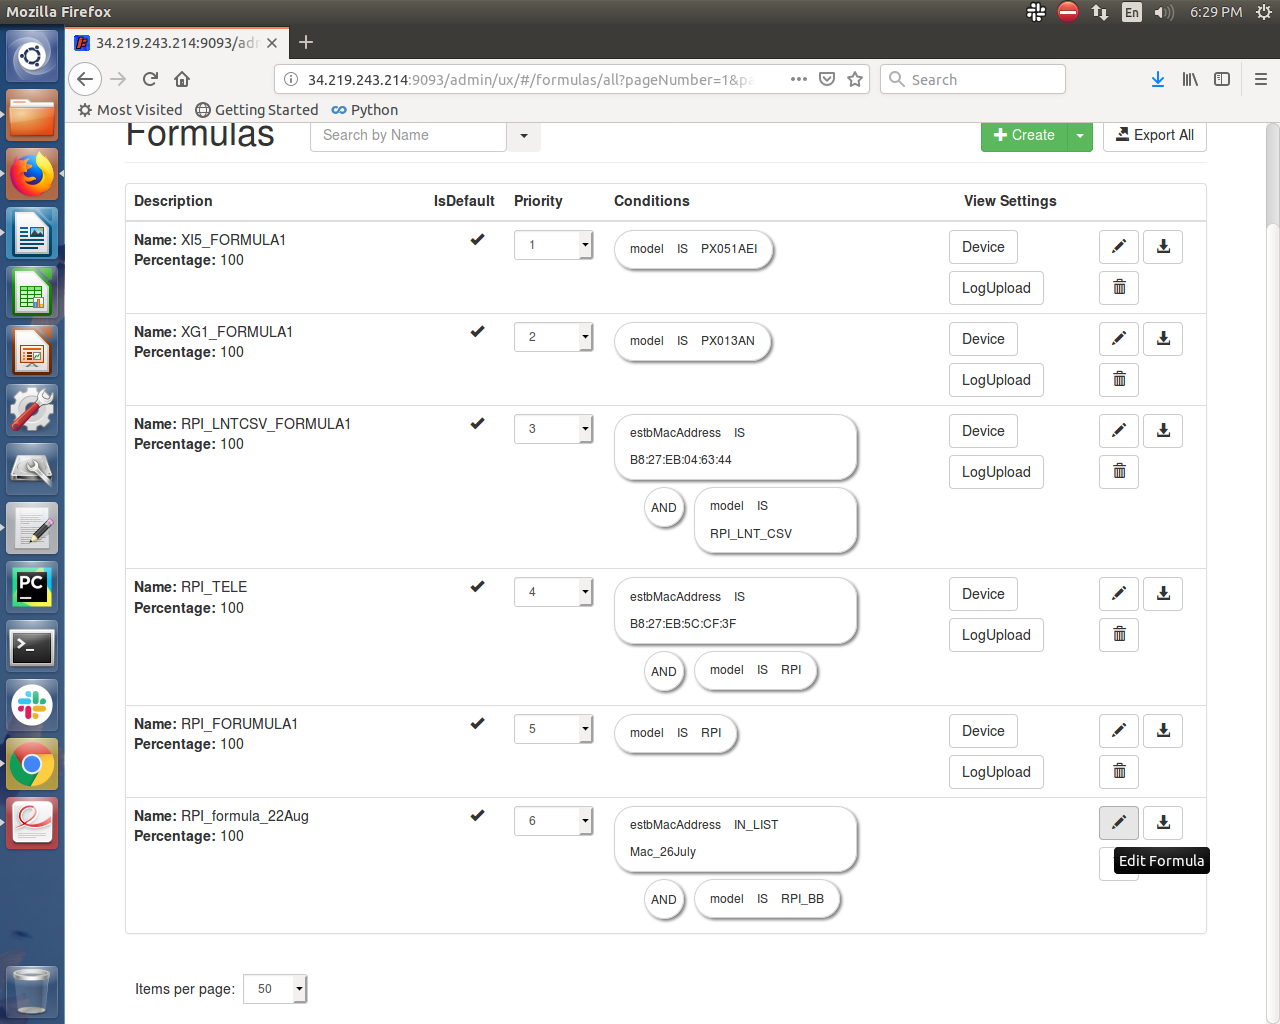
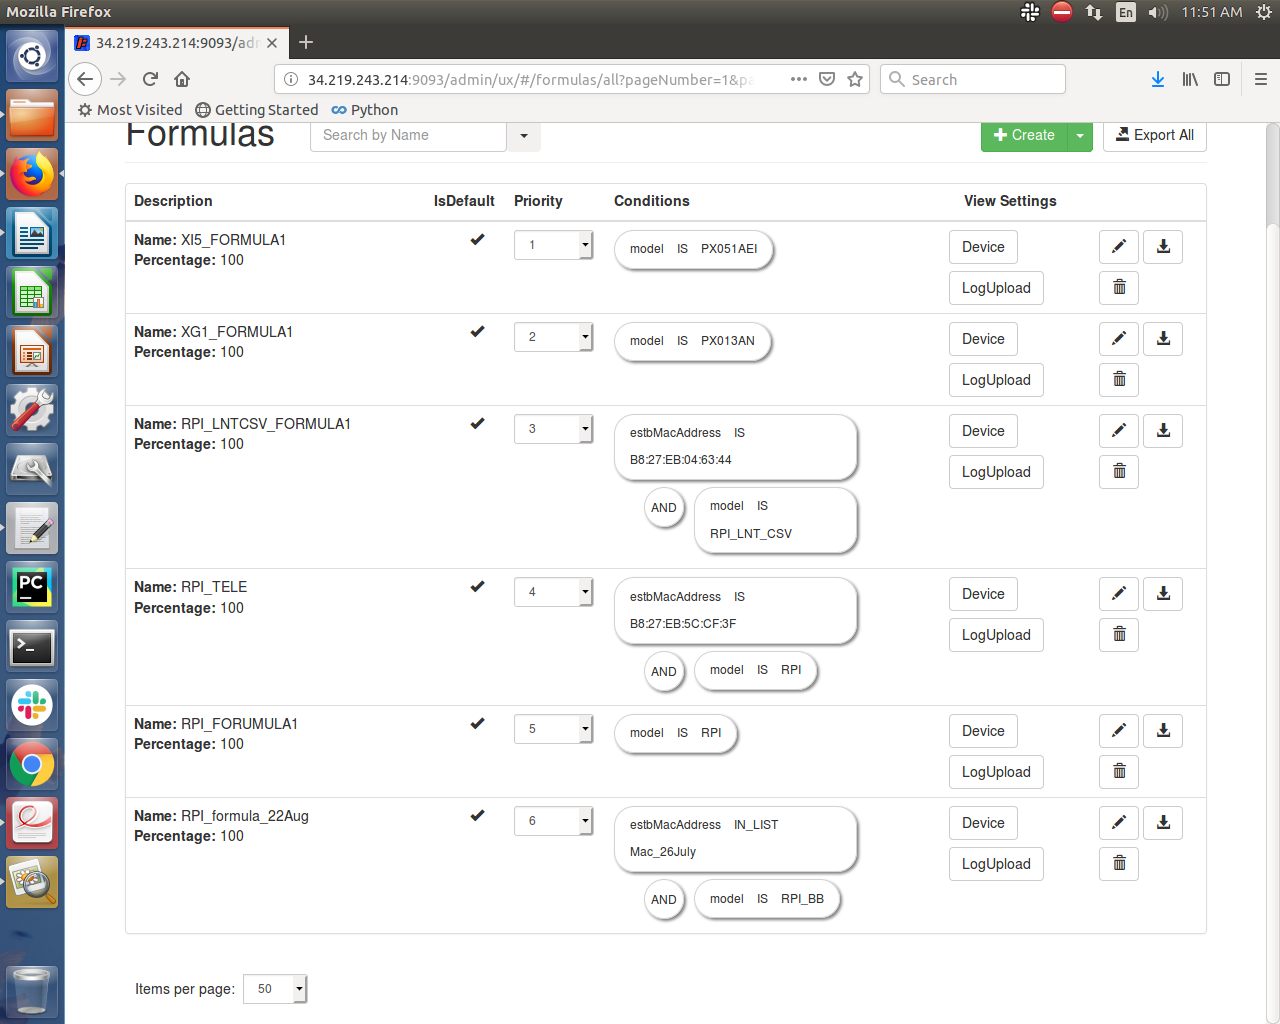
4. Verify the created formula (ex. RPI_formula22Aug) displayed in the formula list.

5. Click on Edit formula for the created formula (ex. RPI_formula_22Aug).
6. Edit formula page opens.
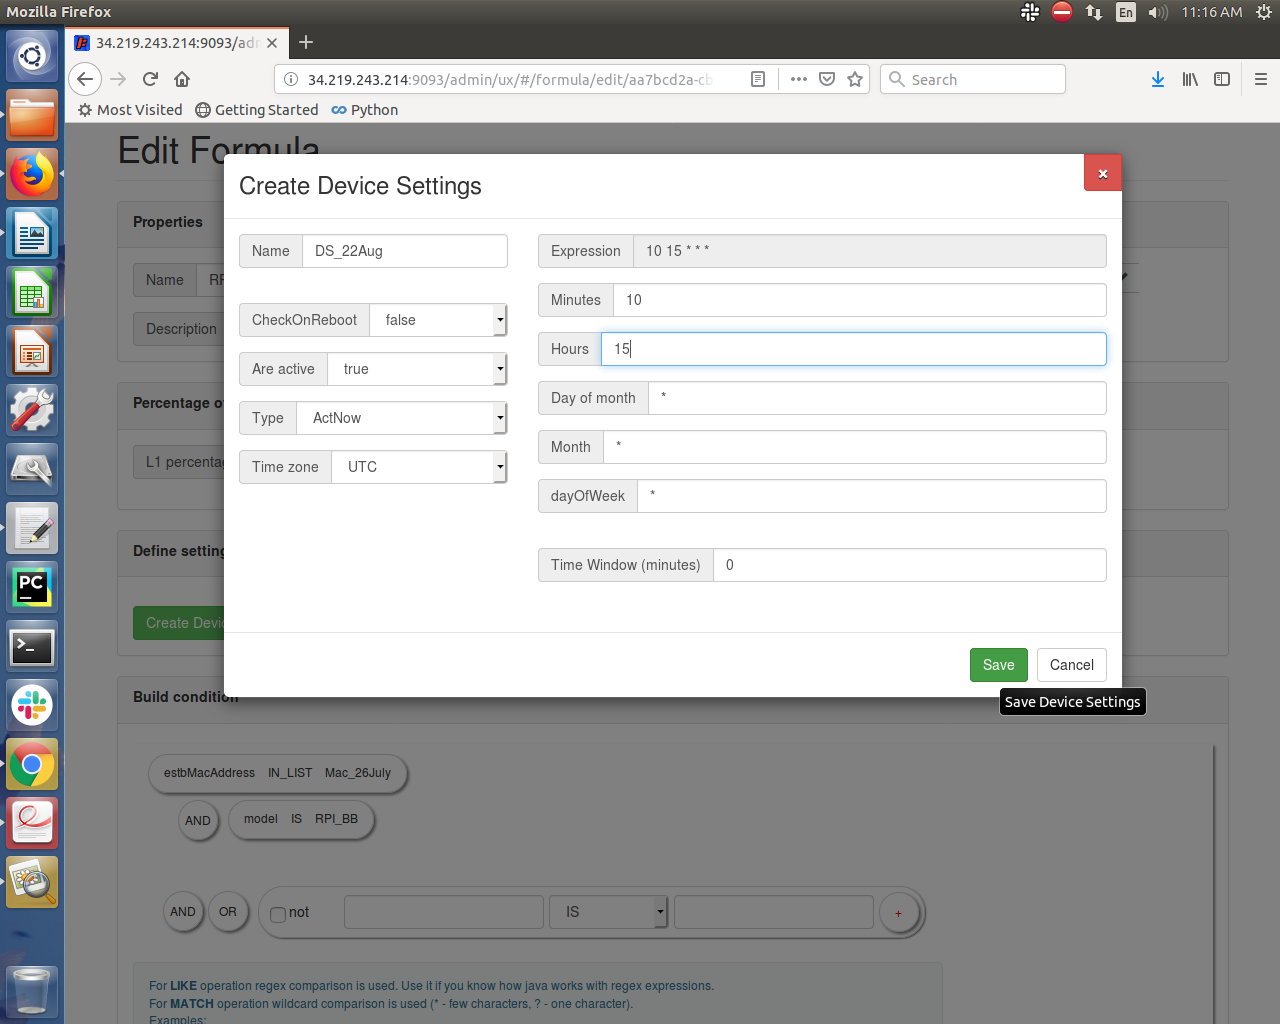
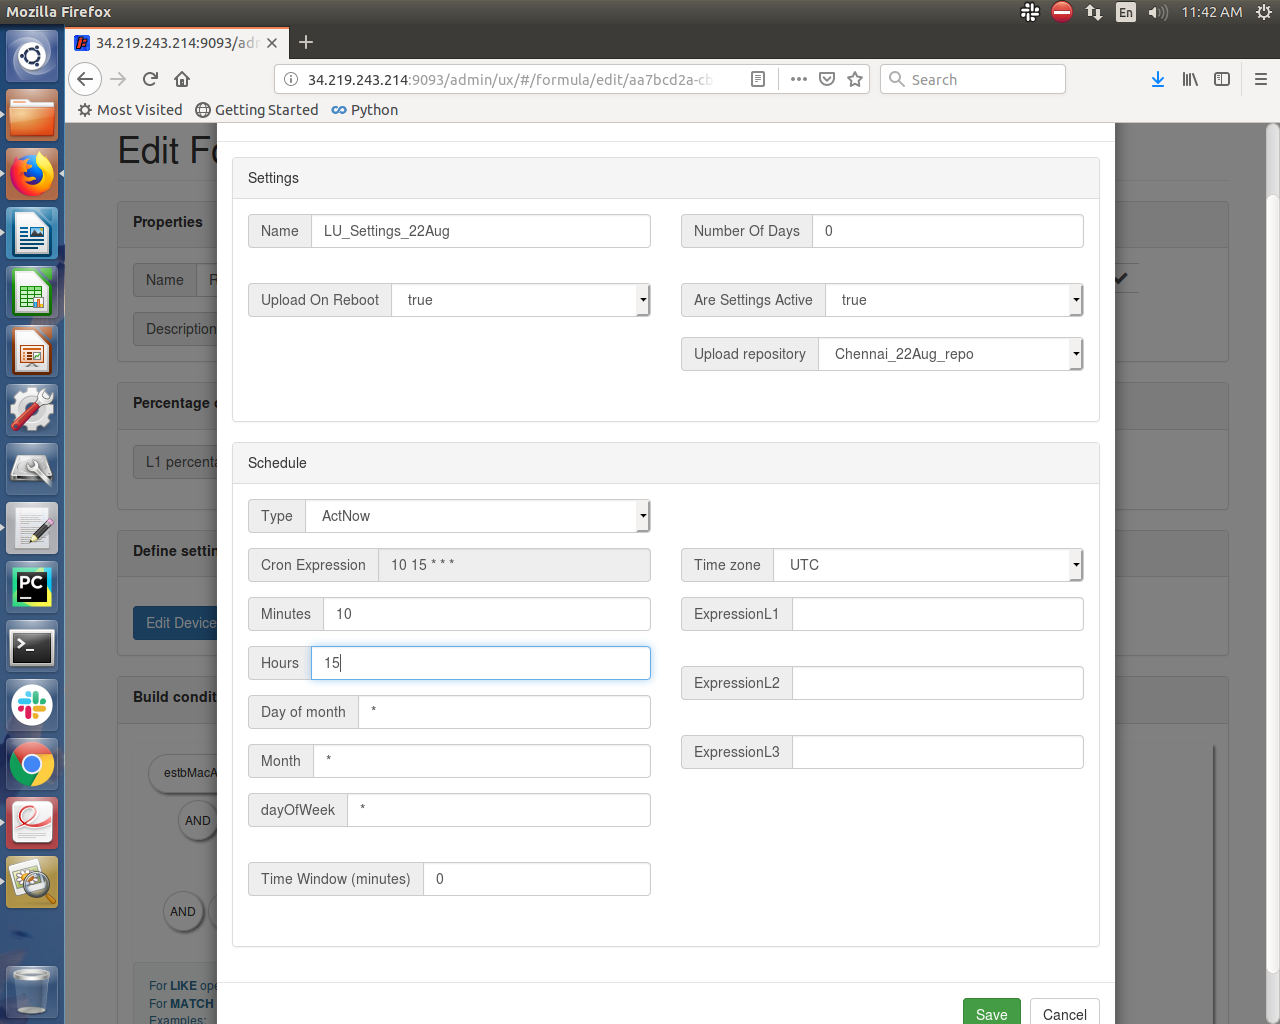
7. Click on “Create Device Settings” and fill up the fields as displayed in the screen below and click on save button:
8. Click on DCM menu then “Upload repository” submenu and click on “Create” button
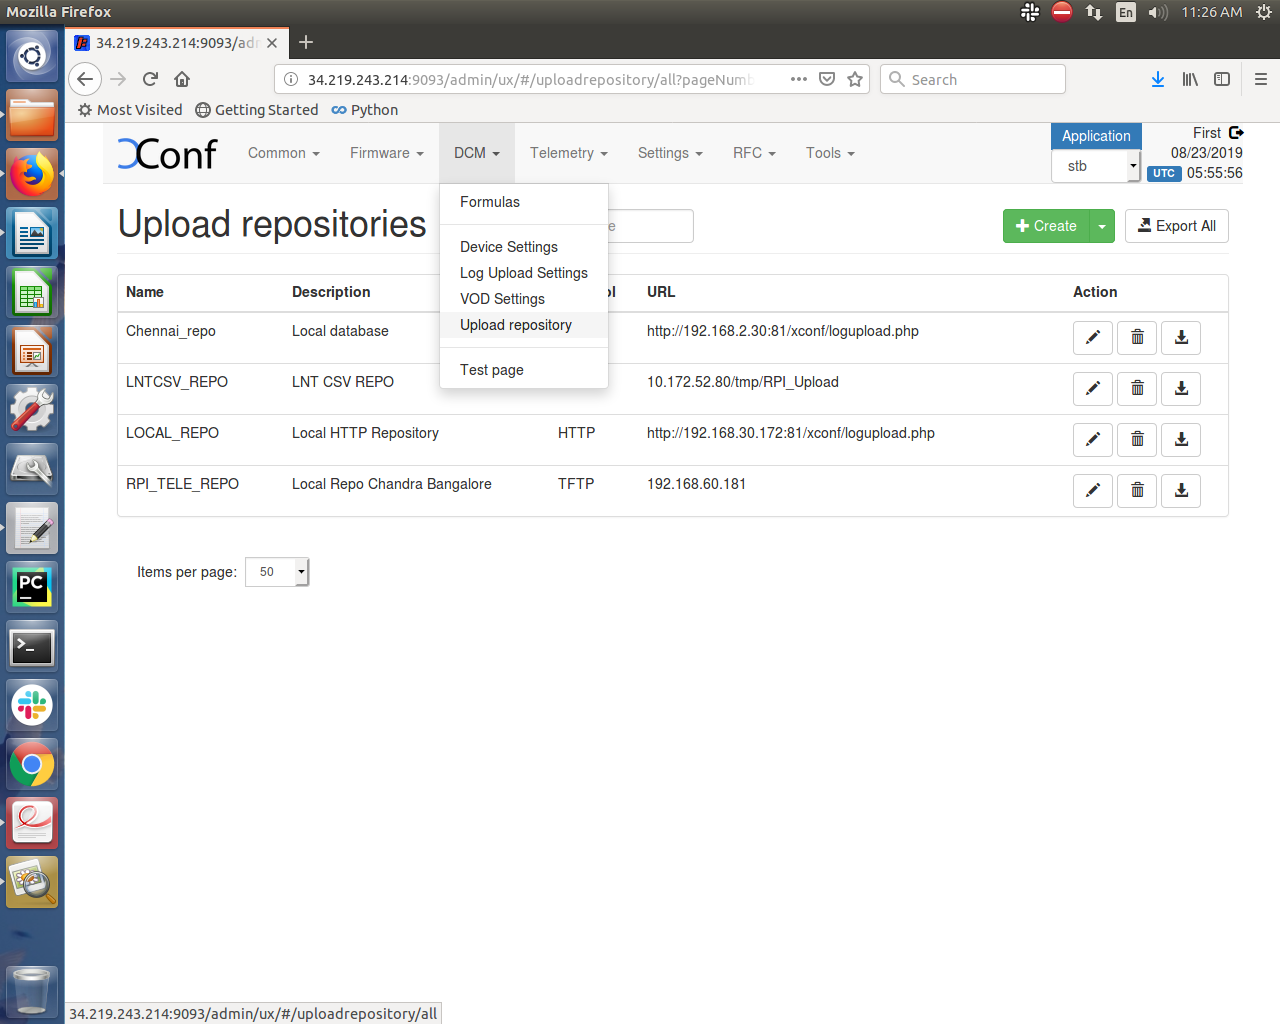
9. Provide inputs as mentioned below screen and save the upload repository.

10. Click on Formula and go back to the Edit formula page of the created formula (ex. RPI_formula_22Aug) and click on “Create Log Upload settings” button. Upload repository drop down menu field will show all the upload repositories including the created one (ex. Chennai_22Aug_repo)
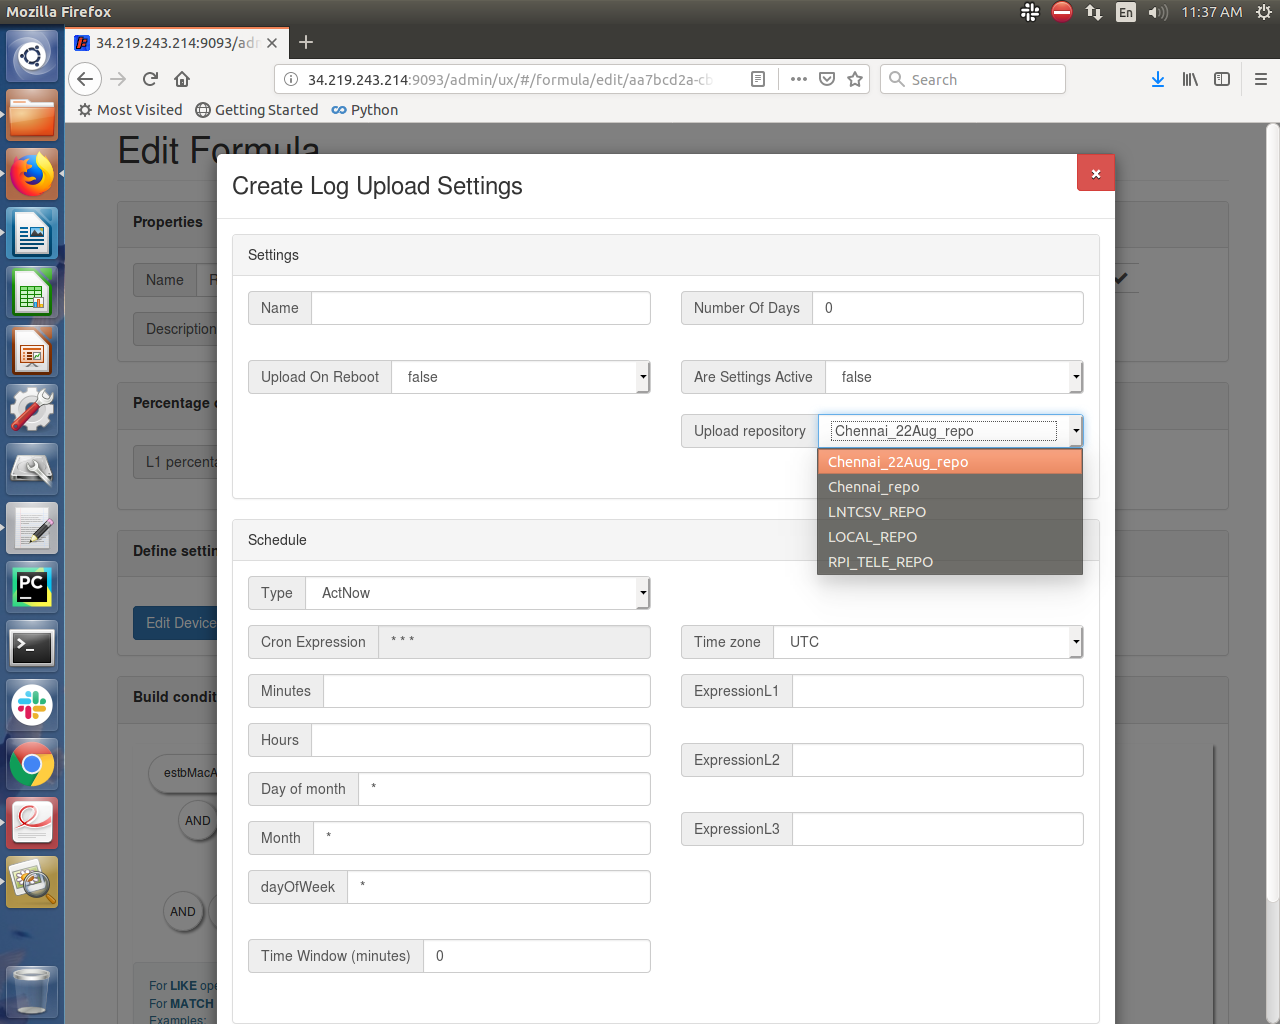
11. Provide inputs as mentioned in the screen below:
12. Save the “Edit Formula” page
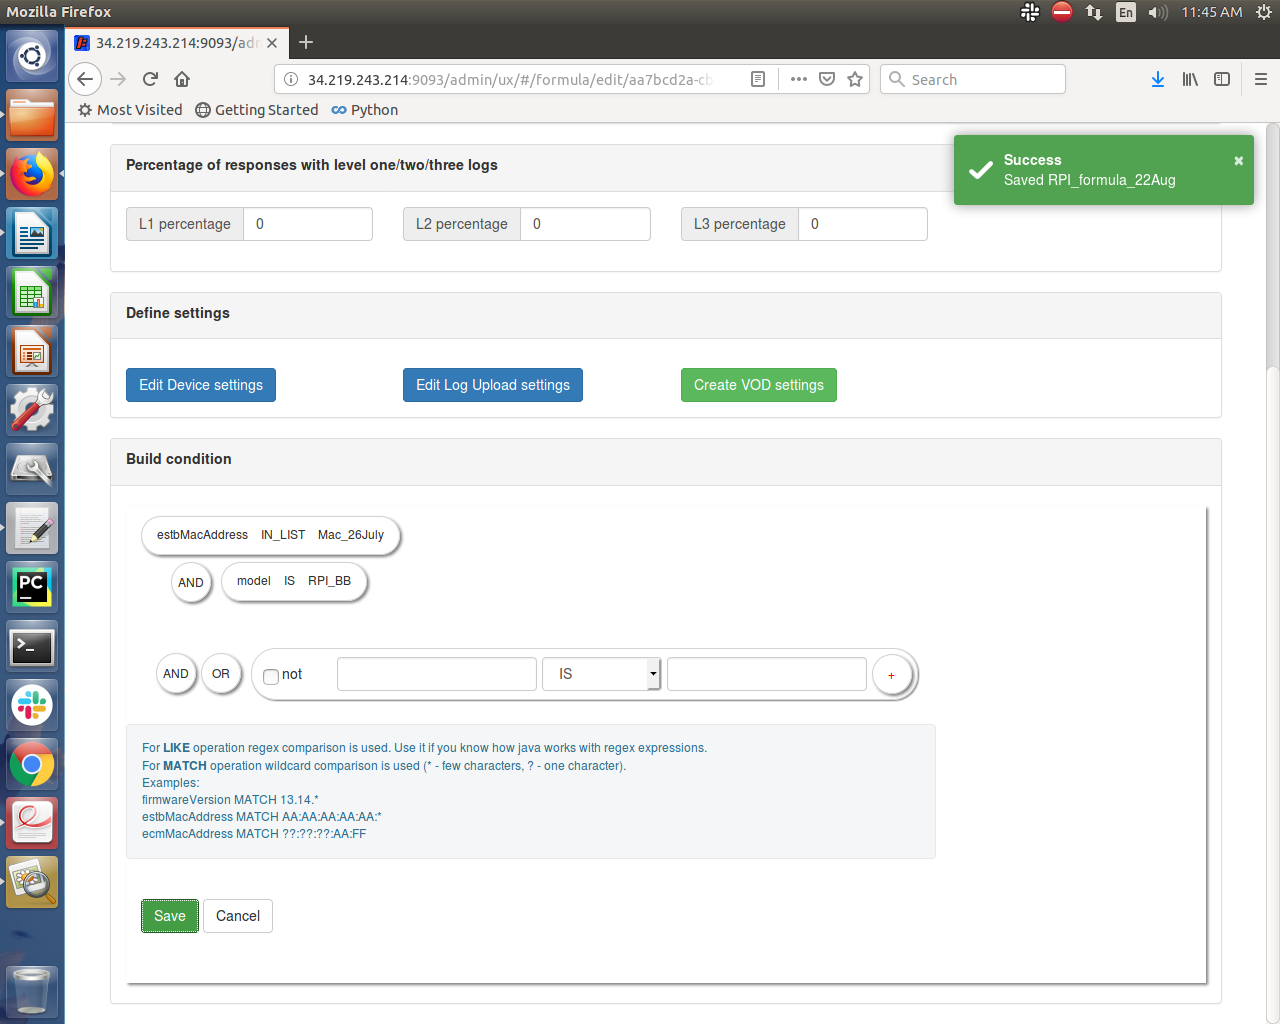
13. Verify the Formula page for the created formula (ex. RPI_formula_22Aug) where View Settings column displays the “Device” and “LogUpload”
14. Go to Telemetry menu and click on “Permanent Profile”
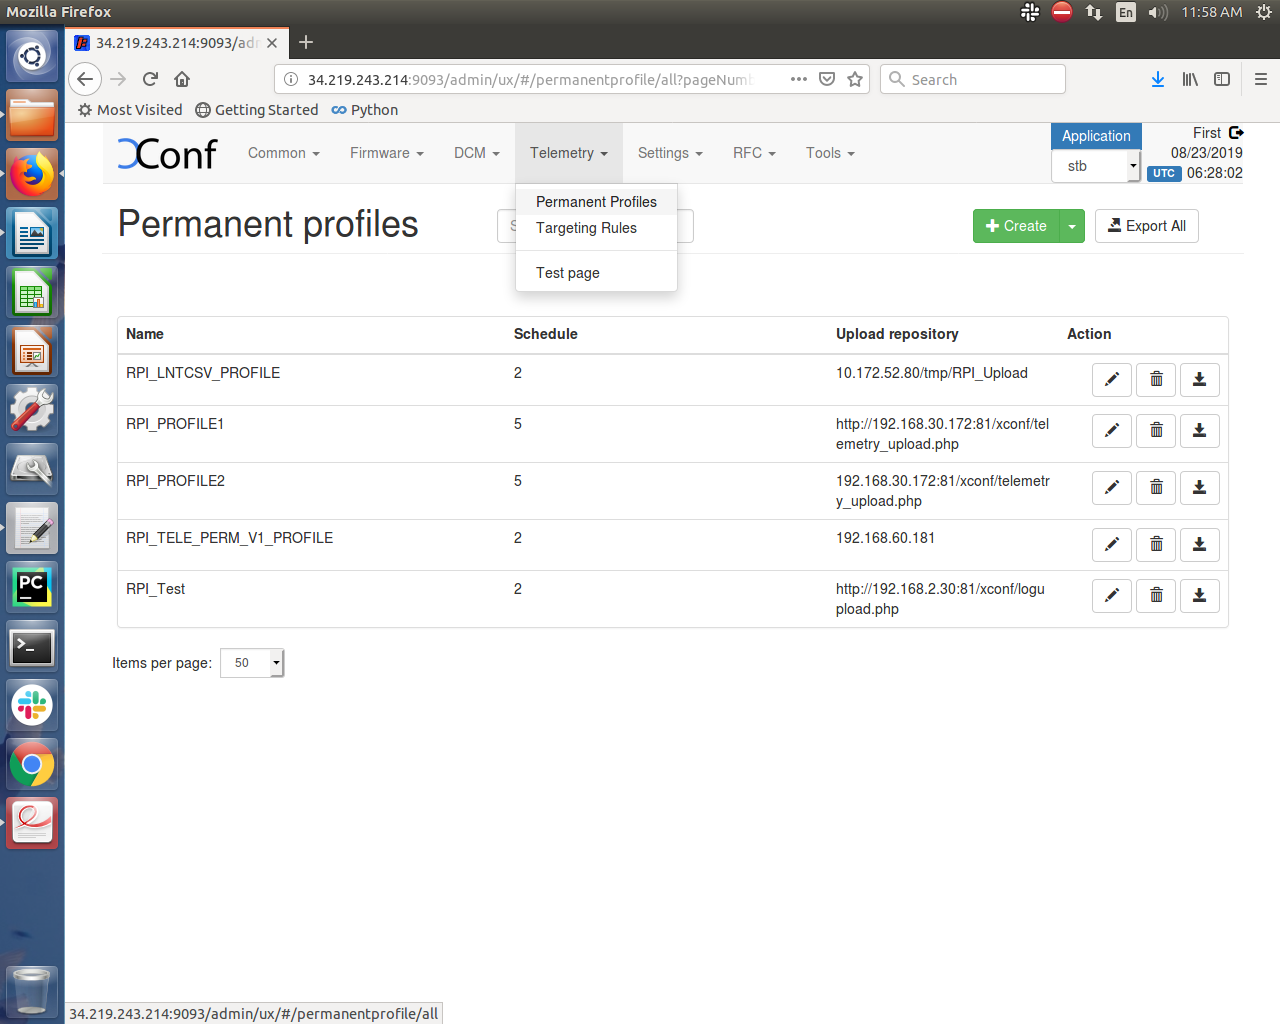
15. Click on “Create” button to create permanent profile with different markers.
Telemetry profile entries -
First field is “Header” - What is the header of the log file
Second field is “Content” - Which string it should look up in the log file
Third field is “type” - Which file it should check for the provided content
Fourth field is “Polling frequency” - How frequently this search should happen
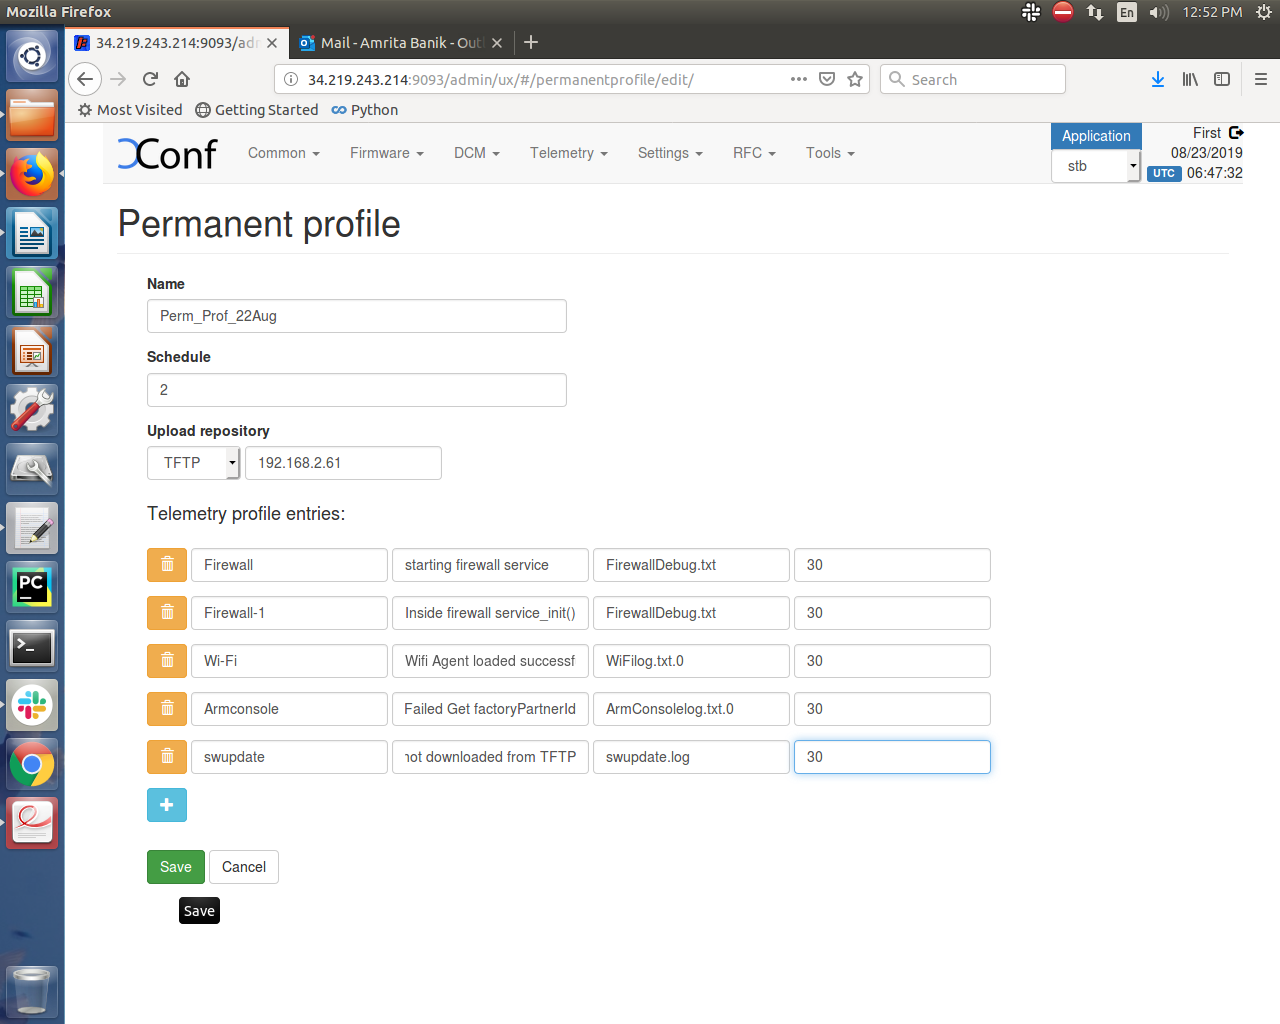
Based on the R-Pi board supported markers available,we have selected few of them as mentioned below:
| Header | Content | Type |
|---|---|---|
| Firewall | starting firewall service | FirewallDebug.txt |
| Firewall-1 | Inside firewall service_init() | FirewallDebug.txt |
| Wi-Fi | Wifi Agent loaded successfully... | WiFilog.txt.0 |
| Armconsole | get_PartnerID - Failed Get factoryPartnerId so set it PartnerID as: comcast | ArmConsolelog.txt.0 |
| swupdate | image itself not downloaded from TFTP, pls check tftp connection!! | swupdate.log |
Polling frequency can be given 0
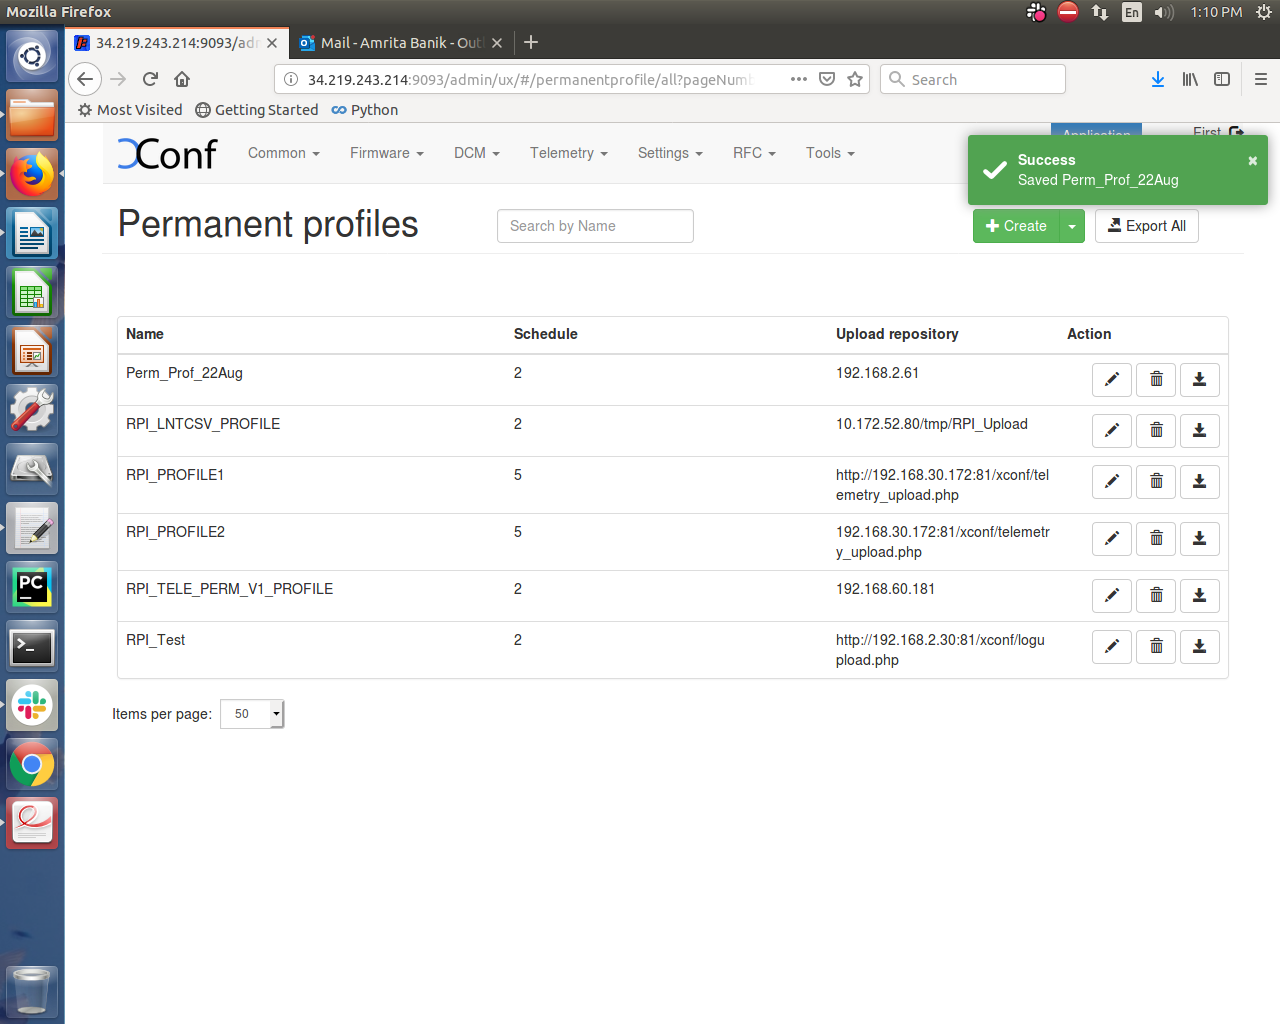
16. Save Permanent profile (ex. Perm_Prof_22Aug) and it will display in the Permanent profiles page
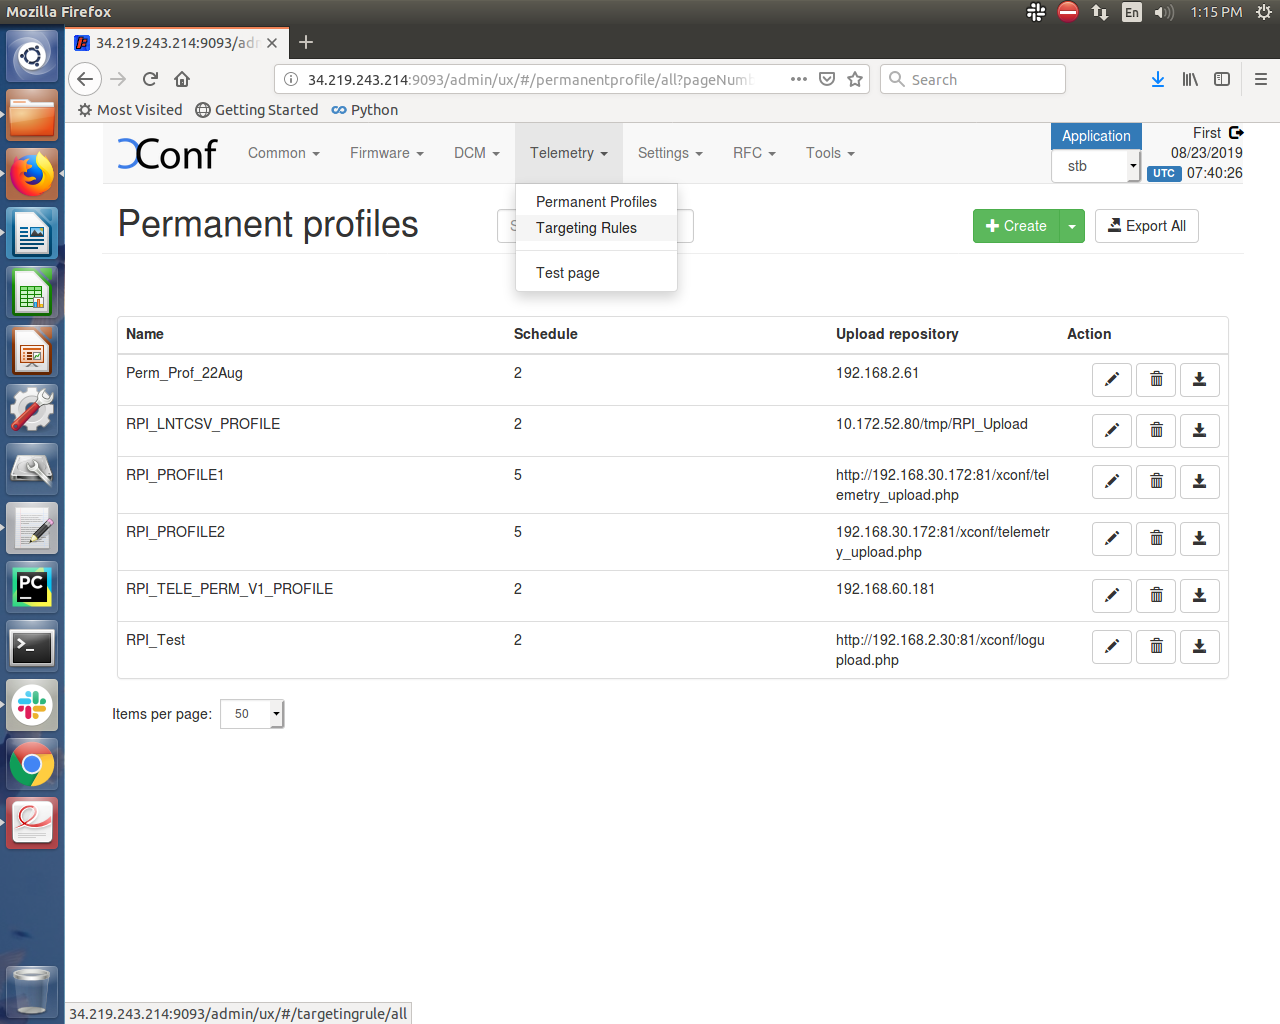
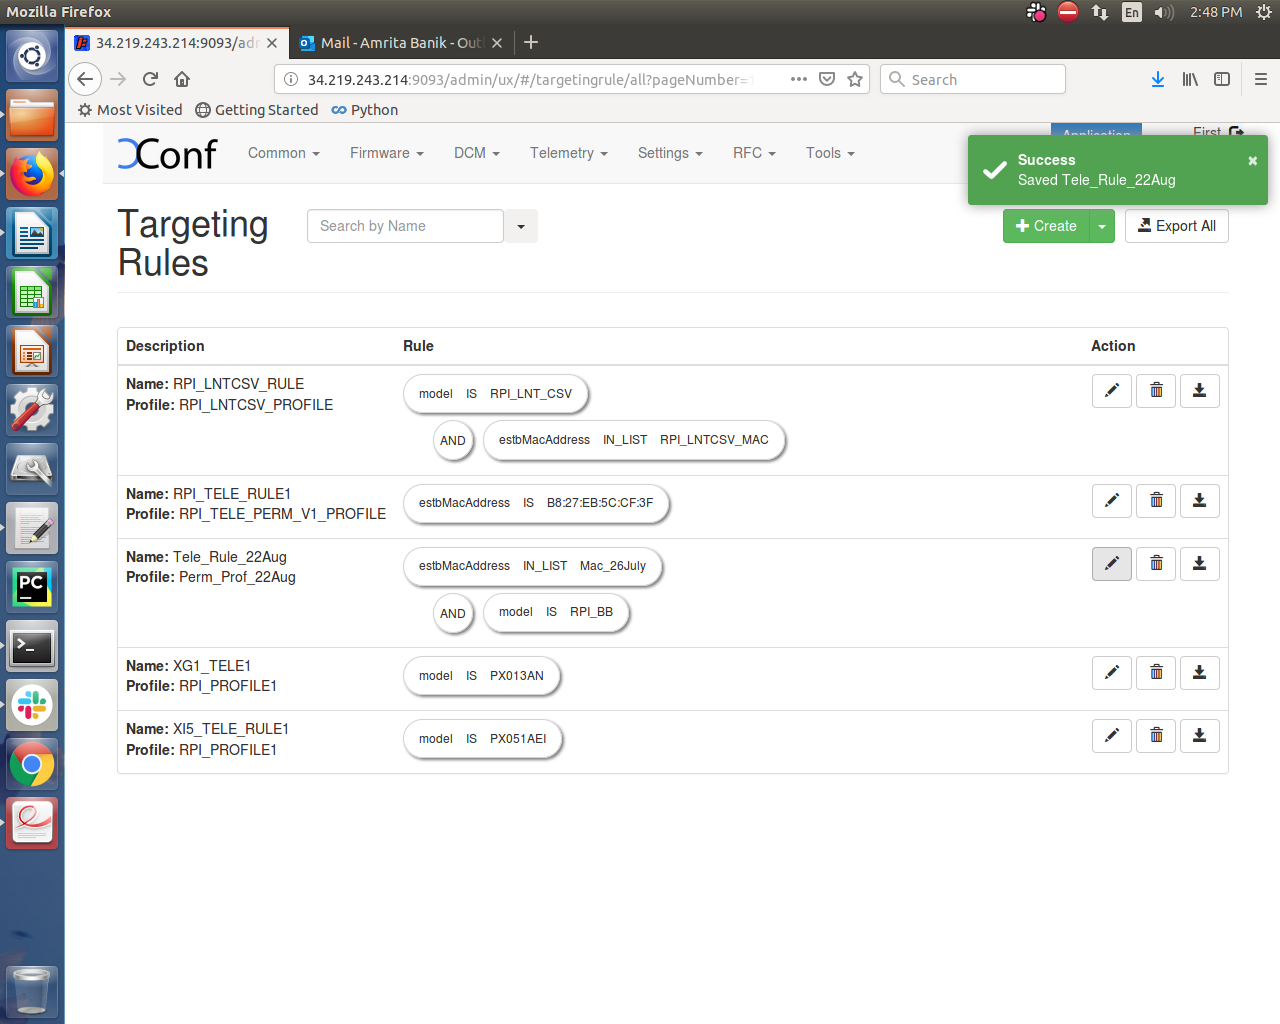
17. Click on “Telemetry” and then click on “Targeting Rules”
18. Click on “Create” button, provide Rule name and select different rule parameters and map the Permanent profile with this rule by selecting “Bound profile” drop down menu. Save the Targeting rule.
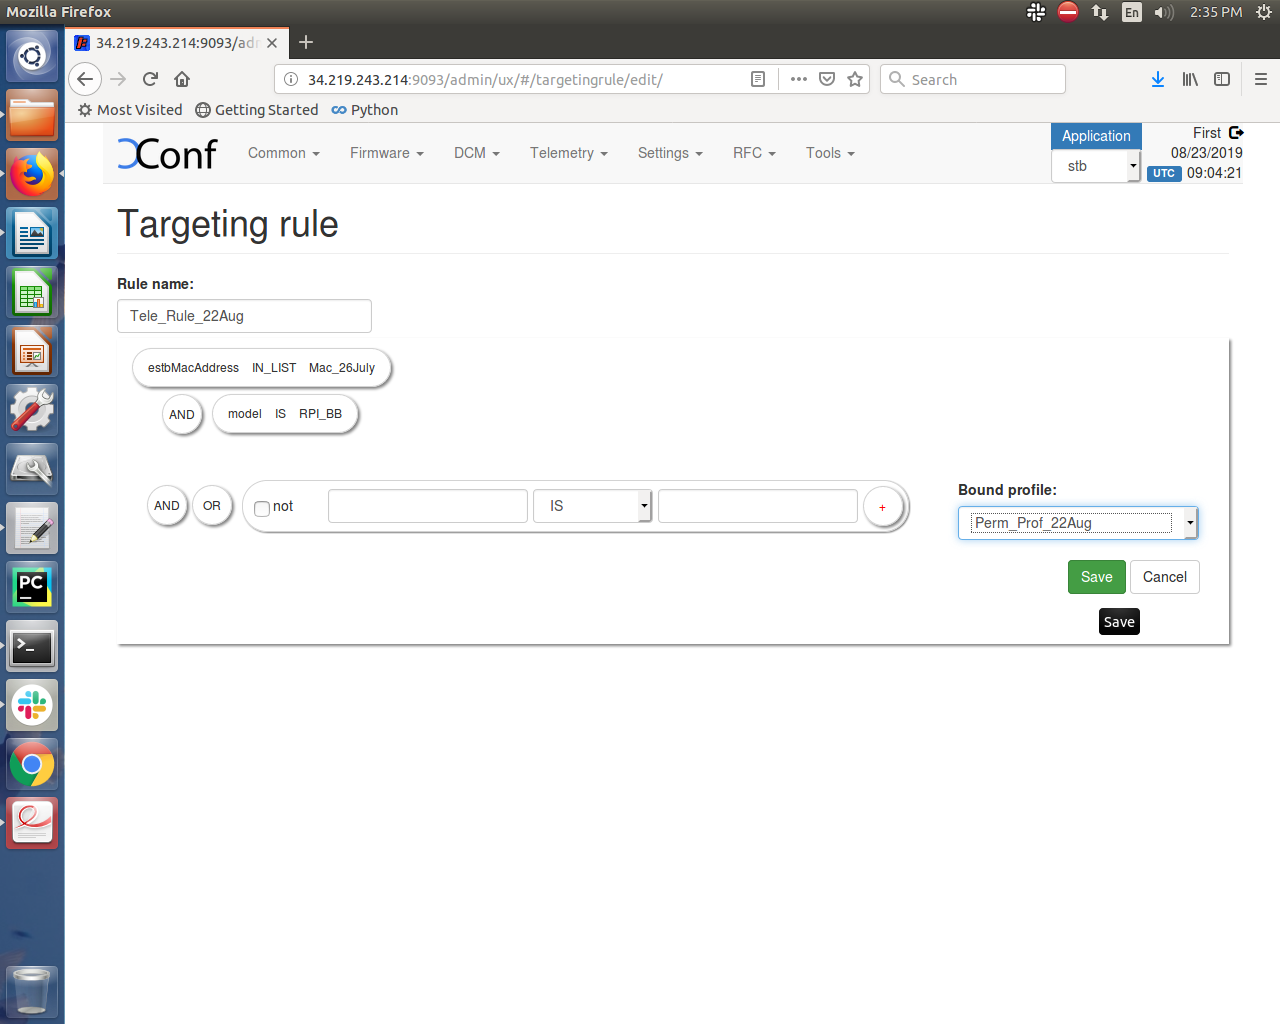
19. Verify the created Targeting rule displayed on the Targeting rule page
These things are under future development.
