RDK Resources
[*RDK Preferred*]
Code Management Facility
RDK Forums
[RDK Conferences]
RDK Support
Archives
Papers & Presentations Archive![]()
Papers & Presentations Archive![]()
This Page is under Development
Introduction-Mulitboot
This page is dedicated for switching the images (broadband to video) specifically for techsummit-2019
All the SD cards should be fully formatted. Use Disk tool to cleanup SD card data. Ignore Precondition steps if SD Card is fresh and empty
Also, this method can be followed for single card multi boot flashing as well
Deletion of partition using Disk tool in Ubuntu:
1) Select particular SD card from left hand side panel and click on '-' symbol of Disk tool

2) Click on Delete button to delete any particular partition
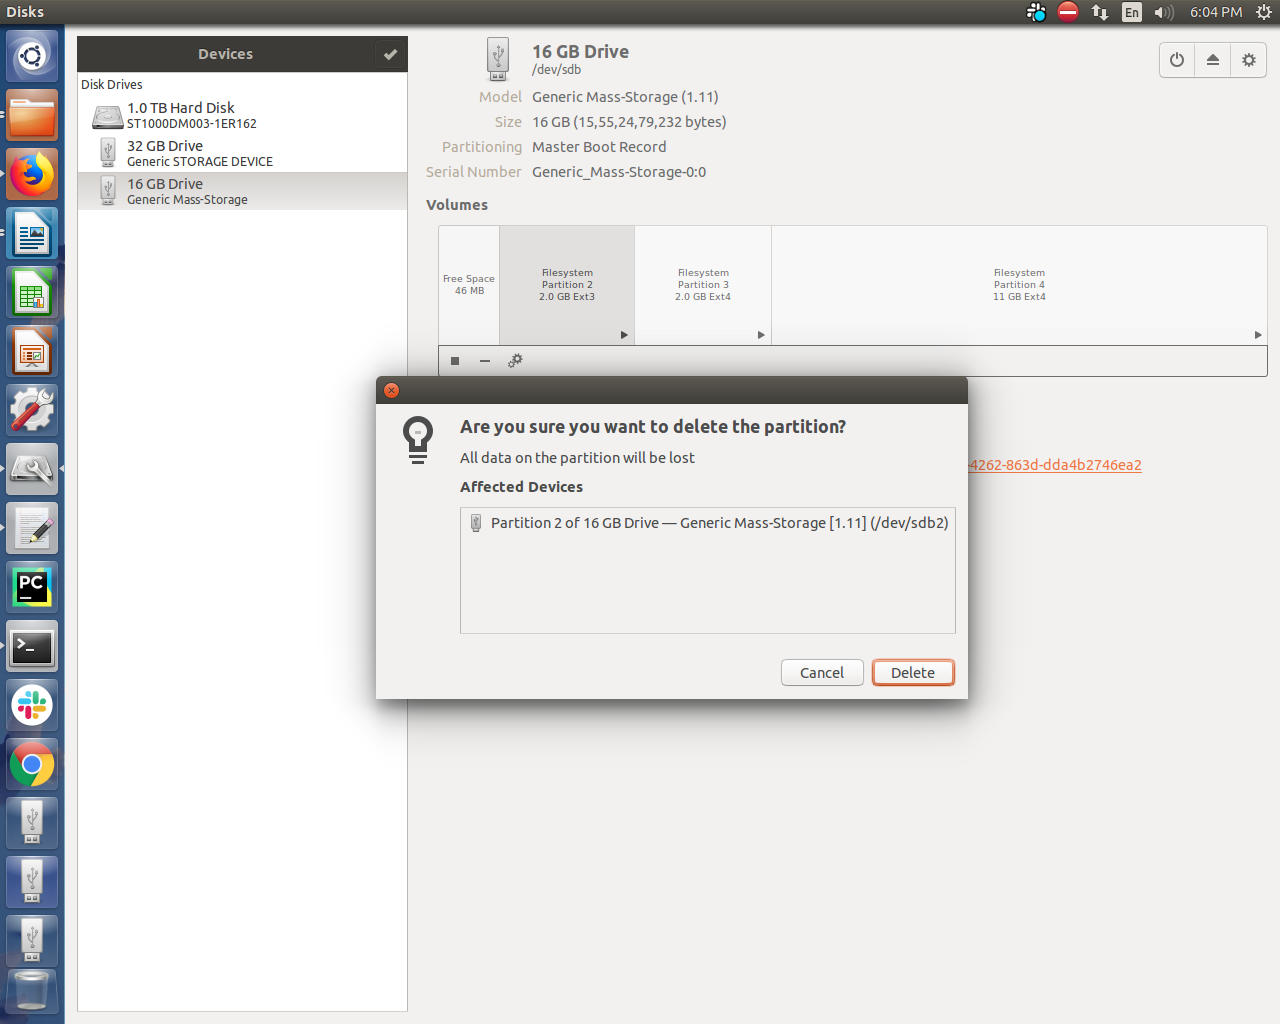
3) Finally deleted all the partitions:

1) Keep all the below files in same location:
i) Broadband image to be flashed
ii) Video image to be flashed
iii) extract.sh script file
iv) multiSDcard_partition.sh
v) threadSD.sh
vi) Create a file (For ex. sudo vi sd_part_size) where all the SD card partition names and their respective sizes are mentioned
2) Connect all the SD cards with host PC and execute the command : sudo fdisk -l . It will list all the SD card partitions with their respective sizes

3) Write all the partition names and their respective size in a text file (as created earlier as sd_part_size). Please don't copy the colon(: ) displayed at the end of the partition name and the word "GB"
For example content of sd_part_size looks like:

[Here we have taken 1 SD card of 16GB and 3 others of 32GB each.]
4) Execute the script below:
bash multiSDcard_partition.sh <Broadband image> <Video image> <SD card details_filename>

For example:
bash multiSDcard_partition.sh rdkb-generic-broadband-image_default_20191009085525.rootfs.rpi-sdimg rdk-generic-hybrid-refapp-thunder-  image_default_20190924125426.rootfs.rpi-sdimg sd_part_size
5) Once script execution gets over pull out each SD card and verify the multiboot feature on each of them, it should be working fine as expected (Refer to Switching to RDK-Video Image from RDK-Broadband section for steps). Each SD card will boot up with Broadband image and from there executing the script bank_video_switch.sh it can be moved to the Video image(which is per-stored in the extended partition of SD card) boot up. Each SD card will contain 4 partitions.
Note: Have tested with 4 SD cards out of which 1 is 16Gb and rest of the 3 cards are 32GB each. Overall process took approximately 6min time to get completed. Host PC having 8GB RAM.
For Broad band image size around 300 MB and video image (thunder) size around 700 MB
SD card size mentioned in input text file should always be in GB but with format as provided in the steps mentioned
1. Flash the Broadband image in SD card
sudo dd if=<RPIimage-sdimg> of=</dev/sdc> bs=4M

Example: sudo dd if=rdk-generic-hybrid-refapp-thunder-image_default_20190829072513.rootfs.rpi-sdimg of=/dev/sdc bs=4M
2. Resizing and partition creation
3. Keep RDK-Video image in the host machine
4. Extracting the RDK-Video image into the extblock directory
sudo sh extract.sh <video-image file>
For ex. sudo sh extract.sh rdk-generic-hybrid-refapp-thunder-image_default_20190924125426.rootfs.rpi-sdimg
After executing the above script, Linux kernel and RootFS of RDK-Video image would be present in the extblock directory
5. To Copy the RDK-Video image in Partition-P4
For ex.
mkdir videomnt
sudo mount /dev/sdb4 videomnt

In above command, storage partition 4 will get mounted to videomnt directory
sudo cp -r extblock/v* videomnt/
6. Copy the vrootfs backup data into partition 4 storage bank, to ensure it will acts as video bank as well
sudo cp -r extblock/vrootfs_backup_data/* videomnt/
7. Unmount videomnt directory as below
sudo umount videomnt
8. Now Boot up the SD card in RPI-> it should come up with BB image in partition (P2)
9. Log into the R-Pi from Host PC execute the below command
ssh root@<RPI-Board IP>
10. To load the video image which is present in the storage execute the script bank_video_switch.sh
root@RaspberryPi-Gateway:/lib/rdk# sh bank_video_switch.sh
11. R-Pi should boot up with video image. Ensure that the ethernet connection is available for R-Pi.
NOTE:
Ensure that while mounting the SD card in host machine it may have different device names like /dev/sdc * and /dev/sdd * . Please check host machine accordingly while using device name.
