RDK Resources
[*RDK Preferred*]
Code Management Facility
RDK Forums
[RDK Conferences]
RDK Support
Archives
Papers & Presentations Archive![]()
Papers & Presentations Archive![]()
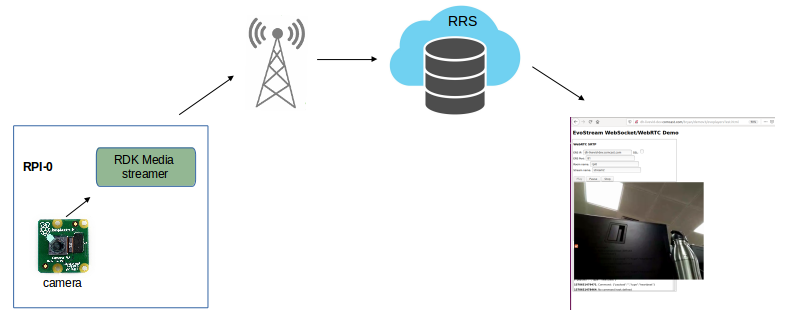
The RDK camera software runs on RPi-0 device.
This page is dedicated for RPI-0 setup with camera,Build Instruction and Testing procedure for camera features.

Please refer below link for RPI-0 Environment setup
repo init -u "https://code.rdkcentral.com/r/rdkcmf/manifests" -m rdkc-nosrc.xml -b master
repo sync
source meta-cmf-raspberrypi/setup-environment (Choose 1 `meta-cmf-raspberrypi/conf/machine/raspberrypi0-rdk-camera.conf`)
bitbake rdk-generic-camera-image
The EvoStream Media Server is much more than a multi-format, multi-protocol server that delivers your media rich content across multiple screens and platforms.
Do below step's one by one
STEP 1:
Add require SSID and PSK in /etc/wpa_supplicant.conf file in below format
network={
ssid="username"
psk="password"
}

STEP 2:
Reboot the Target
After Reboot don't do step 1 and 2.
STEP 3:
Get WiFi IP by using below command
udhcpc -i wlan0

STEP 4:
Connect RPI-0 device with WiFi Ip
ssh root@WiFI_IP
for Ex: ssh root@192.168.2.7

STEP 5:
This modprobe command is used to load v4l2 module in RPI-0 device.
modprobe bcm2835-v4l2

STEP 6:
check loaded module by using below command
lsmod
STEP 7:
check camera device there or not by using below command
ls /dev/video0

STEP 8:
export LD_PRELOAD=/usr/lib/libwayland-client.so.0:/usr/lib/libwayland-egl.so:/usr/lib/libopenmaxil.so

STEP 9:
Run mediastreamer in background
mediastreamer &

Some prints are coming after run mediastreamer,After that print just give ENTER button and the terminal will come back.
STEP 10:
Run Evostreamms in background
cd /usr/bin/evo/bin
./evostreamms ../config/config.lua &

Some prints are coming after run evostreamms,After that print just give ENTER button and the terminal will come back.
STEP 11:
check the mediastreamer and evostreamms are running or not by using below command
jobs

STEP 12:
Connect ASCII CLI Interface at EMS by using below command
Telnet localhost 1222

STEP 13:
Check available configuration in telnet console by using below command
listconfig
Follow from step 14 continuously when you got listconfig like below snap.

Follow from step 15 continuously when you got listconfig like below snap.

Follow step 17 only when you got listconfig like below.

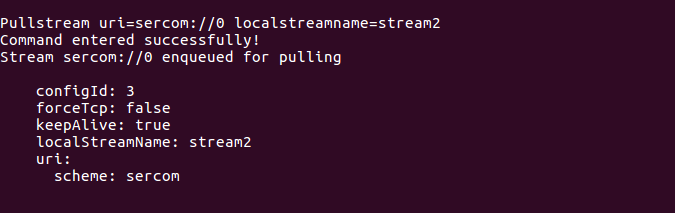
STEP 14:
Do the pull stream in telnet console.
Pullstream uri=sercom://0 localstreamname=stream2
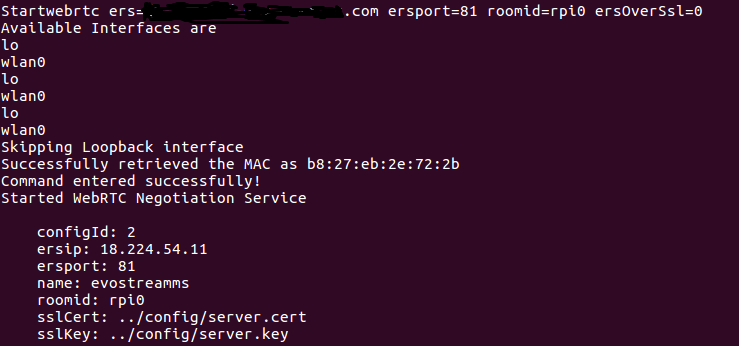
STEP 15:
start webstc in Telnet console.
Startwebrtc ers=community.dummyers.server.com ersport=81 roomid=rpi0 ersOverSsl=0
STEP 16:
Check whether the pullstream and webrtc are properly added or not in EMS by using below command
listconfig

STEP 17:
On Bowser of PC:
http://community.dummyersserver.com
Need to modify roomid as rpi0
Press "PLAY" button in WebBrowser page.
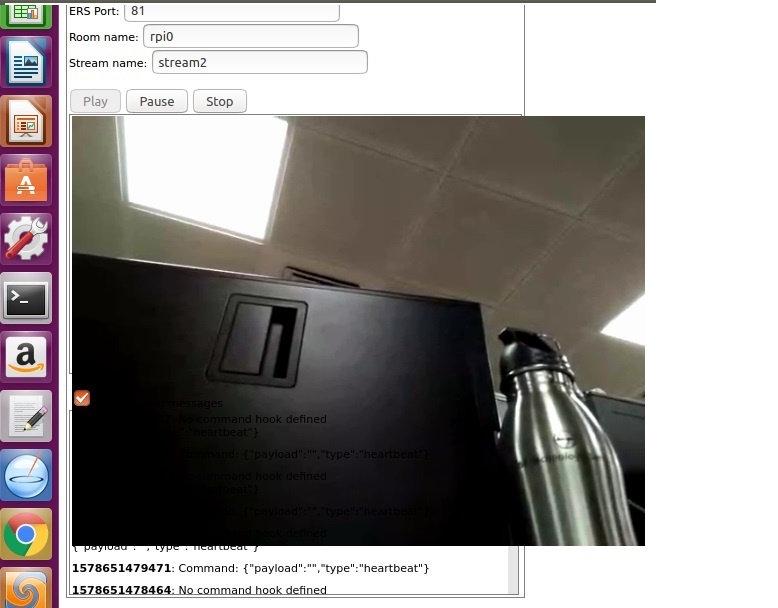
We can able to see the capturing content on WebBrowser.
