RDK Resources
[*RDK Preferred*]
Code Management Facility
RDK Forums
[RDK Conferences]
RDK Support
Archives
Papers & Presentations Archive![]()
Papers & Presentations Archive![]()
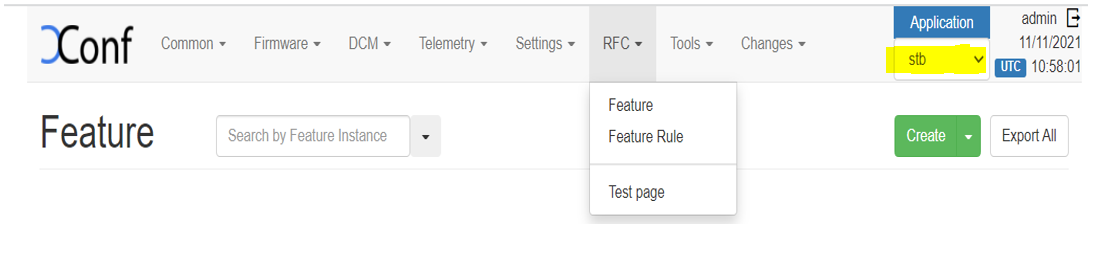
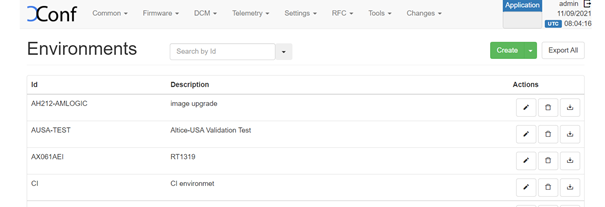
Flow: Xconf-server -> Common -> Environments
Click on Create Button.
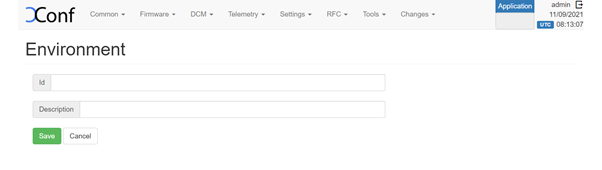
Click on Create, Enter the ID and Description fields, click on Save.
ID : <Unique Identifier> ; Description : <Description>
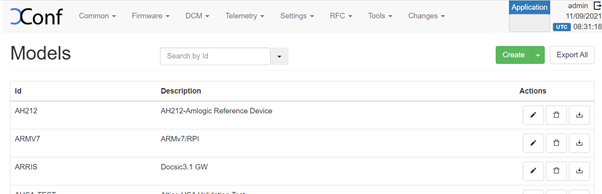
Flow: Xconf-server -> Common -> Models
Click on Create, Enter the ID and Description fields, click on Save.

Define Mac List
Flow: Xconf-server -> Common -> MAC Lists -> Create -> Add your Device MAC address -> Save.

Flow: Xconf-server -> Common -> IP Lists -> Create-> Create -> Add your device IP address -> Save.

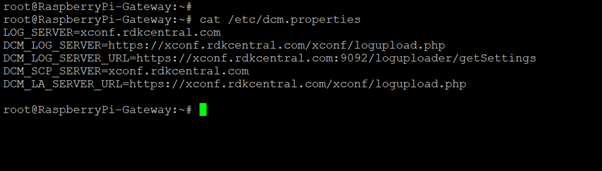
File : /etc/dcm.properties
LOG_SERVER=xconf.rdkcentral.com
DCM_LOG_SERVER=https://xconf.rdkcentral.com/xconf/logupload.php
DCM_LOG_SERVER_URL=https://xconf.rdkcentral.com:9092/loguploader/getSettings
DCM_SCP_SERVER=xconf.rdkcentral.com
DCM_LA_SERVER_URL=https://xconf.rdkcentral.com/xconf/logupload.php

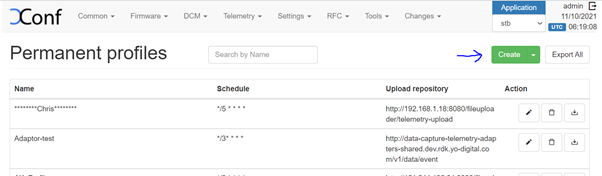
Flow: Xconf-server -> DCM -> Upload repository -> create ->save
Name: <Unique Identifier>
Description: <Unique Identifier>
URL: HTTP: http://35.161.239.220/xconf/telemetry_upload.php

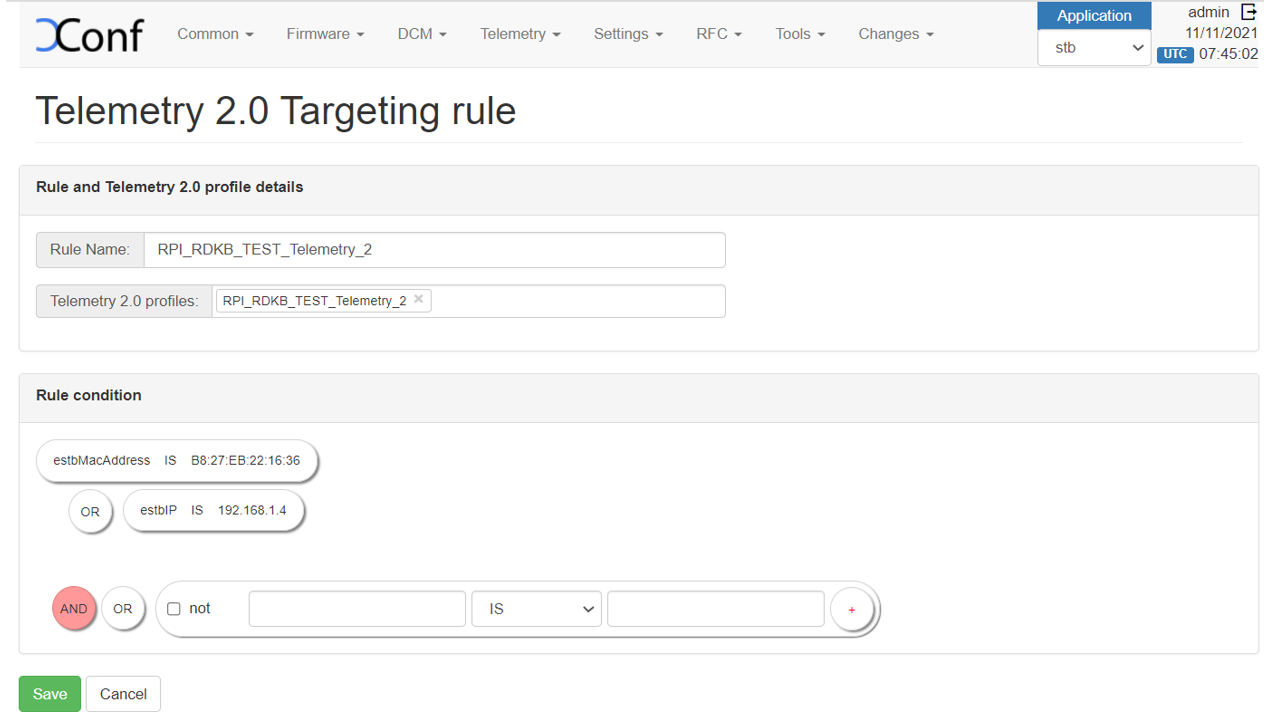
Flow: Xconf-server -> DCM -> Formulas -> Create
Name: <unique name for log upload>
Description: <Short description for log upload>
Percentage: 100
Build condition: estbMacAddress IS <MAC Address> OR estbIP IS <IP Address>
(or) estbMacAddress IS <MAC Address> AND model is <Model Name> (Model name is already configured under Common Tab)


Name: Enter the name given during Log Upload Formula Creation.
Note: The formula will be effective only if we select 'Are Settings Active' option to 'true' in 'Create Device Settings' and 'Log Upload settings'.

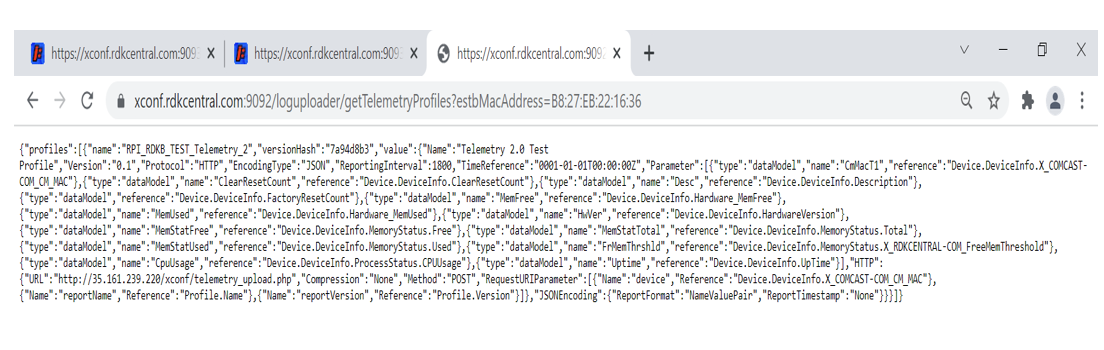
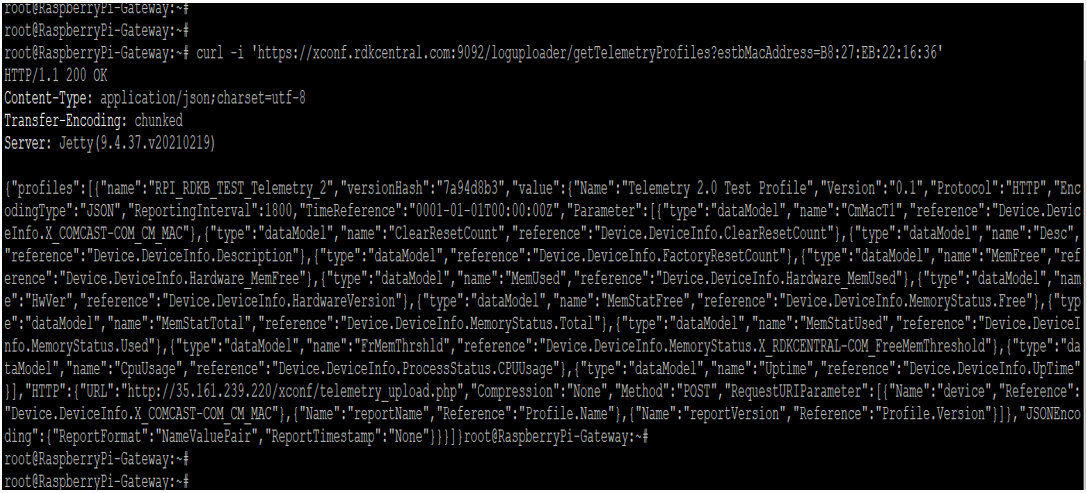
Verification at Xconf UI.


Sample Output


| root@RaspberryPi-Gateway:/rdklogs/logs# root@RaspberryPi-Gateway:/rdklogs/logs# tail -f telemetry.log 211110-06:10:14.269011 dca: Using Direct commnication • Sample number of proUPdel1:42 Upload protocol telemetry is:HTTP before HTTP upload number of httpdeli:42 HTTPTELEMETRYURL:http://35.161.239.220/xconf/telemetry_upload.php ------CURL_CMD:curl --tlsv1.2 -w '%{http_code}\n' -H "Accept: application/json" -H "Content-type: application/json" -X POST -d @/nvram/rtl_json.txt 'http://35.161.239.220/xconf/telemetry_upload.php' --connect-timeout 30 -m 30 number of proUPdel2:42 Upload protocol logupload is:HTTP before HTTP log upload HTTPLOGUPLOADURL:http://35.161.239.220/xconf/logupload.php upload log file is:11-10-21-06-08AM.tgz ------CURL_CMD2:curl -w '%{http_code}\n' -F filename=@/rdklogs/logs//PreviousLogs/B8:27:EB:22:16:36-Logs-11-10-21-06-08AM.tgz 'http://35.161.239.220/xconf/logupload.php' --connect-timeout 100 -m 100 http code in telemetry is :200 HTTP telemetry curl upload succeded!!!!!!!!!!!!!!!!! http_code is :200 HTTP log upload succeded!!!!!!!!!!!!!!!!! number of proUPdel2:42 Upload protocol logupload is:HTTP before HTTP log upload HTTPLOGUPLOADURL:http://35.161.239.220/xconf/logupload.php upload log file is:11-10-21-06-08AM.tgz ------CURL_CMD2:curl -w '%{http_code}\n' -F filename=@/rdklogs/logs//PreviousLogs/B8:27:EB:22:16:36-Logs-11-10-21-06-08AM.tgz 'http://35.161.239.220/xconf/logupload.php' --connect-timeout 100 -m 100 http_code is :200 HTTP log upload succeded!!!!!!!!!!!!!!!!! Done Uploading Logs and removing rtl_json.txt file Done Uploading Logs and removing rtl_json.txt file |
|---|


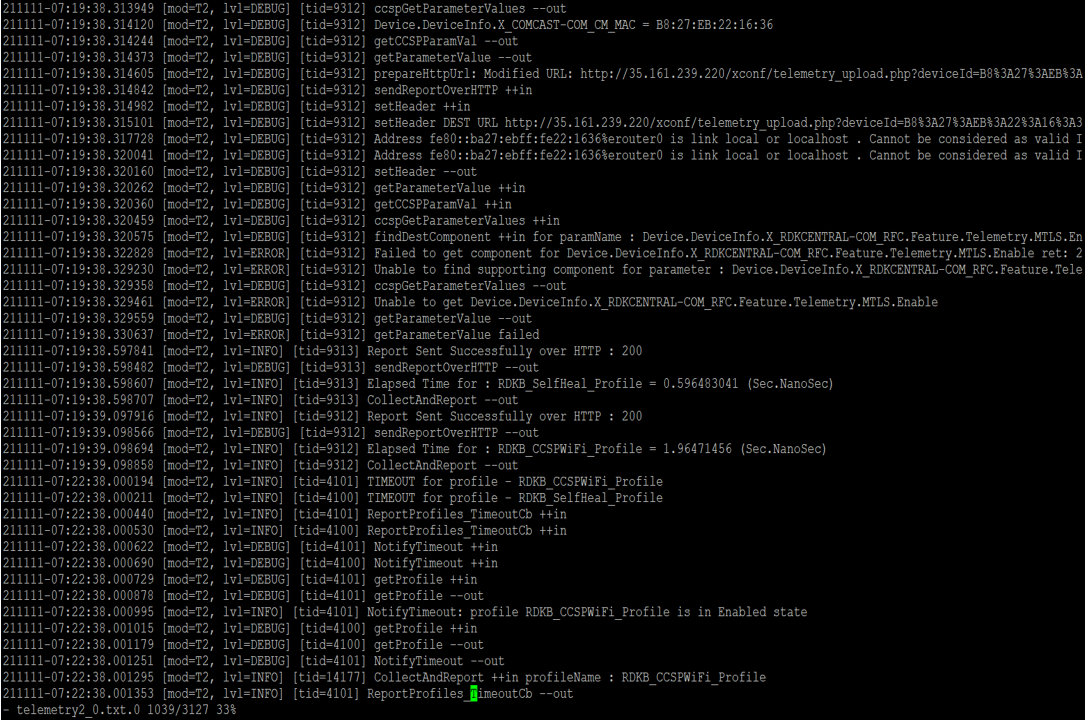
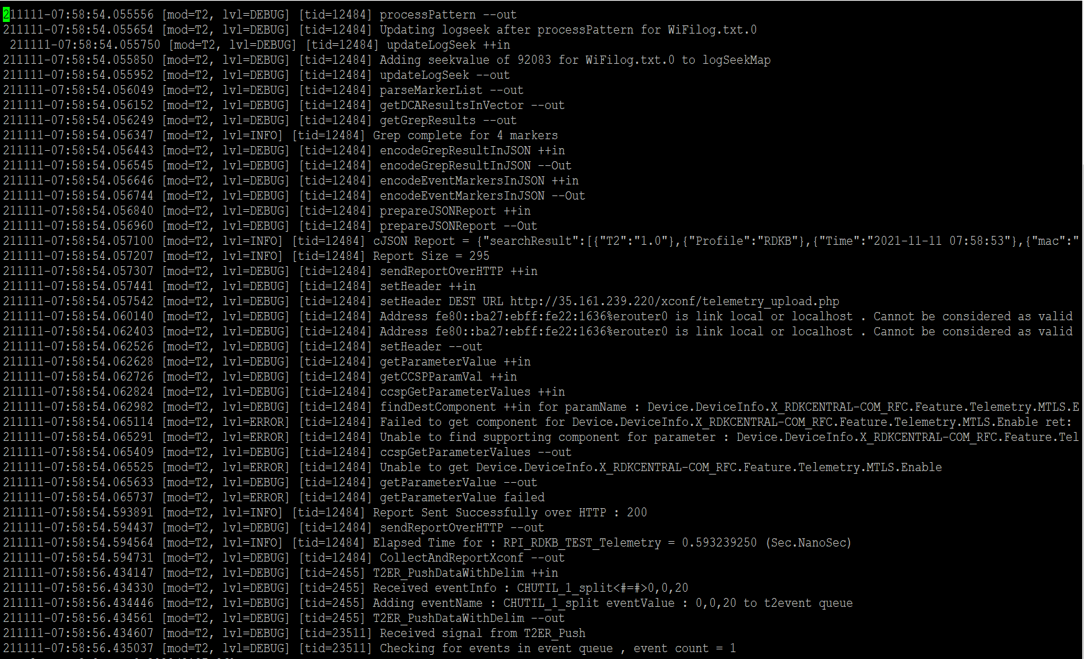
Pre- requisites for enabling Telemetry2_0
Telemetry Version: 2.0.1 (by default telemetry version as 1)
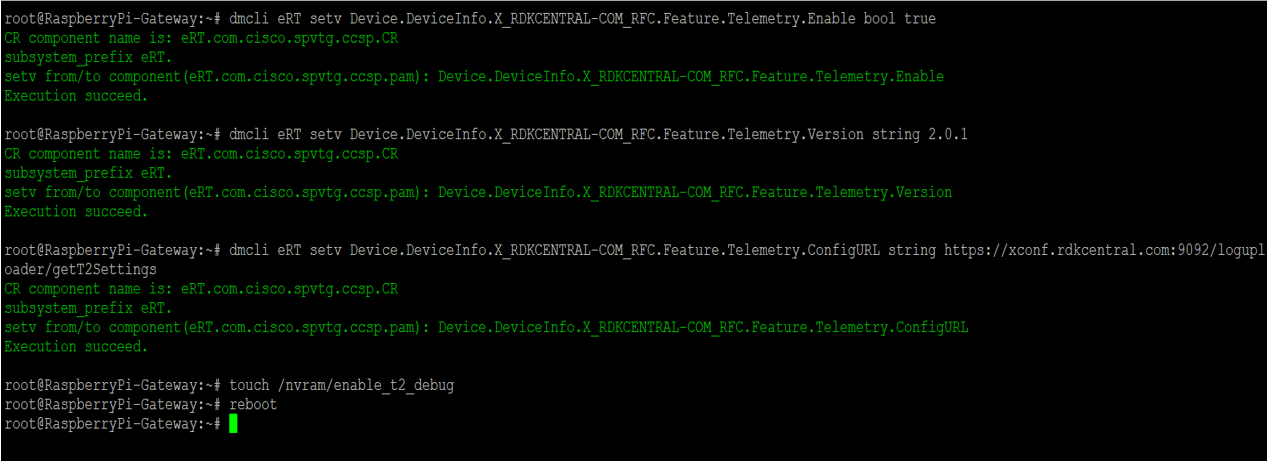
After reboot the device
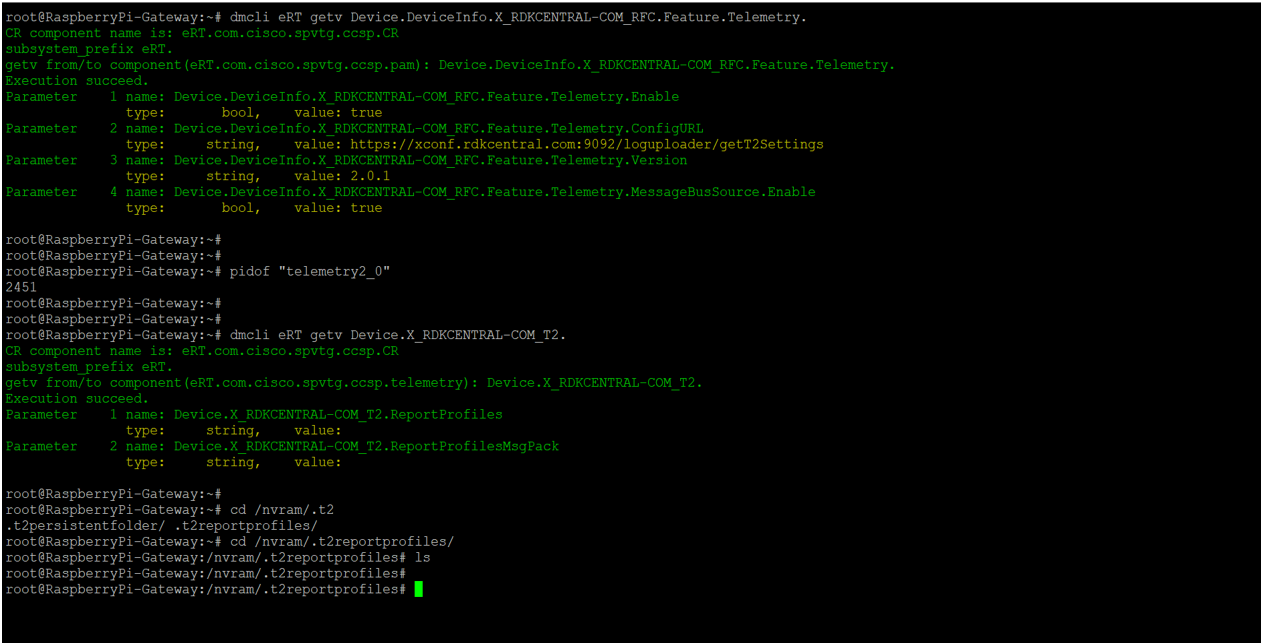
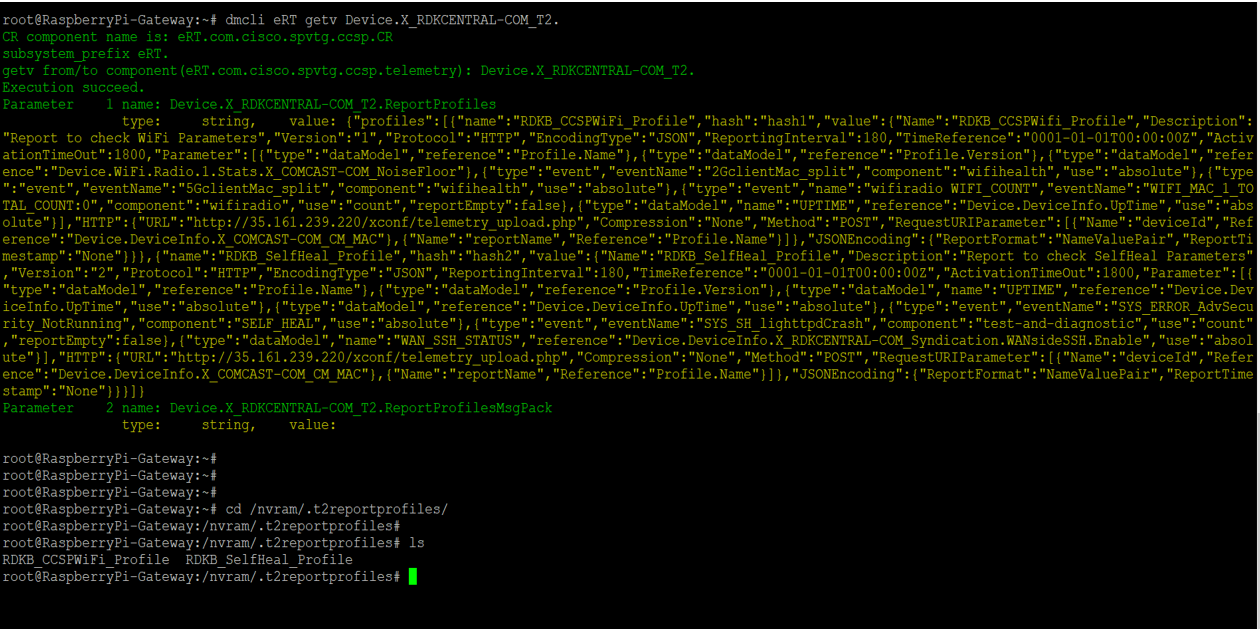
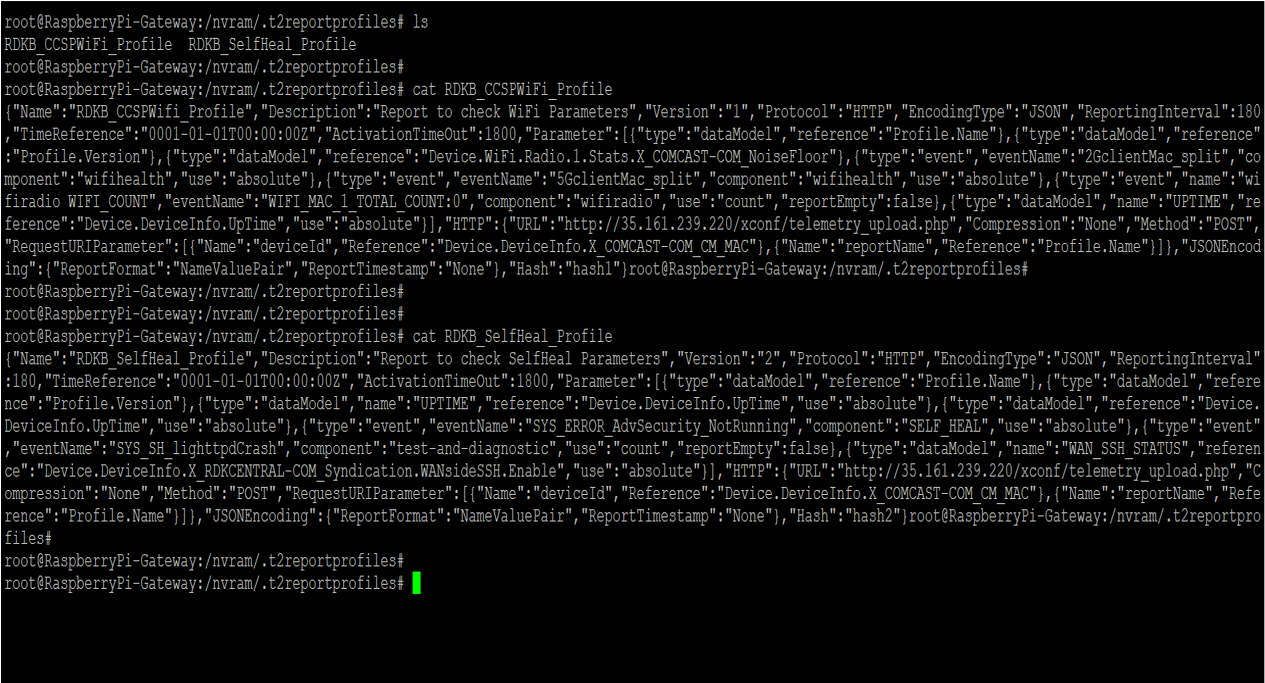
There are 2 parameters under T2 report profiles,
DM | Description | |
1 | Device.X_RDKCENTRAL-COM_T2.ReportProfilesMsgPack | Value must be JSON configuration blob in base 64 encoded msgpack format |
2 | Device.X_RDKCENTRAL-COM_T2.ReportProfiles | Value must be JSON configuration blob in string |
| dmcli eRT setv Device.X_RDKCENTRAL-COM_T2.ReportProfiles string '{"profiles":[{"name":"RDKB_CCSPWiFi_Profile","hash":"hash1","value":{"Name":"RDKB_CCSPWifi_Profile","Description":"Report to check WiFi Parameters","Version":"1","Protocol":"HTTP","EncodingType":"JSON","ReportingInterval":180,"TimeReference":"0001-01-01T00:00:00Z","ActivationTimeOut":1800,"Parameter":[{"type":"dataModel","reference":"Profile.Name"},{"type":"dataModel","reference":"Profile.Version"},{"type":"dataModel","reference":"Device.WiFi.Radio.1.Stats.X_COMCAST-COM_NoiseFloor"},{"type":"event","eventName":"2GclientMac_split","component":"wifihealth","use":"absolute"},{"type":"event","eventName":"5GclientMac_split","component":"wifihealth","use":"absolute"},{"type":"event","name":"wifiradio WIFI_COUNT","eventName":"WIFI_MAC_1_TOTAL_COUNT:0","component":"wifiradio","use":"count","reportEmpty":false},{"type":"dataModel","name":"UPTIME","reference":"Device.DeviceInfo.UpTime","use":"absolute"}],"HTTP":{"URL":"http://35.161.239.220/xconf/telemetry_upload.php","Compression":"None","Method":"POST","RequestURIParameter":[{"Name":"deviceId","Reference":"Device.DeviceInfo.X_COMCAST-COM_CM_MAC"},{"Name":"reportName","Reference":"Profile.Name"}]},"JSONEncoding":{"ReportFormat":"NameValuePair","ReportTimestamp":"None"}}},{"name":"RDKB_SelfHeal_Profile","hash":"hash2","value":{"Name":"RDKB_SelfHeal_Profile","Description":"Report to check SelfHeal Parameters","Version":"2","Protocol":"HTTP","EncodingType":"JSON","ReportingInterval":180,"TimeReference":"0001-01-01T00:00:00Z","ActivationTimeOut":1800,"Parameter":[{"type":"dataModel","reference":"Profile.Name"},{"type":"dataModel","reference":"Profile.Version"},{"type":"dataModel","name":"UPTIME","reference":"Device.DeviceInfo.UpTime","use":"absolute"},{"type":"dataModel","reference":"Device.DeviceInfo.UpTime","use":"absolute"},{"type":"event","eventName":"SYS_ERROR_AdvSecurity_NotRunning","component":"SELF_HEAL","use":"absolute"},{"type":"event","eventName":"SYS_SH_lighttpdCrash","component":"test-and-diagnostic","use":"count","reportEmpty":false},{"type":"dataModel","name":"WAN_SSH_STATUS","reference":"Device.DeviceInfo.X_RDKCENTRAL-COM_Syndication.WANsideSSH.Enable","use":"absolute"}],"HTTP":{"URL":"http://35.161.239.220/xconf/telemetry_upload.php","Compression":"None","Method":"POST","RequestURIParameter":[{"Name":"deviceId","Reference":"Device.DeviceInfo.X_COMCAST-COM_CM_MAC"},{"Name":"reportName","Reference":"Profile.Name"}]},"JSONEncoding":{"ReportFormat":"NameValuePair","ReportTimestamp":"None"}}}]}' |
|---|


root@RaspberryPi-Gateway:~# dmcli eRT getv Device.X_Comcast_com_ParentalControl.ManagedSites.Enable Device.X_Comcast_com_ParentalControl.ManagedServices.Enable
CR component name is: eRT.com.cisco.spvtg.ccsp.CR
subsystem_prefix eRT.
getv from/to component(eRT.com.cisco.spvtg.ccsp.pam): Device.X_Comcast_com_ParentalControl.ManagedSites.Enable
Execution succeed.
Parameter 1 name: Device.X_Comcast_com_ParentalControl.ManagedSites.Enable
type: bool, value: false
Parameter 2 name: Device.X_Comcast_com_ParentalControl.ManagedServices.Enable
type: bool, value: true