RDK Resources
[*RDK Preferred*]
Code Management Facility
RDK Forums
[RDK Conferences]
RDK Support
Archives
Papers & Presentations Archive![]()
Papers & Presentations Archive![]()
The build procedures are as follows:
Generated image has to be flashed to an SD card using this command in local PC:
|
Ex:
|
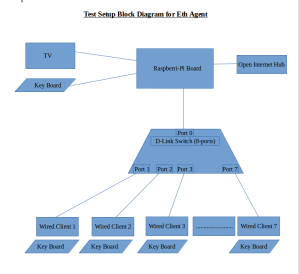
The SD card is inserted to the Raspberry Pi board and booted to check for containers created.
The Raspberry Pi board is connected to the PC via a USB to serial converter and the logs can be checked in console or can be connected via HDMI cable to a TV and logs will be shown in the terminal
Z
